5-6 COOLING AND LUBRICATION SYSTEM
INSTALLATION
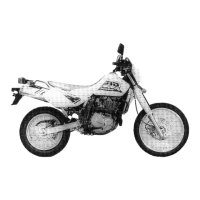
• Install the cooling fan and horn.
$ Cooling fan/horn mounting bolt:
8 N·m (0.8 kgf-m, 6.0 lb-ft)
• Install a new O-ring and tigten the cooling fan thermo-switch
to the specified torque.
$ Cooling fan thermo-switch: 17 N·m (1.7 kgf-m, 12.5 lb-ft)
• Install the radiator in the reverse order of removal.
• Route the radiator hoses.
• Install the drain plug with a new sealing washer.
• Pour engine coolant. (#2-17)
• Bleed air from the cooling circuit. (#2-18)
• Install the cowling.
RADIATOR RESERVOIR TANK
REMOVAL/INSTALLATION
• Remove the cowling.
• Disconnect the siphone hose from the radiator.
• Remove the reservoir tank by removing its mouning bolt.
• Drain engine coolant.
• Install the reservoir tank in the reverse order of removal.
• Fill the reservoir tank to the upper level.
RADIATOR CAP
INSPECTION
• Remove the cowling.
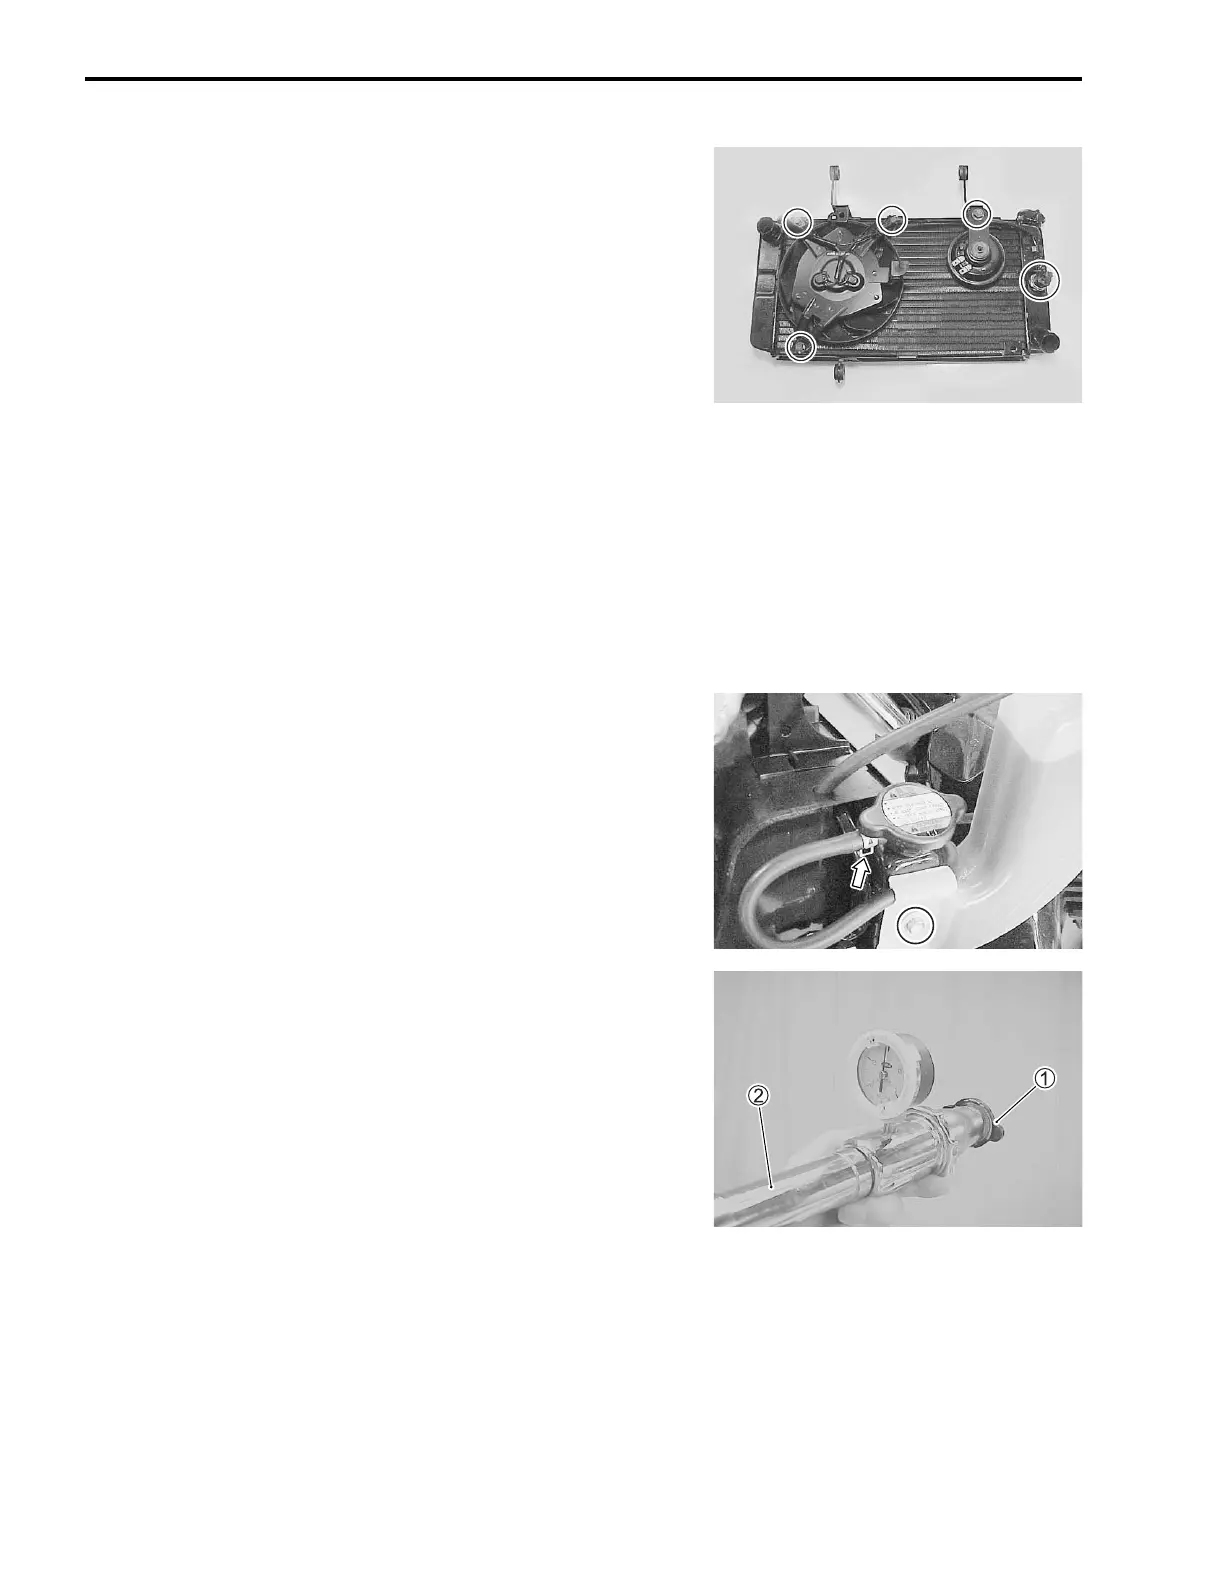
• Fit the cap
1 to the radiator cap tester
2.
• Build up pressure slowly by operating the tester. Make sure
that the pressure build-up stops at 95 – 125 kPa (0.95 – 1.25
kgf/cm², 13.5 – 17.8 psi) and that, with the tester held stand-
still, the cap is capable of holding that pressure for at least 10
seconds.
• Replace the cap if it is found not to satisfy either of these two
requirements.
% Radiator cap valve opening pressure
Standard: 95 – 125 kPa
(0.95 – 1.25 kgf/cm
2
, 13.5 – 17.8 psi)

 Loading...