FUEL AND LUBRICATION SYSTEM 4-11
CLEANING
Some carburetor cleaning chemicals, especially dip-
type soaking solutions, are very corrosive and must
be handled carefully. Always follow the chemical
manufacturer’s instructions for proper use, handling
and storage.
Clean all jets with a spray-type carburetor cleaner and dry
them using compressed air.
Clean all circuits of the carburetor thoroughly––not just the
perceived problem area. Clean the circuits in the carburetor
body with a spray-type cleaner. If necessary, soak each cir-
cuit in a dip-type cleaning solution to loosen dirt and varnish.
Dry the carburetor body using compressed air.
Do not use wire to clean the passageways, valve seat,
and jets. If the components cannot be cleaned with a
spray-type cleaner it may be necessary to soak them
in a dip-type cleaning solution. Always follow the chemi-
cal manufacturer’s instructions for proper use and
cleaning of the carburetor components.
After cleaning, reassemble the carburetor with new O-rings.
Replace the removed O-rings with new ones.
INSPECTION AND ADJUSTMENT
Check the following items for any damage or clogging. If any
damages are found, replace the damaged parts with new ones.
Main jet Throttle valve
Pilot jet Float
Needle jet Needle valve
Pilot air screw Pilot outlet and bypass holes
Thermoelement ( 6-21)
Carburetor heater ( 6-22)
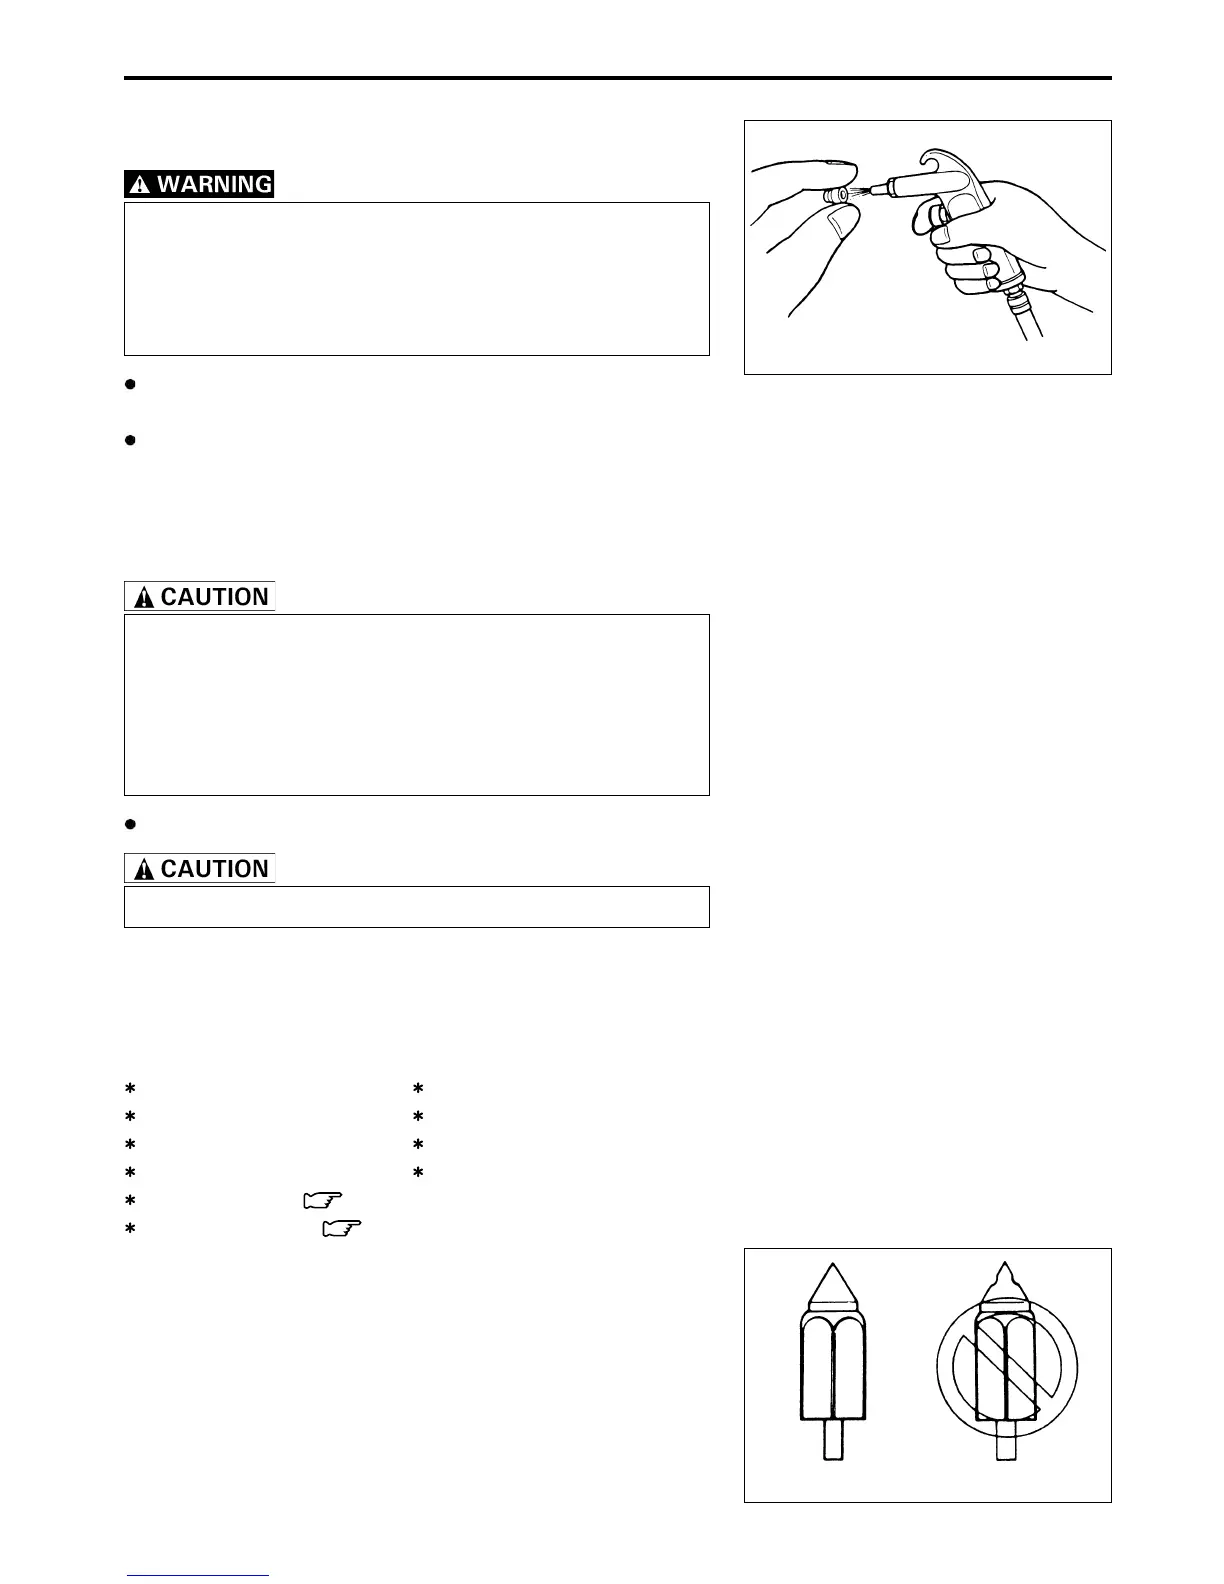
NEEDLE VALVE
If foreign matter is caught between the valve seat and the needle
valve, the gasoline will continue flowing and overflow. If the valve
seat and needle valve are worn beyond the permissible limits,
similar trouble will occur. Conversely, if the needle valve sticks,
the gasoline will not flow into the float chamber. Clean the float
chamber and float parts with gasoline. If the needle valve is worn,
as shown in the illustration, replace it with a new valve seat.
Clean the fuel passage of the mixing chamber with compressed
air.
CORRECT INCORRECT

 Loading...