reports alarms. Check whether the distance is consistent with that in the
previous test. If not, continue to test other ports.
3. After the abnormal port is found, test the port using a ber microscope. If the
port is dirty, clean it. For details, see "Inspecting and Cleaning Optical Fiber
Connectors and Adapters".
4. After the port is cleaned, restore the port, and ensure that the connector is
tightened. Perform an OTDR test on the port to check whether loss and
reection of each link and node are normal.
5. If the fault persists, replace the
ange and perform an OTDR test on the port
that reports alarms to check whether loss and reection of each link and
node are normal.
6. If the fault persists, replace the optical
ber and perform an OTDR test on the
port that reports alarms to check whether loss and reection of each link and
node are normal.
7. If multiple abnormal points exist on the link, repeat steps 2 to 6.
4.2.4.5.6 Cleaning Optical Fiber Connectors Using the Cassette Cleaner
This topic describes how to clean the
ber connectors using a cassette cleaner.
Prerequisites
Before cleaning, inspect the
ber end face with a ber microscope or a magnier
to conrm the degree of ber contamination. Clean the ber only when it is
severely contaminated. This is because the cleaning operation itself may introduce
dust, dirt, or cause damage to the
ber.
The following procedure provides the steps to clean the ber connectors using
cartridge type cleaners.
Tools, Equipment, and Materials
The following lists the required tools, equipment and materials for cleaning optical
ber connectors:
● cassette cleaner
● Optical power meter
● 400X
ber microscope (A video ber microscope is recommended.)
Precautions
Laser energy is invisible and may cause eye injuries. Never look directly into ber
connectors or ports.
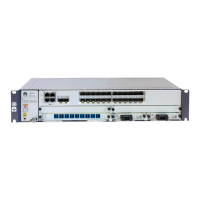
HUAWEI NetEngine 8000 F
Hardware Guide 4 Hardware Installation and Parts Replacement
Issue 05 (2023-03-31) Copyright © Huawei Technologies Co., Ltd. 594
 Loading...