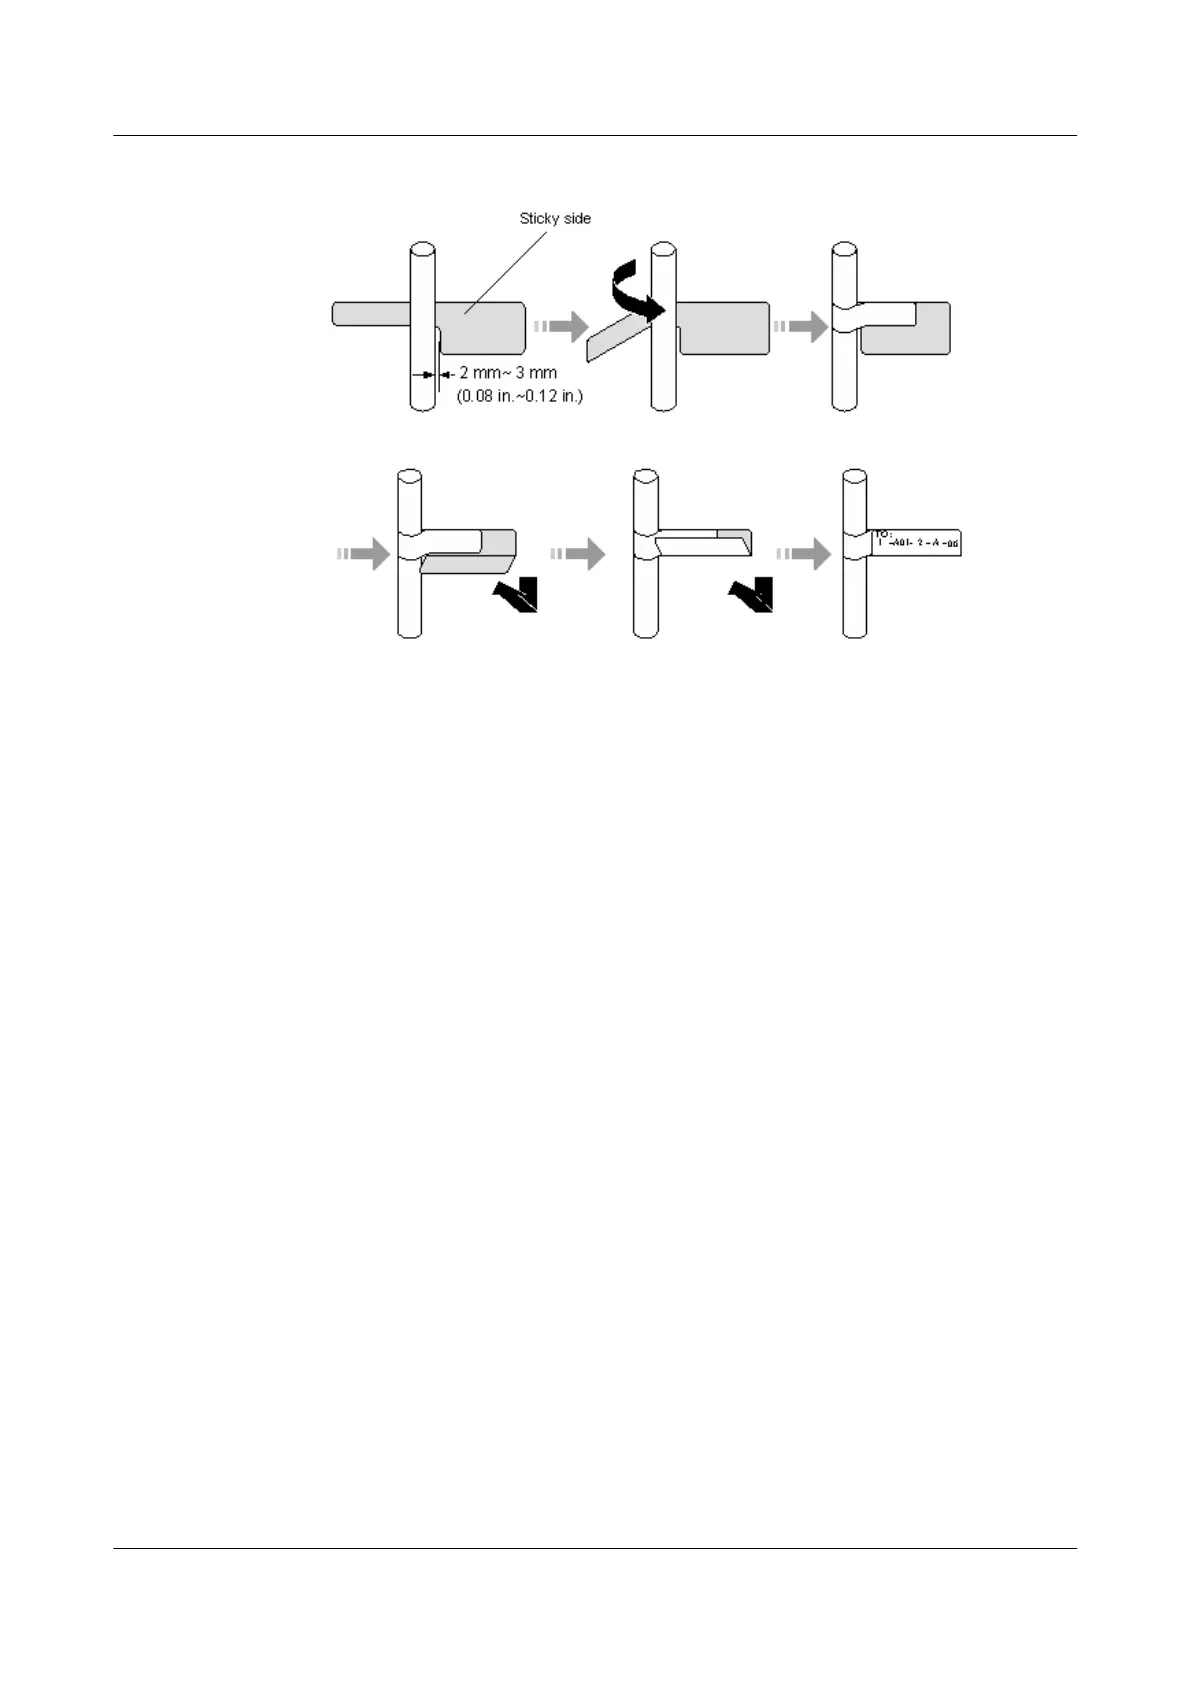
Figure 4-282 Attaching a label to a new optical cable
8. Lay out the new optical cable in a tidy manner in the cabinet and bind the
optical cable with a binding strap. Note that the optical cable should be
bound with proper strength and with even space in between. Bind the
redundancies of the optical cable at the ODF side.
9. Check whether the new optical cable works normally.
a. Check the LINK indicator at the optical interface. If the indicator is steady
on and green, it indicates that the link is Up.
b. Check whether the service on the board where the new optical cable
connects is normal. If the services are normal, it indicates that the optical
cable is replaced successfully.
c. Check whether there is any new alarm or performance event.
Follow-up Procedure
After replacing an optical cable, collect the tools and the replaced optical cable.
Do not place the old and the new optical cables together to avoid confusions.
4.2.11.6 Replacing a Network Cable
Context
Before replacing a network cable, you need to note the following points:
● During the process of replacing a network cable, the services are interrupted
temporarily.
● It is recommended that you replace a network cable during the hours when
the network is not busy, for example, from 00:00 am to 06:00 am.
Tool
Before replacing a network cable, you need the following tools:
HUAWEI NetEngine 8000 F
Hardware Guide 4 Hardware Installation and Parts Replacement
Issue 05 (2023-03-31) Copyright © Huawei Technologies Co., Ltd. 638
 Loading...