- Check the diaphragm has not hardened and is
not broken.
- Replace with a new one if necessary.
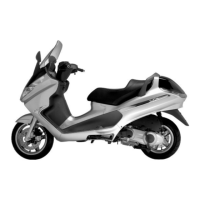
- Re-fit the needle to the vacuum valve.
- Ensure the spring is correctly positioned, both on
the needle and in its seat.
- Push and turn the bayonet fitting 1/8th of a turn,
back into position.
- Re-fit the vacuum petrol valve on the carburettor
body, ensuring that the needle is inserted in the
atomiser.
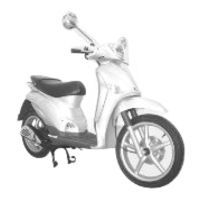
- Gradually screw in the vacuum valve to the point
where the lobe on the diaphragm locates in its
notch; with the valve in such a position, the main
vacuum opening should be in line with the axis of
the bore of the carburettor, offset towards the but-
terfly valve side.
- Re-fit the spring on the valve.
- Re-fit the vacuum chamber cover, aligning the
reference mark on the cover with the one on the
diaphragm.
- Tighten the screw fasteners to the specified tight-
ening torque.
- Take off the auto-choke seat and blow it out.
- Replace the gasket with a new one and tighten
the two screw fasteners.
Inspecting the automatic choke device
- Inspect the auto-choke piston for signs of scoring
and oxidation.
- Check the auto-choke piston does not stick, but
is free to move back and forth in its housing.
- Check the gasket is not deformed.
- The auto-choke piston should be more or less
fully retracted at room temperature.
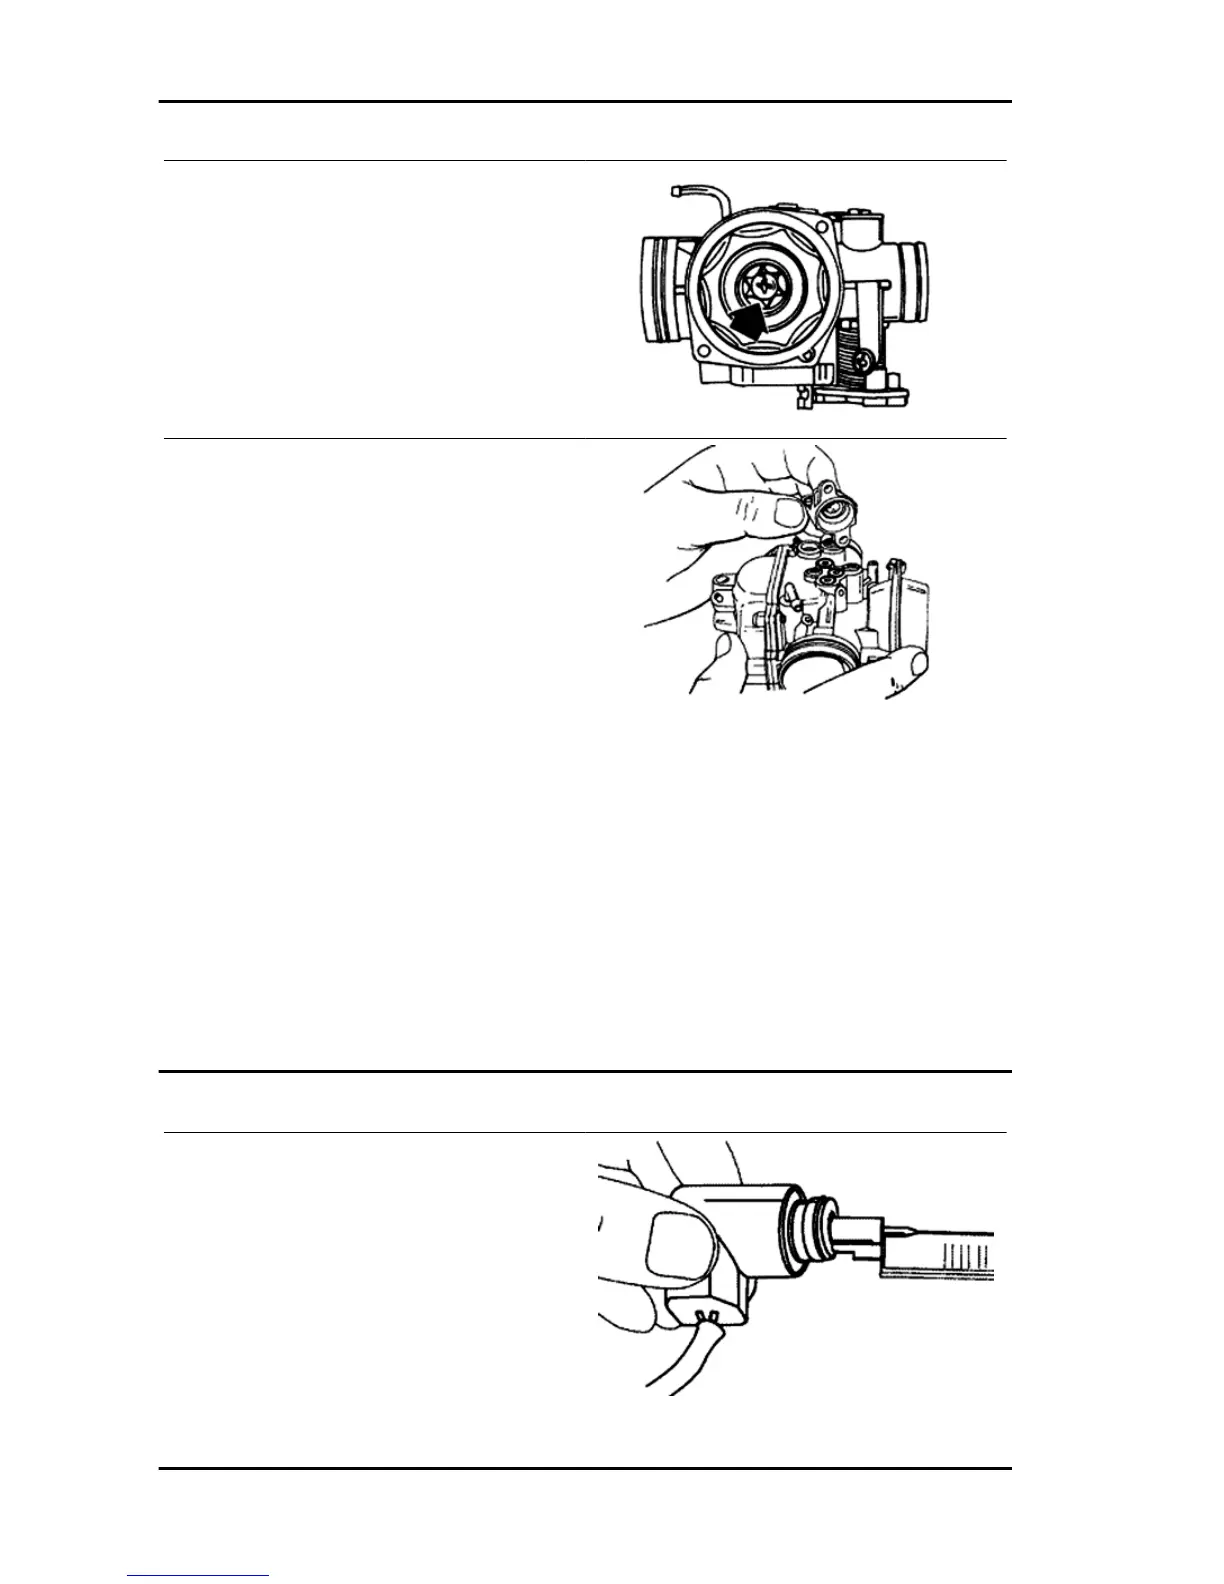
- Measure the distance by which the auto-choke
piston projects.
Engine Liberty 125 - 200 4tempi
ENG - 134

 Loading...