8
9929422 R02 - 2017-2019 ACE 900 Service Manual
© Copyright Polaris Industries Inc.
8.21
LOWER A-ARM REMOVAL / REPLACEMENT
1. Elevate and safely support the front of the vehicle and
remove the front wheel.
2. Remove the four wheel nuts and remove the front
wheel.
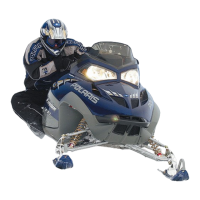
3. Remove the cotter pin
q
and loosen the front wheel
hub castle nut
w
. Remove the nut, and two cone
washers
e
from the front wheel hub assembly.
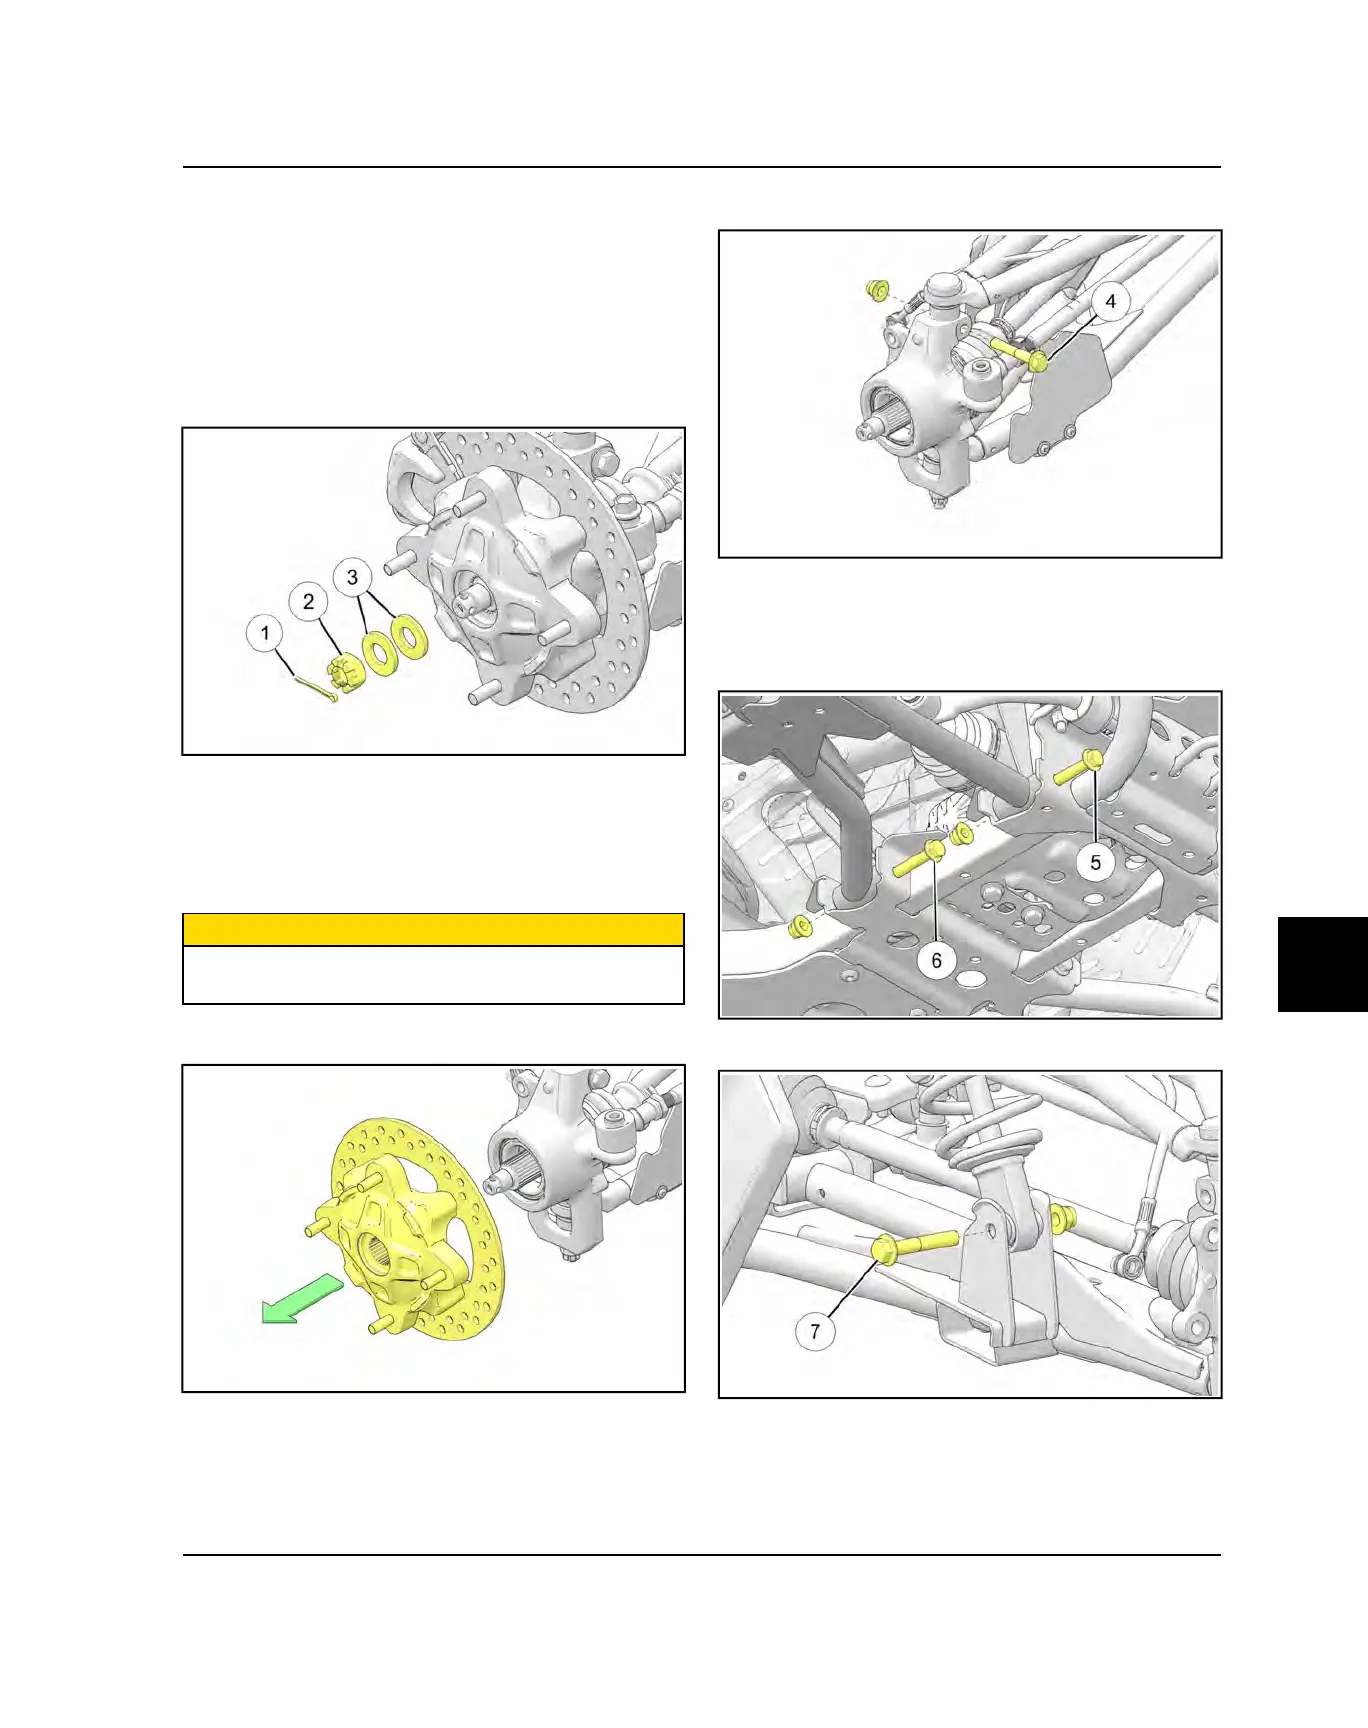
4. Remove the fastener retaining the steering tie rod
end to the front bearing carrier.
5. Remove and discard the two front brake caliper
mounting bolts and remove the caliper from the brake
disc (see Chapter 9 –
CAUTION
Do not hang the caliper by the brake line. Use wire to
hang caliper to prevent damage to the brake line.
6. Remove the front wheel hub assembly.
7. Remove and discard the upper ball joint pinch bolt
r
.
8. Remove the fastener retaining the front stabilizer bar
link to the upper control arm.
9. Loosen and remove the lower A-arm front through-
bolt fastener
t
and rear through-bolt fastener
y
.
10.Remove lower shock fastener
u
from lower A-arm.
11. Using a soft faced hammer, lightly tap on the bearing
carrier while removing the upper joint end.
STEERING / SUSPENSION

 Loading...