8
9929422 R02 - 2017-2019 ACE 900 Service Manual
© Copyright Polaris Industries Inc.
8.35
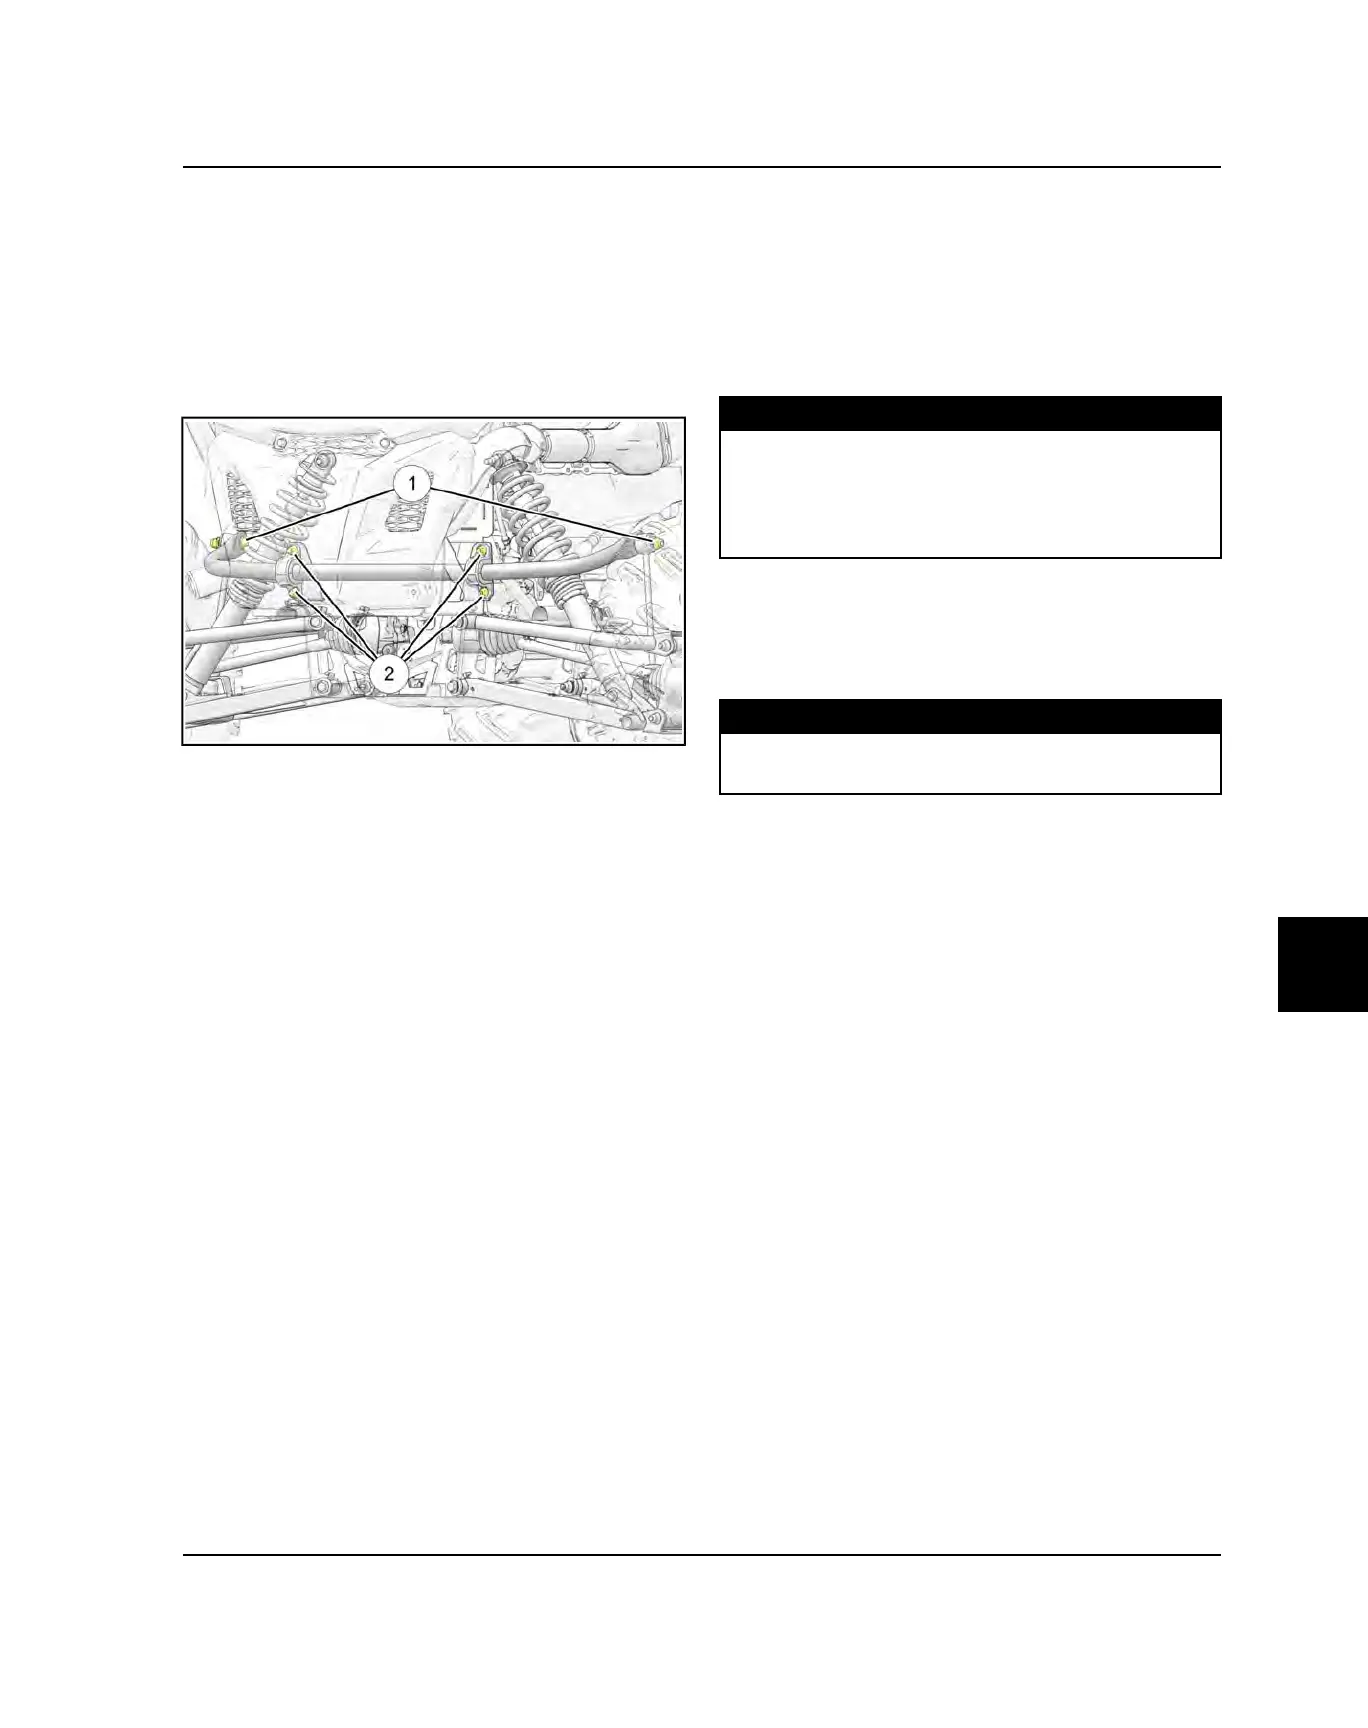
REAR STABILIZER BAR REMOVAL
1. Lift and support vehicle by main frame.
2. Remove rear wheel nuts and wheels.
3. Identify / mark top side of the stabilizer bar to
reference during installation.
4. Remove the fasteners retaining the stabilizer bar to
the linkage
q
on each side of the vehicle.
5. Remove the four fasteners
w
retaining the stabilizer
bar to the vehicle frame.
6. Remove the bushing brackets and bushings for ease
of removal.
7. Carefully remove the stabilizer from the LH wheel well
area of the vehicle.
8. Inspect the stabilizer bar for straightness. Inspect the
pivot bushings and replace if needed.
REAR STABILIZER BAR INSTALLATION
1. Carefully install stabilizer bar through the LH wheel
well area.
2. Fully install stabilizer bar, bushings, bracket and
bracket fasteners and stabilizer links. Center
stabilizer bar in the frame. Torque fasteners to
specification (see below).
TORQUE
Sway Bar Linkage Nuts:
42 ft-lbs (57 Nm)
Sway Bar Bracket Nuts:
31 ft-lbs (42 Nm)
3. Lubricate stabilizer bar pivot bushings via grease
fitting.
4. Install rear wheels and wheel nuts. Torque wheel nuts
to specification.
TORQUE
Aluminum Wheels:
30 ft-lbs + 90° (41 Nm)
STEERING / SUSPENSION

 Loading...