48
Install Hardware Options
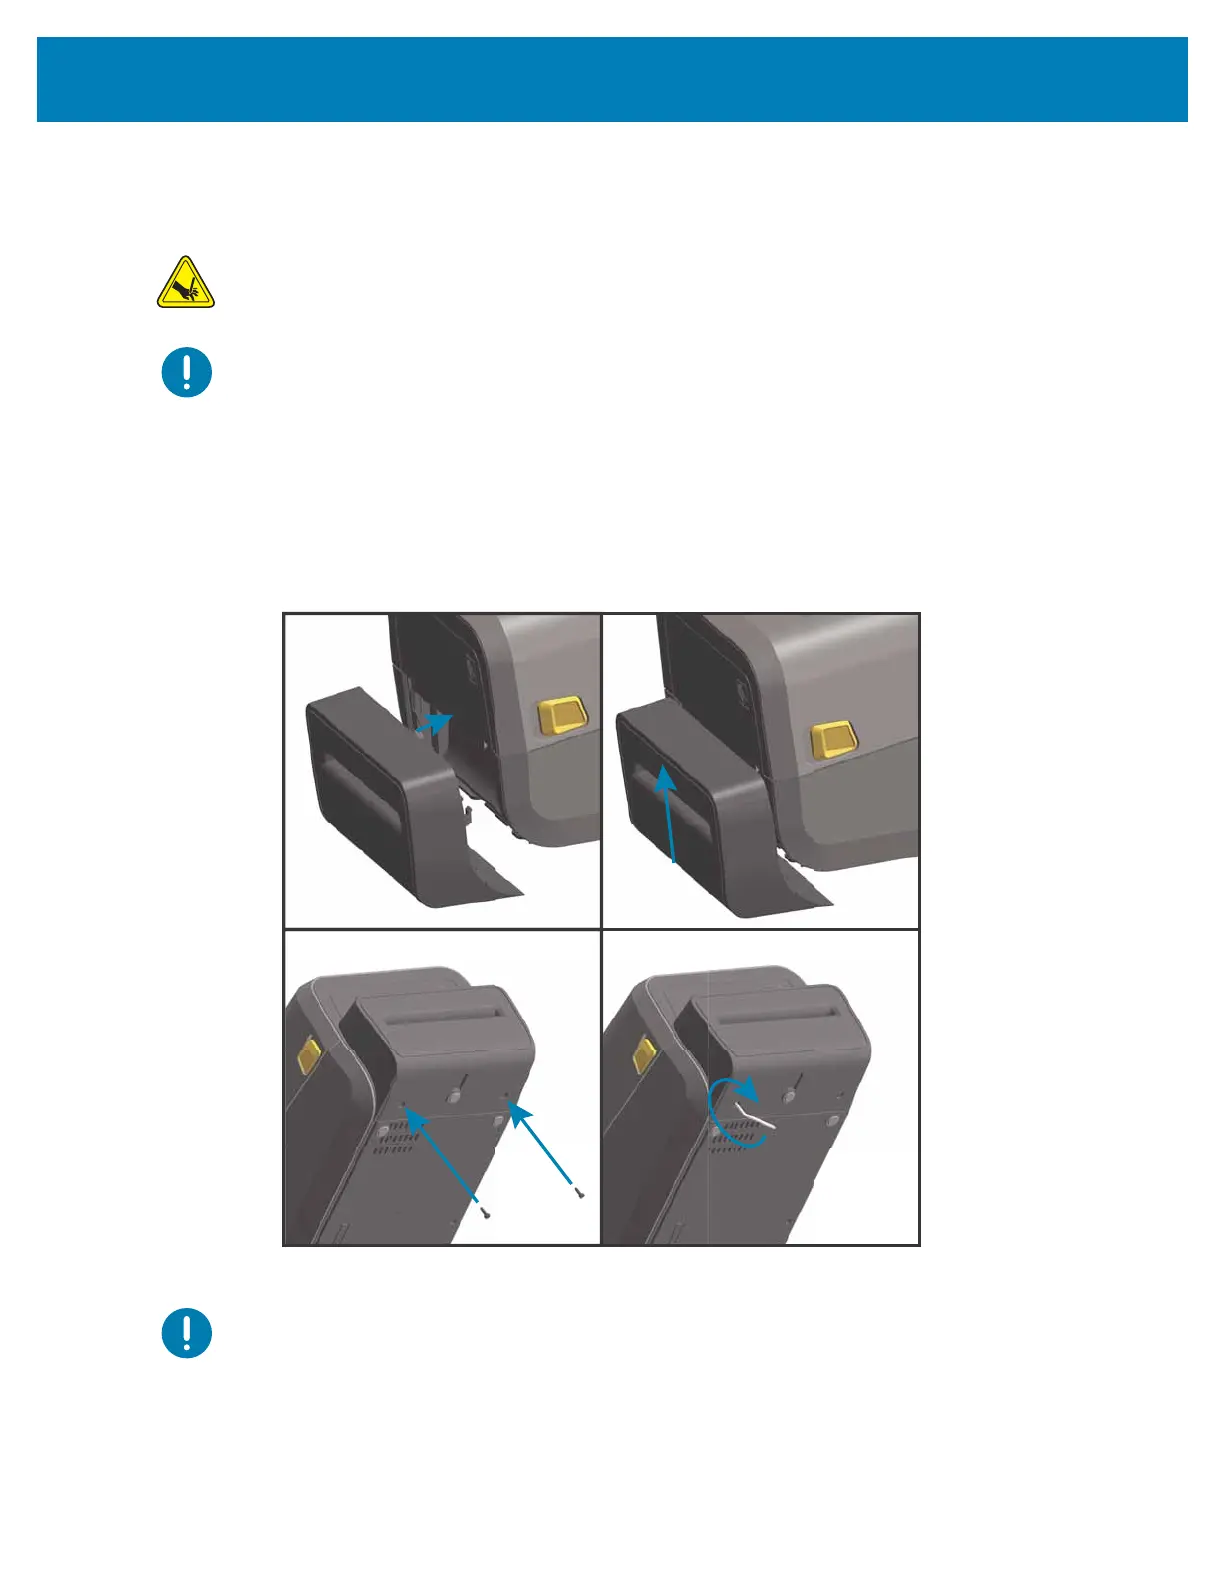
Installing the Standard Media Cutter
The standard bezel must be removed and DC input power disconnected before the Label
Dispenser can be installed. See Removing the Standard Bezel.
Cut Warning • There are no operator serviceable parts in the cutter unit. Never remove
the cutter cover (bezel). Never attempt to insert objects or fingers in to the cutter
mechanism.
Important• Using un-approved tools, cotton swabs, solvents, etc. all may damage or
shorten the cutter’s usable life or cause the cutter to jam.
1. Place the Cutter module and printer right side up with the top of the module even with
the bottom of the top cover. Center and push the module into the front of the printer
and slide it up until it stops.
2. Turn the printer upside down and attach the module to the printer with the two screws
using the Torx wrench.
Note • For best printer performance, update the printer’s firmware after installing options
or immediately after the printer’s initial setup. See Updating Printer Firmware.
 Loading...