Get started with Connect IT 16/48 Connect the power supplies and fans
Digi Connect IT® 16/48 User Guide
23
f. Optionally, you can screw one of the COREmodule cover screws into the center of the
handle.
g. Place the white CORE module cover over the end of the device. Make sure that the
antenna labels are oriented correctly.
h. Push the cover in place.
3. Attach both of the included antennas. While gripping the metal connector section with your
thumb and forefinger, tighten until secure. Do not tighten the antenna by holding any part of
the plastic antenna housing.
Note Attaching both antennas ensures maximum performance. If a single antenna solution is
required, it must be attached to the antenna port labeled MAIN.
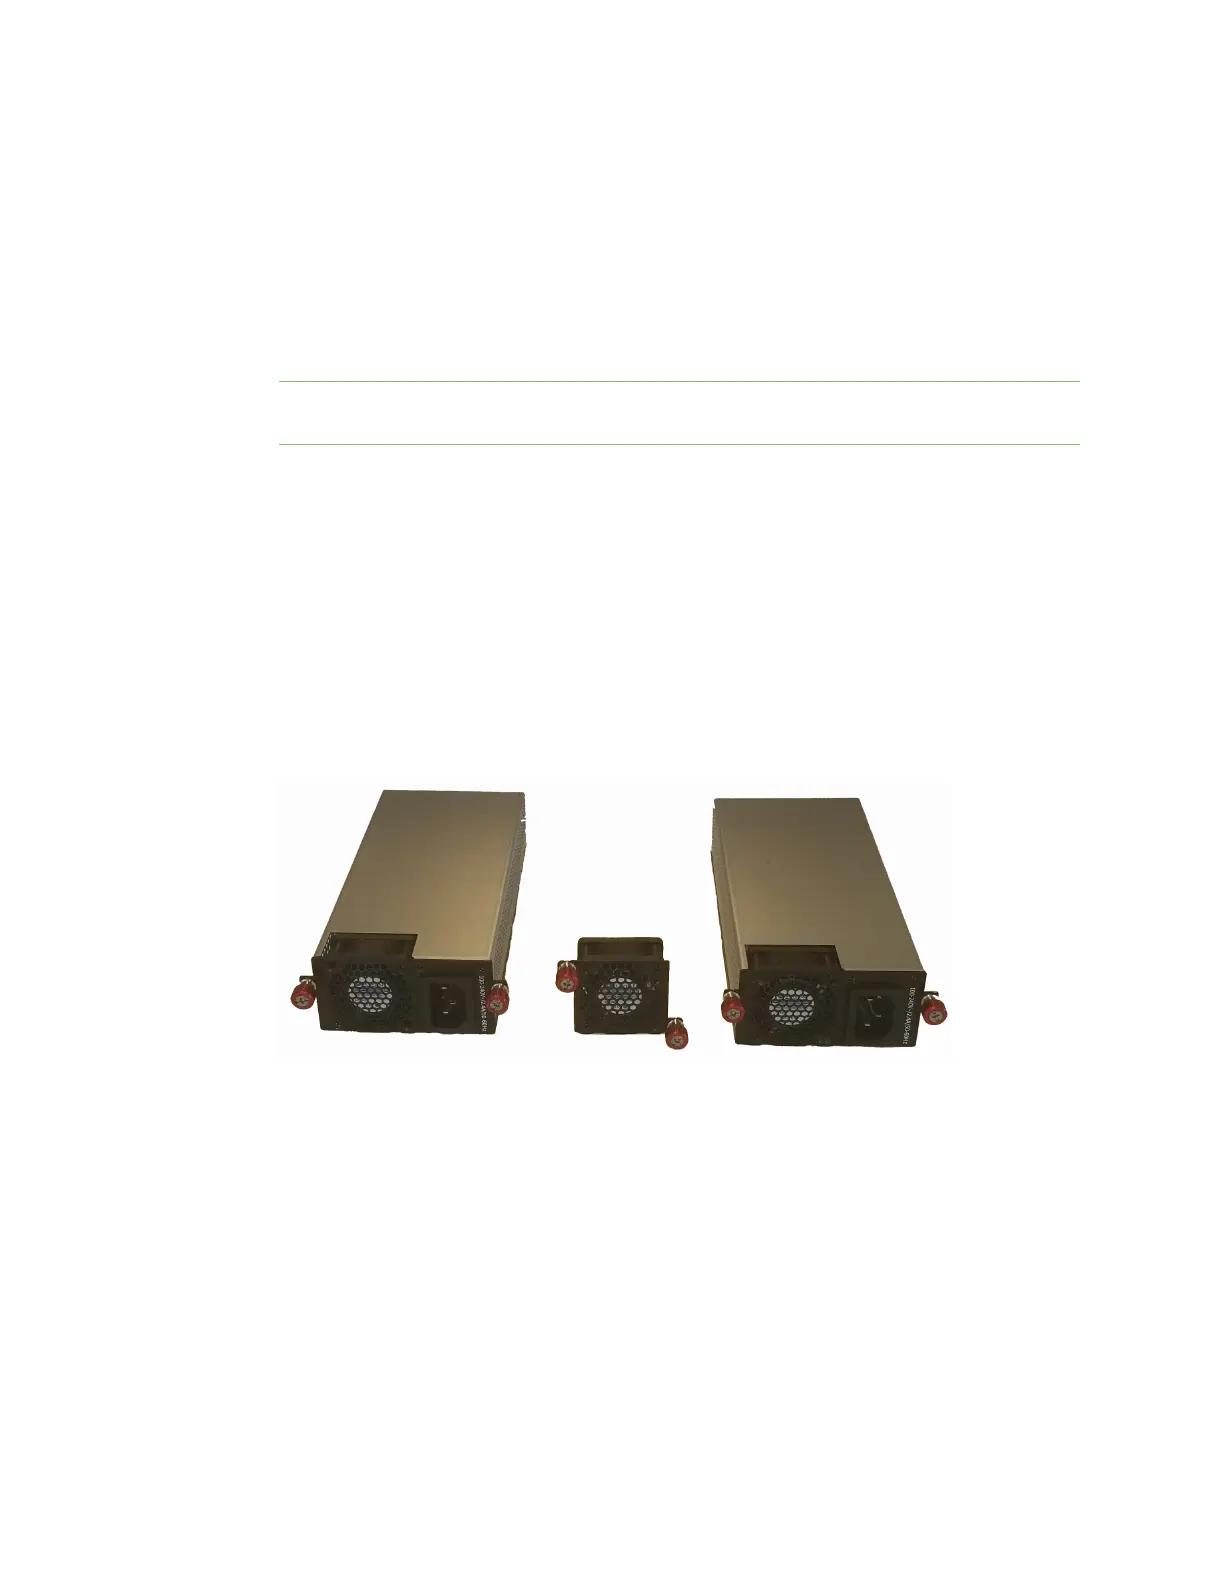
Connect the power supplies and fans
You must purchase a power supply kit. Each kit includes three units: two fan and power supply units
and one fan unit.
You can choose between the following two kits:
n ITPS-PSEK: Connect IT 16/48 power supply kit, port-side exhaust. Use this when the serial
ports will be in the hot aisle. The thumb screws used to connect the items to the Connect IT
are blue.
n ITPS-PSIK: Connect IT 16/48 power supply kit, port-side intake. Use this when the serial ports
will be in the cold aisle. The thumb screws used to connect the items to the Connect IT are red.
1. Orient the device so the back of the device is facing you.
2. Connect the first power supply and fan unit to the Connect IT.
a. Orient a power supply and fan unit to match the picture shown above.
b. Insert the unit into the slot on the left side of the device.
c. Turn the red or blue screws to securely attach the unit to the device case.
3. Connect the second power supply and fan unit to the Connect IT.
a. Orient the second power supply and fan unit to match the picture shown above.
b. Insert the unit into the slot on the right side of the device.
c. Turn the red or blue screws to securely attach the unit to the device case.
 Loading...