4. POINTS, EVENT MARKS
4-2
4.2 How to Enter a Point, Event Mark
4.2.1 How to enter a point (plotter and radar displays only)
Method 1: Selected position
1. Tap the position on the screen where to put a point.
2. Tap [New Point] on the pop-up menu.
The default point symbol is put at the position selected. The point is saved to the points
list.
Method 2: At own ship position
Open the slide-out menu, then tap [Lat/Lon]. The position shown is your current posi-
tion. Edit the position if necessary. Tap to enter the point and close the keyboard.
Note that is method is not available with the fish finder display.
Method 3: Input from external equipment
External equipment (fish finder, etc.) can output points to this equipment. TLL data
(NMEA 0183 format) from the external equipment is output to this equipment via an
NMEA data converter (IF-NMEA2K2, option). The latitude and longitude position of
the point is marked with the event icon.
4.2.2 How to enter an event mark
Method 1: Function gesture
This function is available by touch control when you tap [Event] in [Settings] - [General]
- [Function Gesture] (see section 1.15).
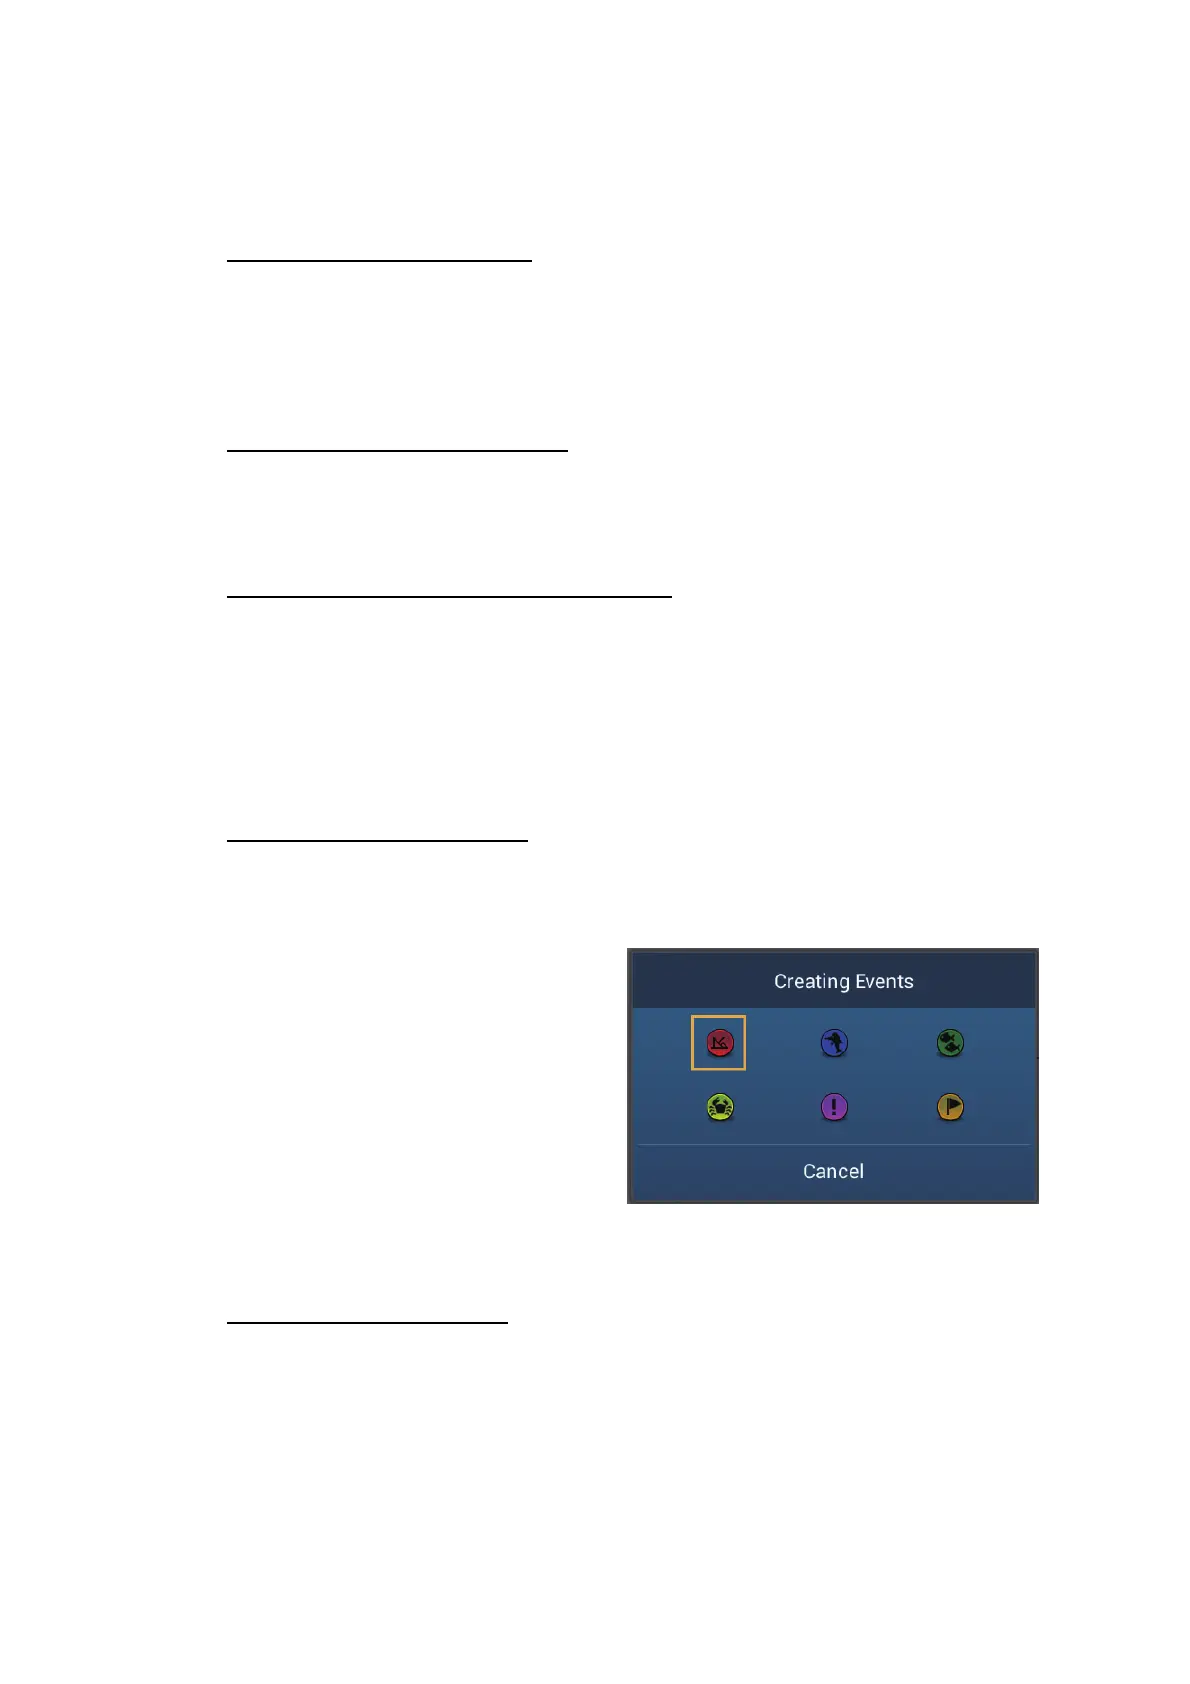
1. Tap the screen with two fingers to
show the [Creating Events] pop-up
menu. ([Record Event1 Automatical-
ly] on the [Points] menu must be set
tor OFF to show this pop-up.)
2. Tap required event mark.
The following occurs.
• The selected mark is put at the own
ship position, on the plotter and radar
displays, at the moment the mark was selected.
• The event mark is saved to the points list.
Method 2: Slide-out menu
Open the slide-out menu, then tap [Event]. Tap required event mark in the [Creating
Events] pop-up menu. Note that is method is not available with the fish finder display.

 Loading...