4.9 Recording Using Specific Conditions (Trigger Function)
115
Chapter 4 Setting the Measurement Conditions (When you want to customize the settings)
4
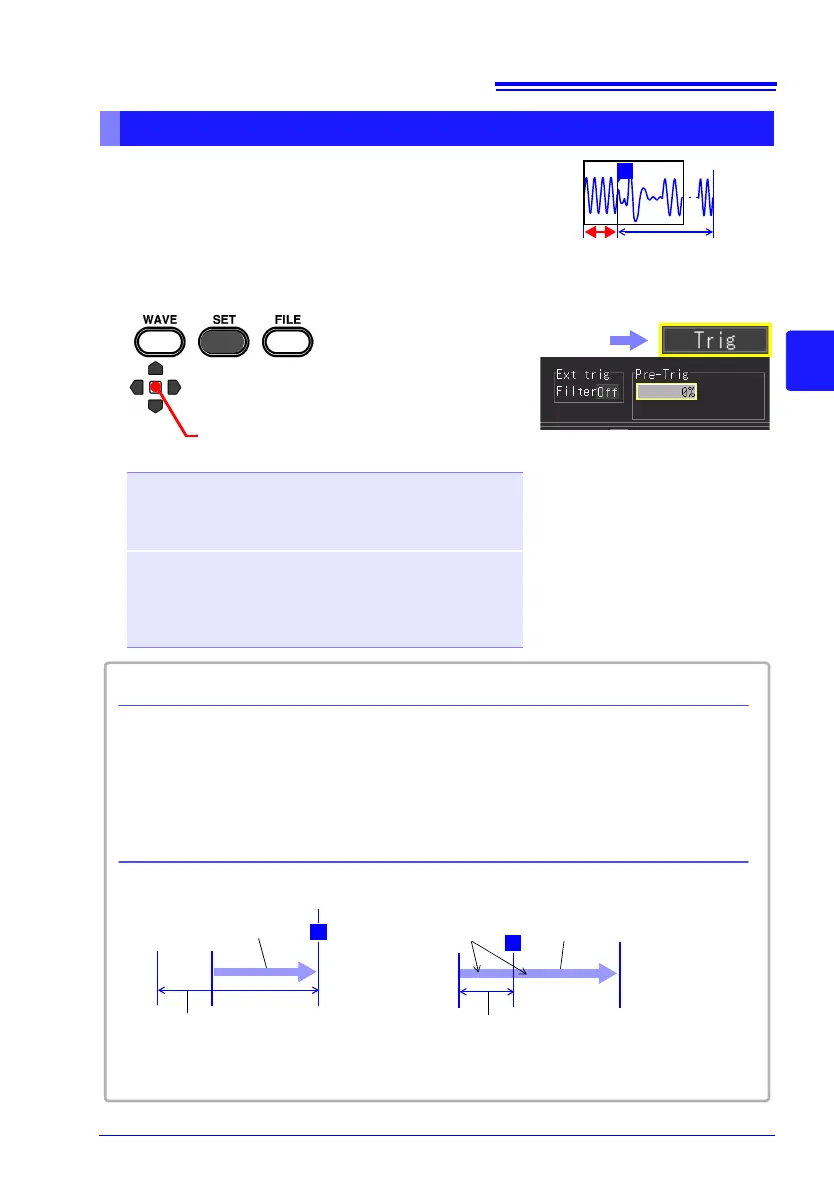
It is possible to record not only the waveform after the
trigger is applied but also the waveform before the
trigger is applied. The options that can be set differ
depending on the function.
This can be set on the [Trig] screen and [Wave+Trg]
display.
Recording Data Before Trigger Applied (Pre-trigger)
1
2
Apply
Select from the setting options
of [Pre-Trig]
Setting options (∗. default setting)
(When High-speed Function)
0%, 5%, 10%, 20%, 30%, 40%, 50%, 60%, 70%, 80%,
90%, 95%, 100%
Set percentage in relation to entire recording length
(When Real-time Function)
Hours, minutes, and seconds can be set (up to maximum
recording time)
Up to 1,000,000 data when continuous recording is set to
[On] (however, up to 500,000 when envelope is set to On)
Select the [Trig] screen.
When measurement is started, the specified pre-trigger length is recorded. This period
is indicated as the [Waiting for pre-trigger]. After the specified pre-trigger length has
been recorded, the period indicated as [Waiting for trigger] continues until a trigger
occurs. During the [Waiting for pre-trigger] period, trigger events are not recognized
even when the trigger criteria are met.
T
Pre-Trig:
2 minutes
Recording ends at
trigger event
Recording Time shorter than
Pre-Trigger Time
Recording Time longer than
Pre-Trigger Time
T
Pre-Trig:
1 minutes
Records both before and
after trigger event
Recording ends when record-
ing length has passed
Pre-Trigger vs. Recording Time (When Real-time Function)
Pressing the MONITOR key when either [Waiting for pre-trigger...] or [Waiting for
trigger..] is displayed allows you to confirm the waveform currently being input.
Difference between [Waiting for pre-trigger] and [Waiting for trigger]
Recording length
(1 minutes)
Recording length (2 minutes)
 Loading...