2.4 Connecting Printer and Loading Recording Paper (Options)
41
2
Chapter 2 Measurement Preparations
Connect the optional MR9000 Printer Unit to the instrument. Usable recording
paper: Hioki’s optional
9234 Recording Paper (112 mm wide, 18 m roll)
See: "Loading the Recording Paper" (p. 42)
Before connecting the printer
Connect the MR9000 Printer Unit to the instrument. When connecting and discon-
necting the printer unit, be sure to turn the power switch OFF. Also, be sure to attach
the protector when the printer is not connected.
2.4 Connecting Printer and Loading Recording
Paper (Options)
Before use, be sure to read "About the Printer" (p. 19).
Operating Precaution
• Be sure to secure the printer with the
screws to prevent it from dropping.
• To prevent damage to the printer cover,
do not apply force to it while it is open.
The printer cannot be used with alkaline dry cell batteries.
When you want to use the printer, use the Z1002 AC Adapter or Z1000 Bat-
tery Pack.
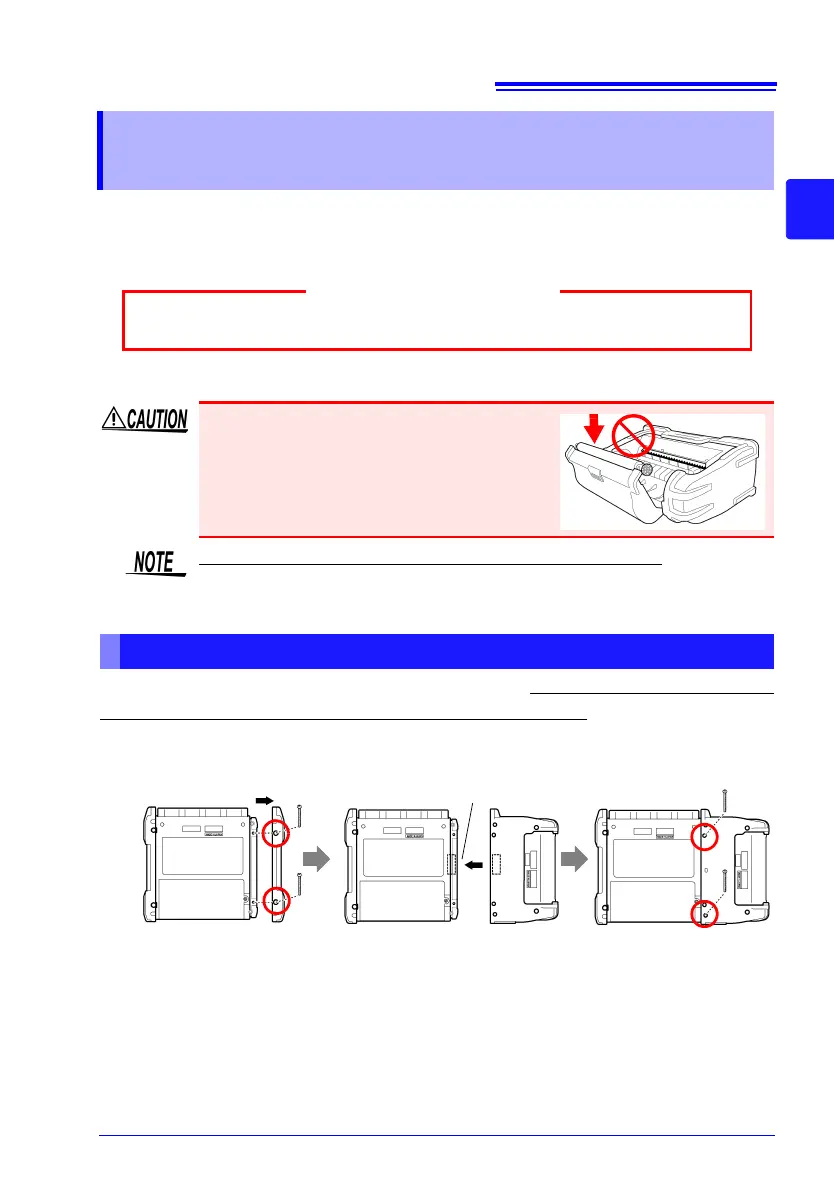
Connecting the Printer
Required items: Phillips screwdriver
Printer connector
12
Connect the printer
unit.
Connect the printer to
the connector properly.
Secure the printer
in place at the
back of the instru-
ment with the two
screws.
3
Back of instrument
Use a Phillips screw-
driver to remove the
two screws securing
the protector on the
left side of the instru-
ment, and then
remove the protector.
 Loading...