08/2012
4-17
WorkCentre 5021/5019
REP 3.1.1, REP 3.1.2
Repairs and Adjustments
Initial Issue
REP 3.1.1 Main Drive Motor
Parts List on PL 3.1
Removal
WARNING
When turning OFF the power switch, check that the 'Data' lamp is OFF and that there is
no Job in progress.
Turn OFF the power switch and make sure that the screen display turns OFF.
Check that the power switch is OFF and unplug the power plug.
1. Remove the Rear Cover. (REP 19.2.1)
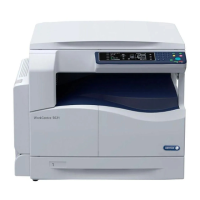
2. Remove the Main Drive Motor. (Figure 1)
(1) Disconnect the connector (x2).
(2) Remove the screw (x2).
(3) Remove the Main Drive Motor.
Figure 1 j0lj40301
Replacement
1. To install, carry out the removal steps in reverse order.
REP 3.1.2 Main Drive Housing
Parts List on PL 3.1
Removal
WARNING
When turning OFF the power switch, check that the 'Data' lamp is OFF and that there is
no Job in progress.
Turn OFF the power switch and make sure that the screen display turns OFF.
Check that the power switch is OFF and unplug the power plug.
1. Remove the Drum Cartridge. (REP 8.1.1)
2. Remove the Toner Cartridge. (PL 8.1)
3. Remove the Front Cover. (REP 19.1.1)
4. Remove the Top Cover. (REP 19.1.2)
5. Remove the Cartridge Guide. (REP 8.2.1)
6. Remove the Fusing Unit. (REP 7.1.1)
7. Remove the MSI. (REP 13.1.1)
8. Remove the L/H Cover. (REP 14.1.1)
9. Remove the Registration Chute. (REP 15.1.1)
10. Remove the Rear Cover. (REP 19.2.1)
11. Remove the Registration Roll. (REP 15.1.2)
12. Remove the HVPS. (REP 18.1.2)
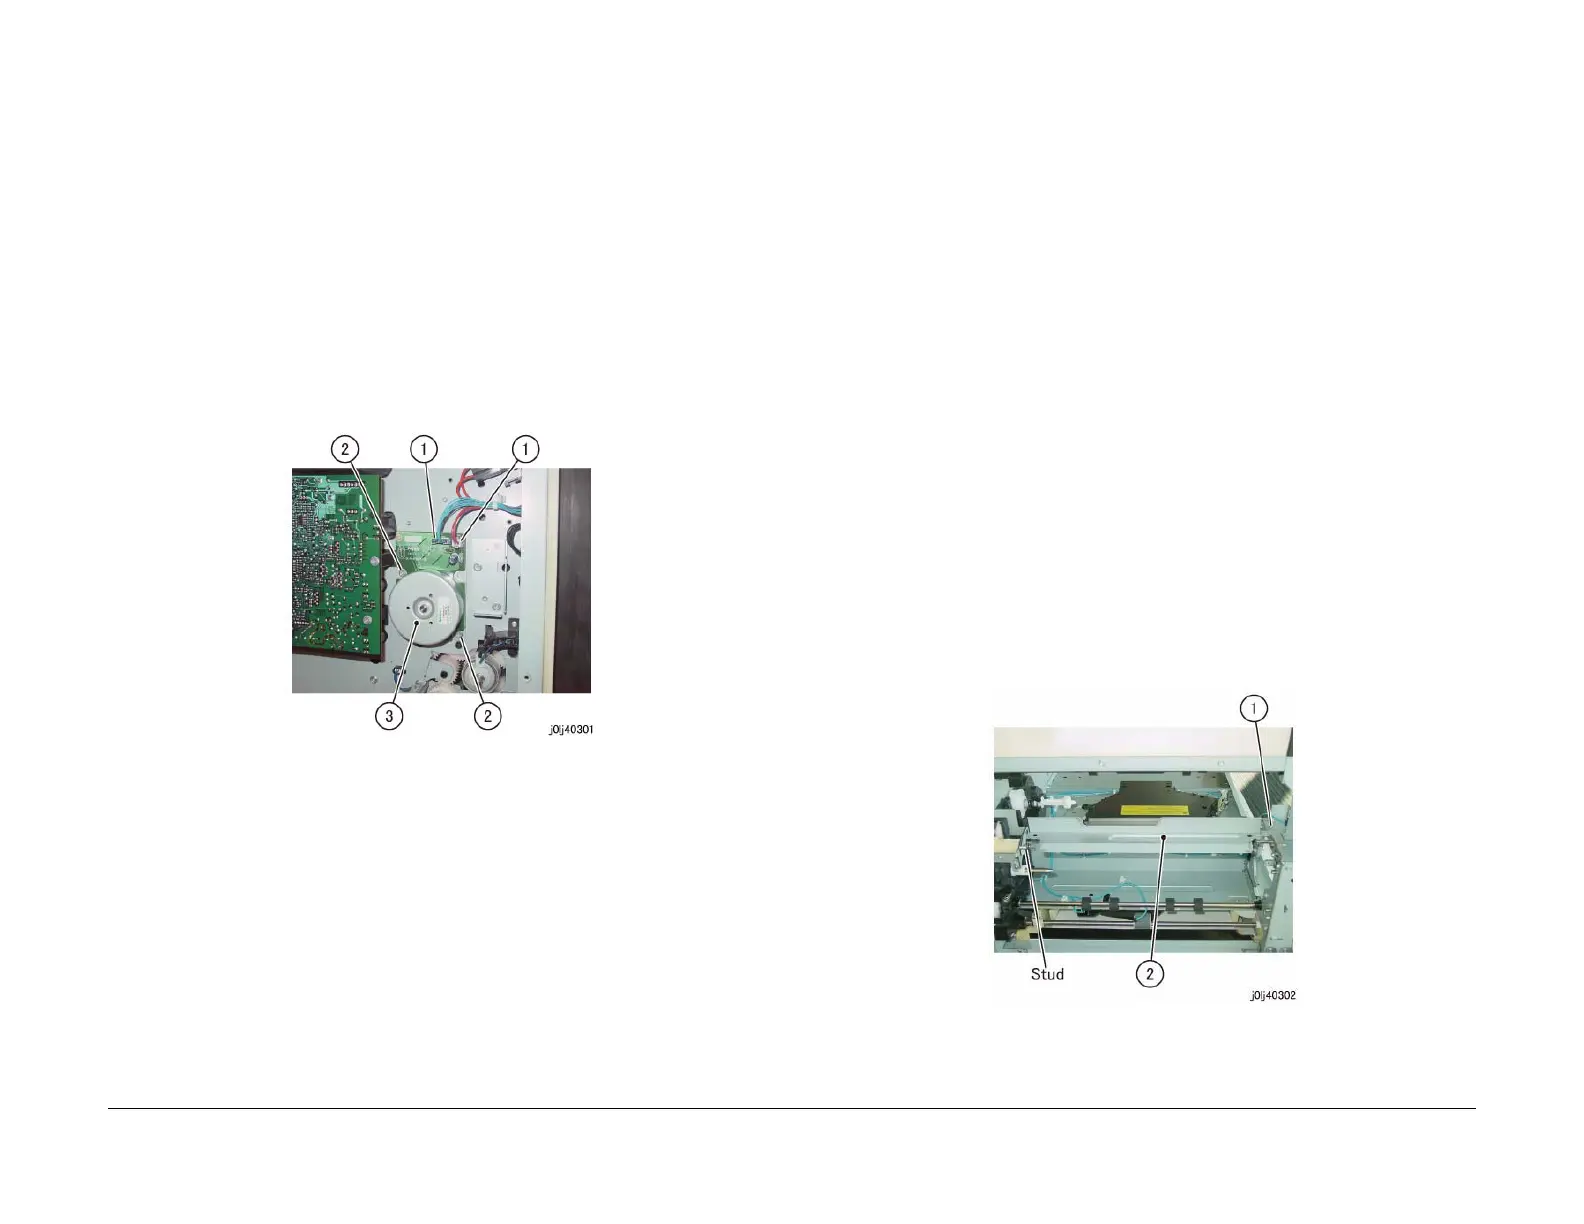
13. Remove the Fusing Unit Plate. (Figure 1)
(1) Remove the Bind Screw.
(2) Remove the Fusing Unit Plate from the stud.
Figure 1 j0lj40302
14. Remove the Fusing Unit Rear Bracket. (Figure 2)
(1) Remove the screw (x2).

 Loading...