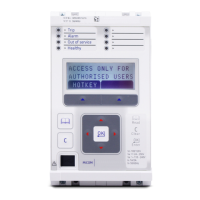
Use a three-phase digital/electronic injection test set to make the commissioning procedure easier.
1. If testing the distance elements using using test sets that do not provide a dynamic model to generate true
fault delta conditions, set COMMISSIONING TESTS > Static Test Mode to Enabled. When set, this disables
phase selector control and forces the device to use a conventional (non-delta) directional line.
2. For lower specification test equipment that cannot apply a full three phase set of healthy simulated pre-
fault voltages, the VT supervision may need to be disabled to avoid spurious pickup. Set CONFIGURATION >
Supervision to Disabled.
3. Connect the test equipment to the device using the test block(s), taking care not to open-circuit any CT
secondary windings. If using MMLG type test blocks, the live side of the test plug must be provided with
shorting links before it is inserted into the test block.
4. When the test is complete, make sure COMMISSIONING TESTS > Static Test Mode is set back to Disabled.
12.2.2
ZONE 1 REACH CHECK
The zone 1 element is set to be directional forward.
1. Apply a dynamic A-phase-to-neutral fault, slightly in excess of the expected reach. The duration of the
injection should be in excess of the tZ1 timer setting, but less than tZ2. These settings are in the DISTANCE
column. No trip should occur, and the red Trip LED should remain OFF.
2. Reduce the impedance and reapply the simulated fault.
3. Repeat this procedure until a trip occurs. When this happens, the display shows Alarms/Faults present and
the Alarm and Trip LEDs switch ON.
4. To view the alarm message, keep pressing the read key until the yellow alarm LED changes from flashing to
being steadily on.
5. At the prompt Press clear to reset alarms, press the C key. This clears the fault record from the display.
6. Record the impedance at which the device trips. The measured impedance should be within +/- 10% of the
expected reach.
7. Read and reset the alarms
Modern injection test sets usually calculate the expected fault loop impedance from the device settings. For those
that do not, check the reach for phase-phase and confirm the operation of the contacts. The appropriate loop
impedance is given by the vector sum:
Z1 + Z1 residual = Z1 + (Z1.kZN Res Comp ÐkZN Angle) Ω
12.2.3
ZONE 2 REACH CHECK
The zone 2 element is set to be directional forward.
1. Apply a dynamic B-C fault, slightly in excess of the expected reach. The duration of the injection should be
in excess of the tZ2 timer setting, but less than tZ3. These settings are in the DISTANCE column. No trip
should occur, and the red Trip LED should remain OFF.
2. Repeat the test described above to find the zone reach.
3. Record the impedance at which the device trips. The measured impedance should be within +/- 10% of the
expected reach.
4. Read and reset the alarms.
Modern injection test sets usually calculate the expected fault loop impedance from the device settings. For those
that do not, check the reach for phase-phase and confirm the operation of the appropriate contacts. The
appropriate loop impedance is now given by:
2 x Z2 Ω
Chapter 25 - Commissioning Instructions P543i/P545i
668 P54x1i-TM-EN-1
 Loading...


