LIGHTS/METERS/SWITCHES
BRAKE/TAIL LIGHT
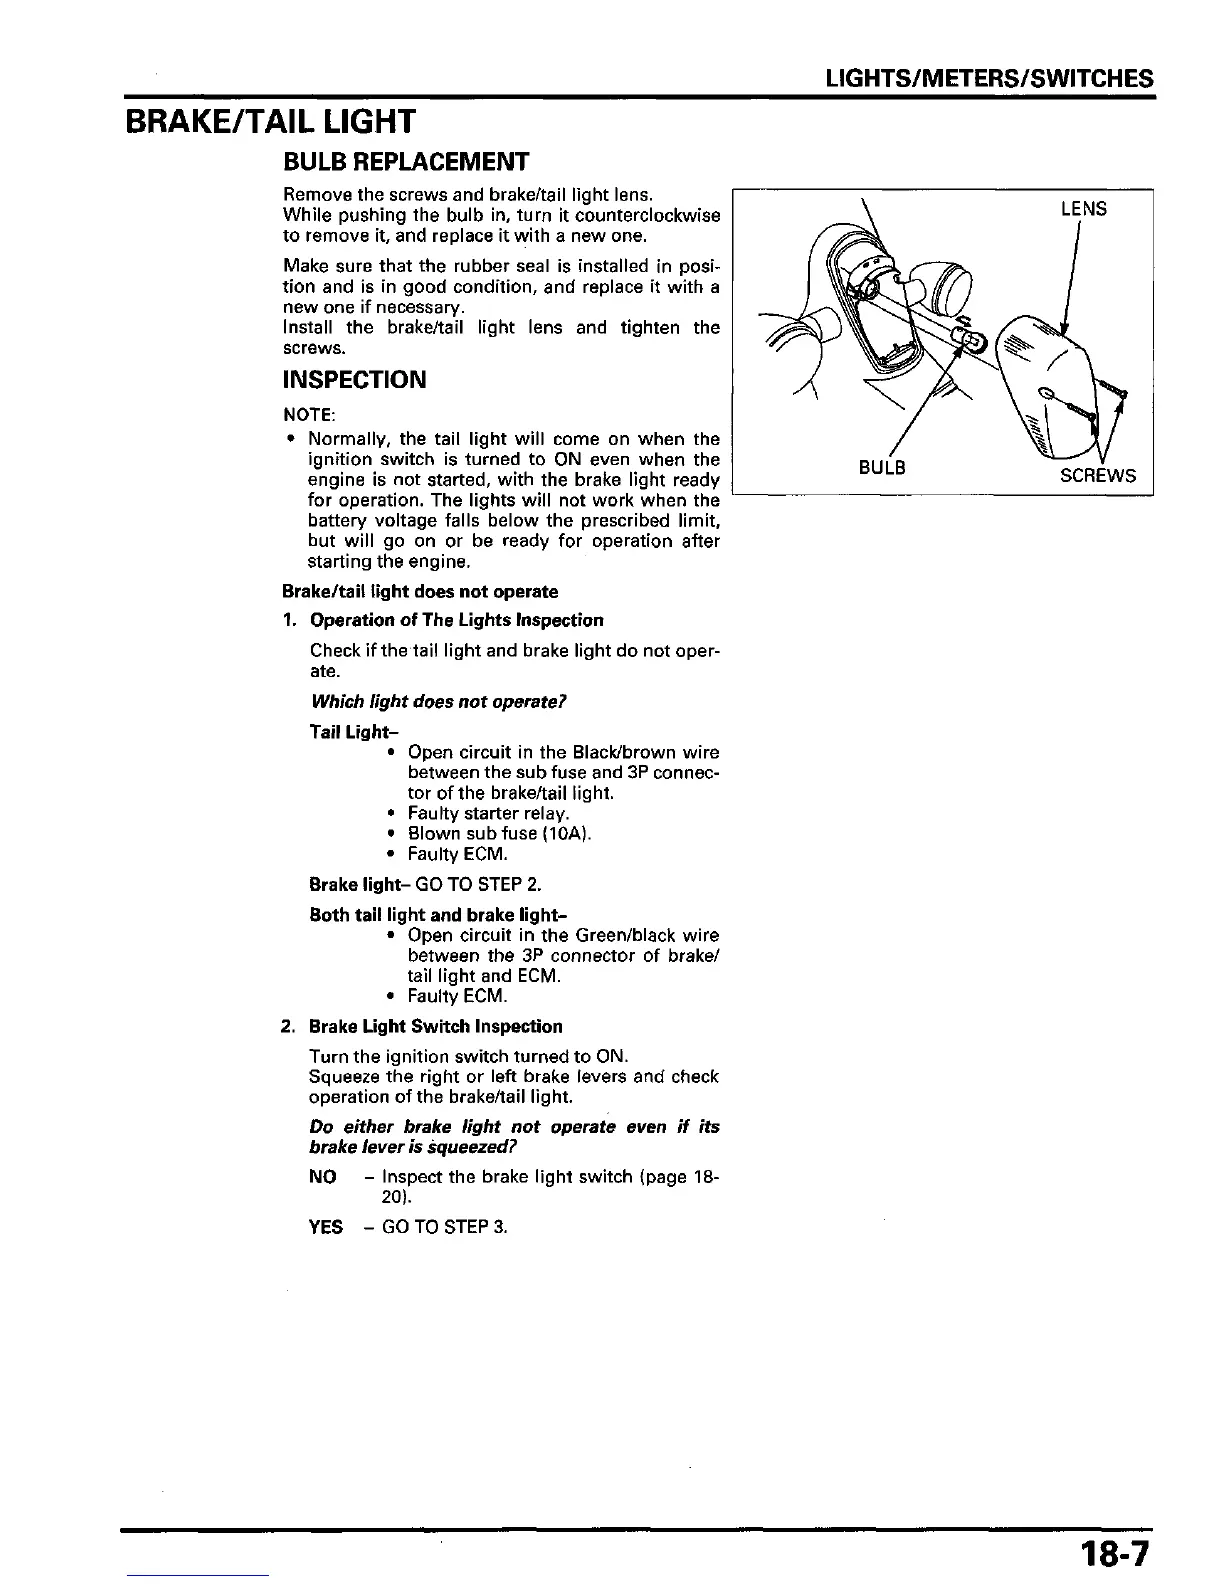
BULB REPLACEMENT
Remove the screws and brake/tail light lens.
While pushing the bulb in, turn it counterclockwise
to remove it, and replace it with a new one.
Make sure that the rubber seal is installed in
posi-
tion and is in good condition, and replace it with a
new one if necessary.
Install the brake/tail light lens and tighten the
screws.
INSPECTION
NOTE:
• Normally, the tail light will come on when the
ignition switch is turned to ON even when the
engine is not started, with the brake light ready
for operation. The lights will not work when the
battery voltage falls below the prescribed limit,
but will go on or be ready for operation after
starting the engine.
Brake/tail light does not operate
1.
Operation of The Lights Inspection
Check if the tail light and brake light do not oper-
ate.
Which
light
does
not
operate?
Tail Light-
• Open circuit in the Black/brown wire
between the sub fuse and 3P connec-
tor of the brake/tail light.
• Faulty starter relay.
• Blown sub fuse (10A).
• Faulty ECM.
Brake light- GO TO STEP 2.
Both tail light and brake light—
• Open circuit in the Green/black wire
between the 3P connector of brake/
tail light and ECM.
• Faulty ECM.
2.
Brake Light Switch Inspection
Turn the ignition switch turned to ON.
Squeeze the right or left brake levers and check
operation of the brake/tail light.
Do either brake light not operate even if its
brake
lever is
squeezed?
NO - Inspect the brake light switch (page 18-
20).
YES - GO TO STEP 3.
18-7
 Loading...