DISASSEMBLY AND ASSEMBLY
SOLENOID VALVE
REMOVAL OF SOLENOID VALVE
ASSEMBLY
A
1.
2.
3.
4.
l
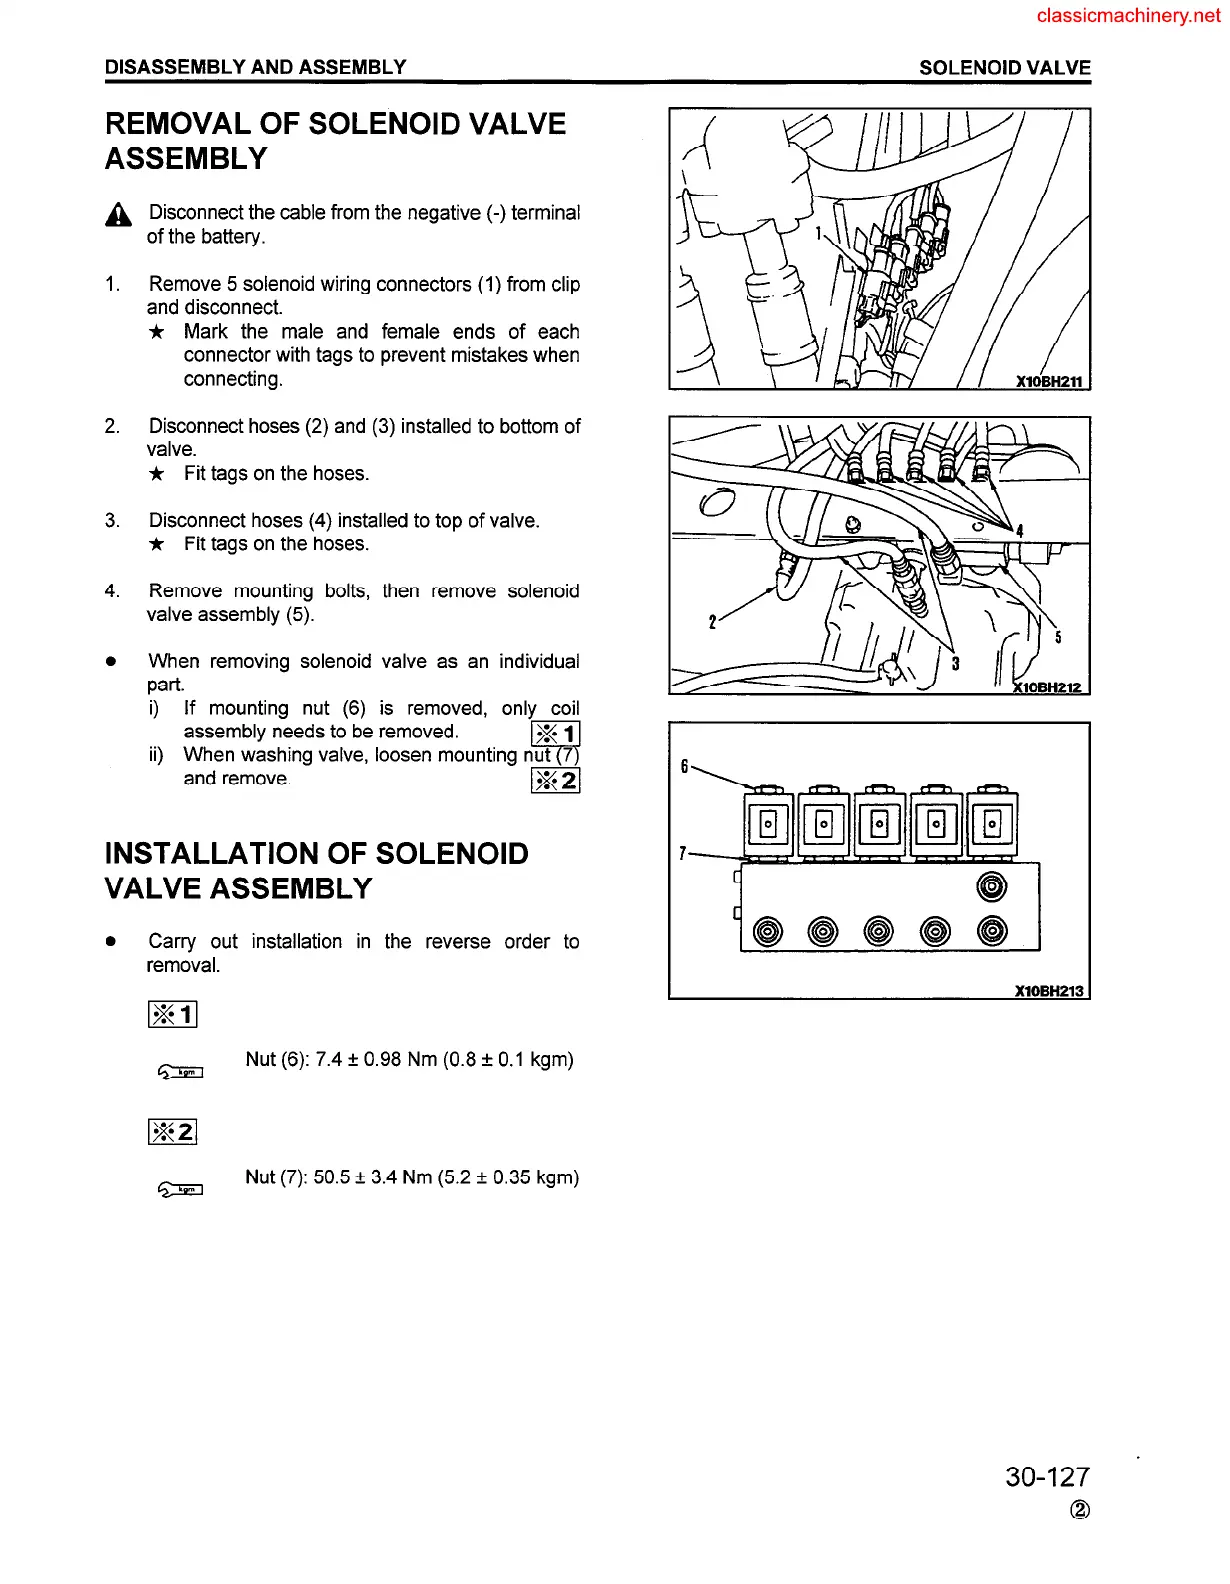
Disconnect the cable from the negative (-) terminal
of the battery.
Remove 5 solenoid wiring connectors (1) from clip
and disconnect.
* Mark the male and female ends of each
connector with tags to prevent mistakes when
connecting.
Disconnect hoses (2) and (3) installed to bottom of
valve.
* Fit tags on the hoses.
Disconnect hoses (4) installed to top of valve.
* Fit tags on the hoses.
Remove mounting bolts, then remove solenoid
valve assembly (5).
When removing solenoid valve as an individual
part.
i) If mounting nut (6) is removed, only coil
assembly needs to be removed.
%l
ii)
q
When washing valve, loosen mounting nut 7
and remove.
ml
INSTALLATION OF SOLENOID
VALVE ASSEMBLY
0
Carry out installation in the reverse order to
removal.
w
Nut (6): 7.4 f 0.98 Nm (0.8 f 0.1 kgm)
XlOBH213
Nut (7): 50.5 f 3.4 Nm (5.2 + 0.35 kgm)
30-127 .
0
 Loading...