DISASSEMBLY AND ASSEMBLY
BUCKET
INSTALLATION OF BUCKET
ASSEMBLY
l
Carry out installation in the reverse order to
removal.
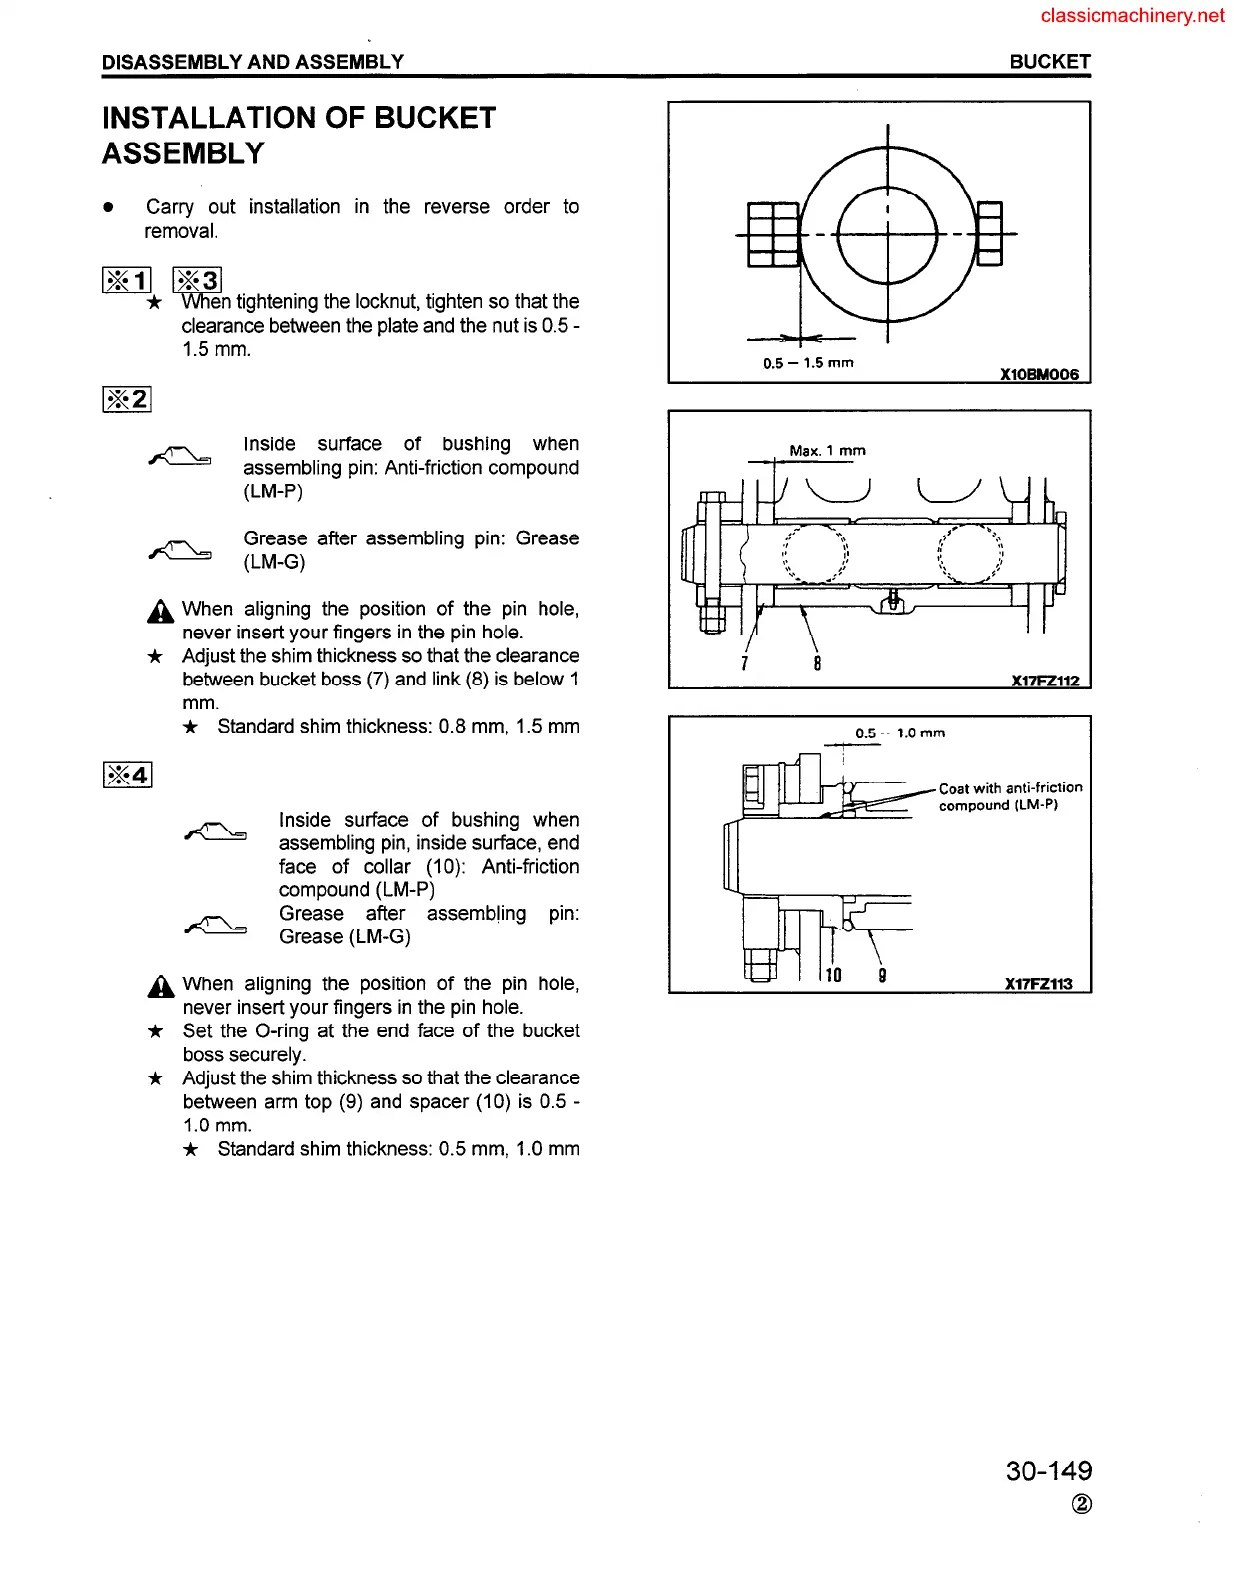
en tightening the locknut, tighten so that the
clearance between the plate and the nut is 0.5 -
1.5 mm.
-
Inside surface of bushing when
assembling pin: Anti-friction compound
(LM-P)
Grease after assembling pin: Grease
- (LM-G)
A When aligning the position of the pin hole,
never insert your fingers in the pin hole.
*
Adjust the shim thickness so that the clearance
between bucket boss (7) and link (8) is below 1
mm.
* Standard shim thickness: 0.8 mm, 1.5 mm
m
-
Inside surface of bushing when
assembling pin, inside surface, end
face of collar (10): Anti-friction
compound (LM-P)
Grease after assembkng pin:
- Grease (LM-G)
A When aligning the position of the pin hole,
never insert your fingers in the pin hole.
*
*
Set the O-ring at the end face of the bucket
boss securely.
Adjust the shim thickness so that the clearance
between arm top (9) and spacer (10) is 0.5 -
1.0 mm.
j, Standard shim thickness: 0.5 mm, 1 .O mm
0.5 - 1.5 mm
XlOBM006
Max. 1 mm
0.5- l.Omm
Coat with anti-friction
compound ILM-P)
30-I 49
0
 Loading...