30lENGINE
-
WORK
ON
THE
INDIVIDUAL
PARTS
Chlckinl
thl
autodlcomp'rlSSor
301221-10
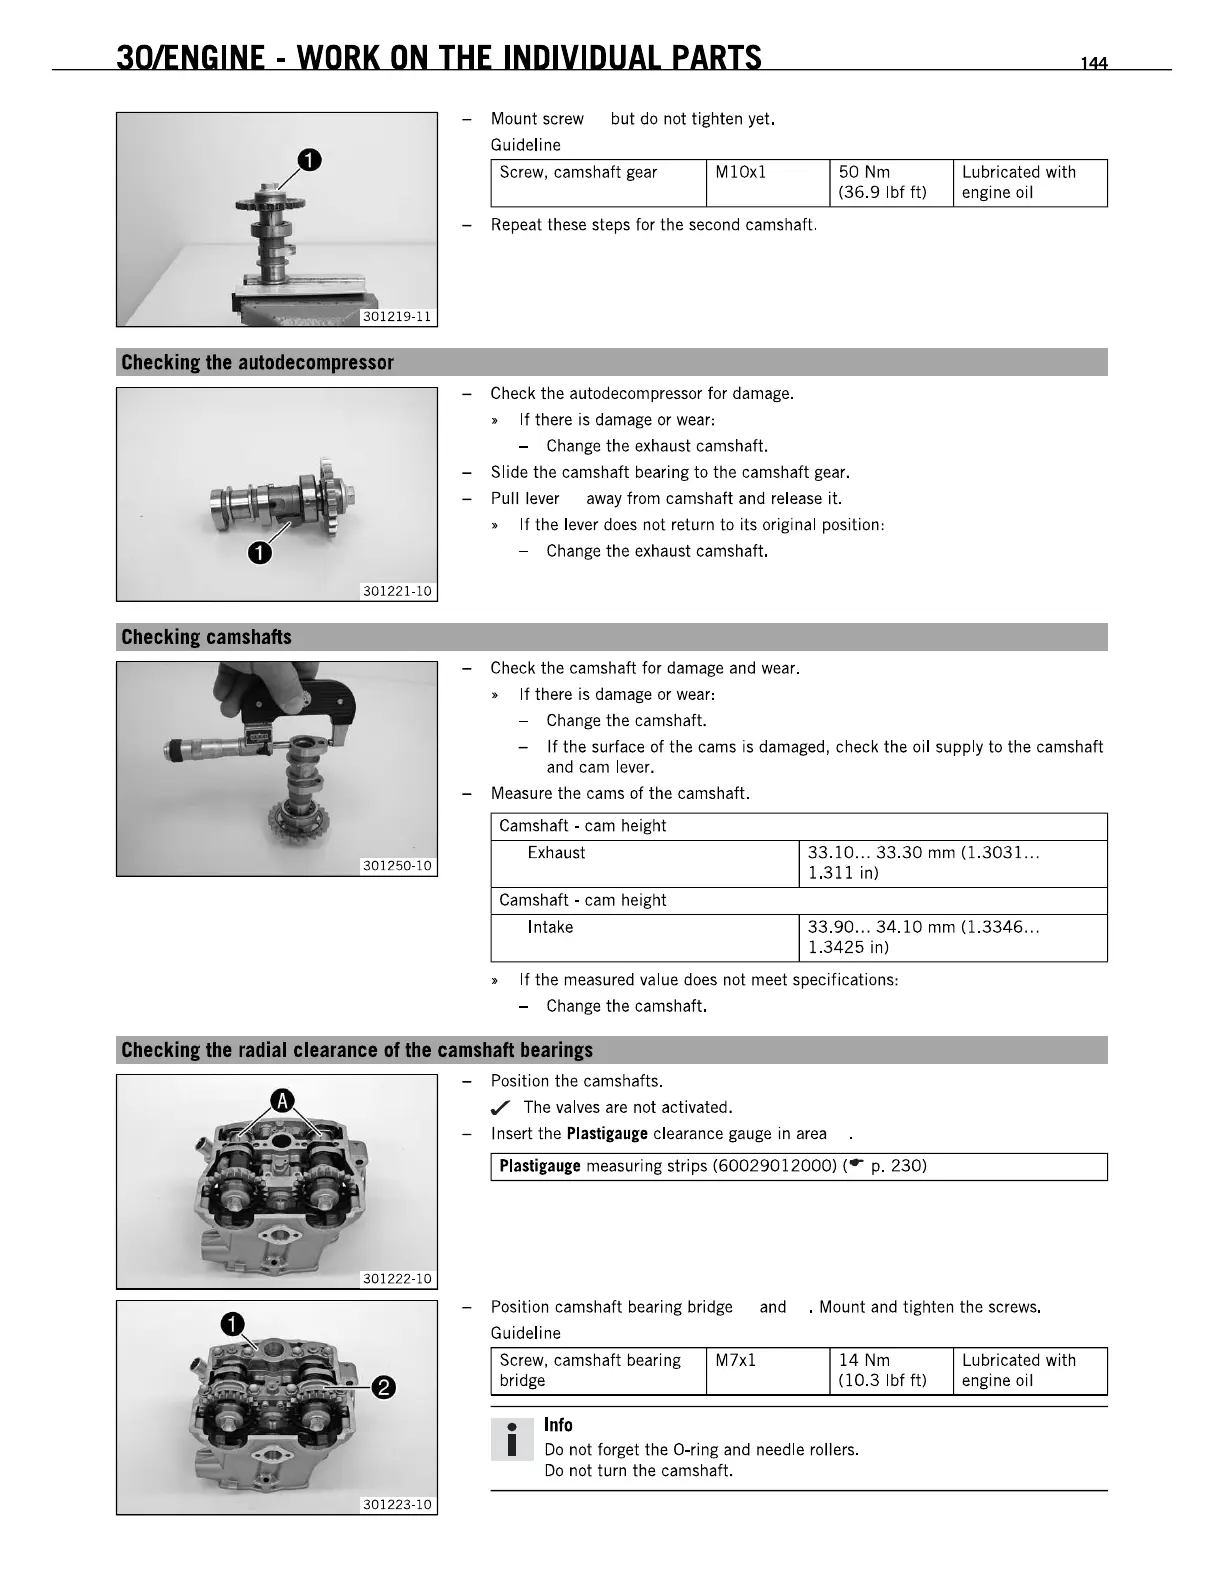
- Mount screw but do not tighten yet.
Guideline
Screw, camshaft gear
MlOxl
- Repeat these steps for the second camshaft.
- Check the autodecompressor for damage.
•
If
there is damage or wear:
- Change the exhaust camshaft.
50
Nm
(36.9
Ibf
ft)
- Slide the camshaft bearing to the camshaft gear.
- Pull lever
away
from camshaft and release it.
•
If
the lever does not return to its original position:
- Change the exhaust camshaft.
- Check the camshaft for damage and wear.
•
If
there is damage or wear:
- Change the camshaft.
Lubricated with
engine oil
144
-
If
the surface of the cams
is
damaged, check the oil supply
to
the camshaft
and cam lever.
- Measure the cams of the camshaft.
Camshaft - cam height
Exhaust
Camshaft - cam height
Intake
33.10 ... 33.30 mm (1.3031...
1.311
in)
33.90 ... 34.10
mm
(1.3346 ...
1.3425
in)
•
If
the measured value does not meet specifications:
- Change the camshaft.
Chlckinl
thl
radial
ciaranci
of
thl
camshaft
b.arin~
301223-10
- Position the camshafts.
,/
The valves are not activated.
- Insert the
Plastigauge
clearance gauge in
area
I
Plastillaulle
measuring strips (60029012000) (
..
p. 230)
- Position camshaft bearing bridge and . Mount and tighten the screws.
Guideline
Screw, camshaft bearing
bridge
•
Info
M7xl
14
Nm
(10.3
Ibf
ft)
I
Do
not forget the O-ring and needle rollers.
Do
not turn the camshaft.
Lubricated with
engine oil
 Loading...