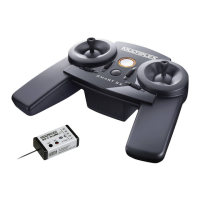
3.2 Initial setup
The following steps should be performed during initial set up of your PROFI TX.
Refer to the relevant sections listed below for a detailed description.
1. Briefly charge the battery. It is sufficient to charge the battery for one hour on
the PC (500mA) or for 20 minutes via the charging socket (1.5A):
Refer to section 3.4 "Transmitter battery" on page 41 for details.
2. Switch on the transmitter: Press and hold the Power button until the annular
light is fully lit. The device is switched on when you release the button.
Refer to section 3.5.1 "Switching on" on page 45.
3. Select the language to be used in the menus and the texts in the model
templates:
Refer to section "Switching on for the first time" on page 46.
4. Switch off the transmitter: Press the Power button until the annular light turns
off. The device is switched off when you release the button (see section 3.5.2
"Switching off" on page 46).
5. Open the case of the transmitter:
Refer to section 3.3.1 "Opening and closing the case" on page 31.
6. Adjust the stick units to suit your ergonomic preferences.
o If necessary, swivel the stick units:
Refer to section 3.3.2.1 "Swivelling stick units" on page 33.
o Activate the stick ratchet:
Refer to section 3.3.2.2 "Adjusting ratchet, friction and centring
spring force" on page 34.
7. If necessary, install additional switches:
Refer to section 3.3.4 "Installing additional controls" on page 37.
8. Install the receive system and connect the servos.
Perform the binding procedure to bind the receiver with the transmitter:
Refer to section "Binding" on page 48.

 Loading...