3.3.4 Installing additional controls
You can install 7 controls on each side of the PROFI TX (see section 3.1
"Transmitter overview" on page 23).
Controls can be buttons, 2- or 3-position dip-switches, or rotary
potentiometers in any arrangement.
In addition, a digi-adjuster can be installed on each side. You can assign
a parameter for direct configuration to each digi-adjuster (see section 6.3
"Digi-adjuster" on page 164).
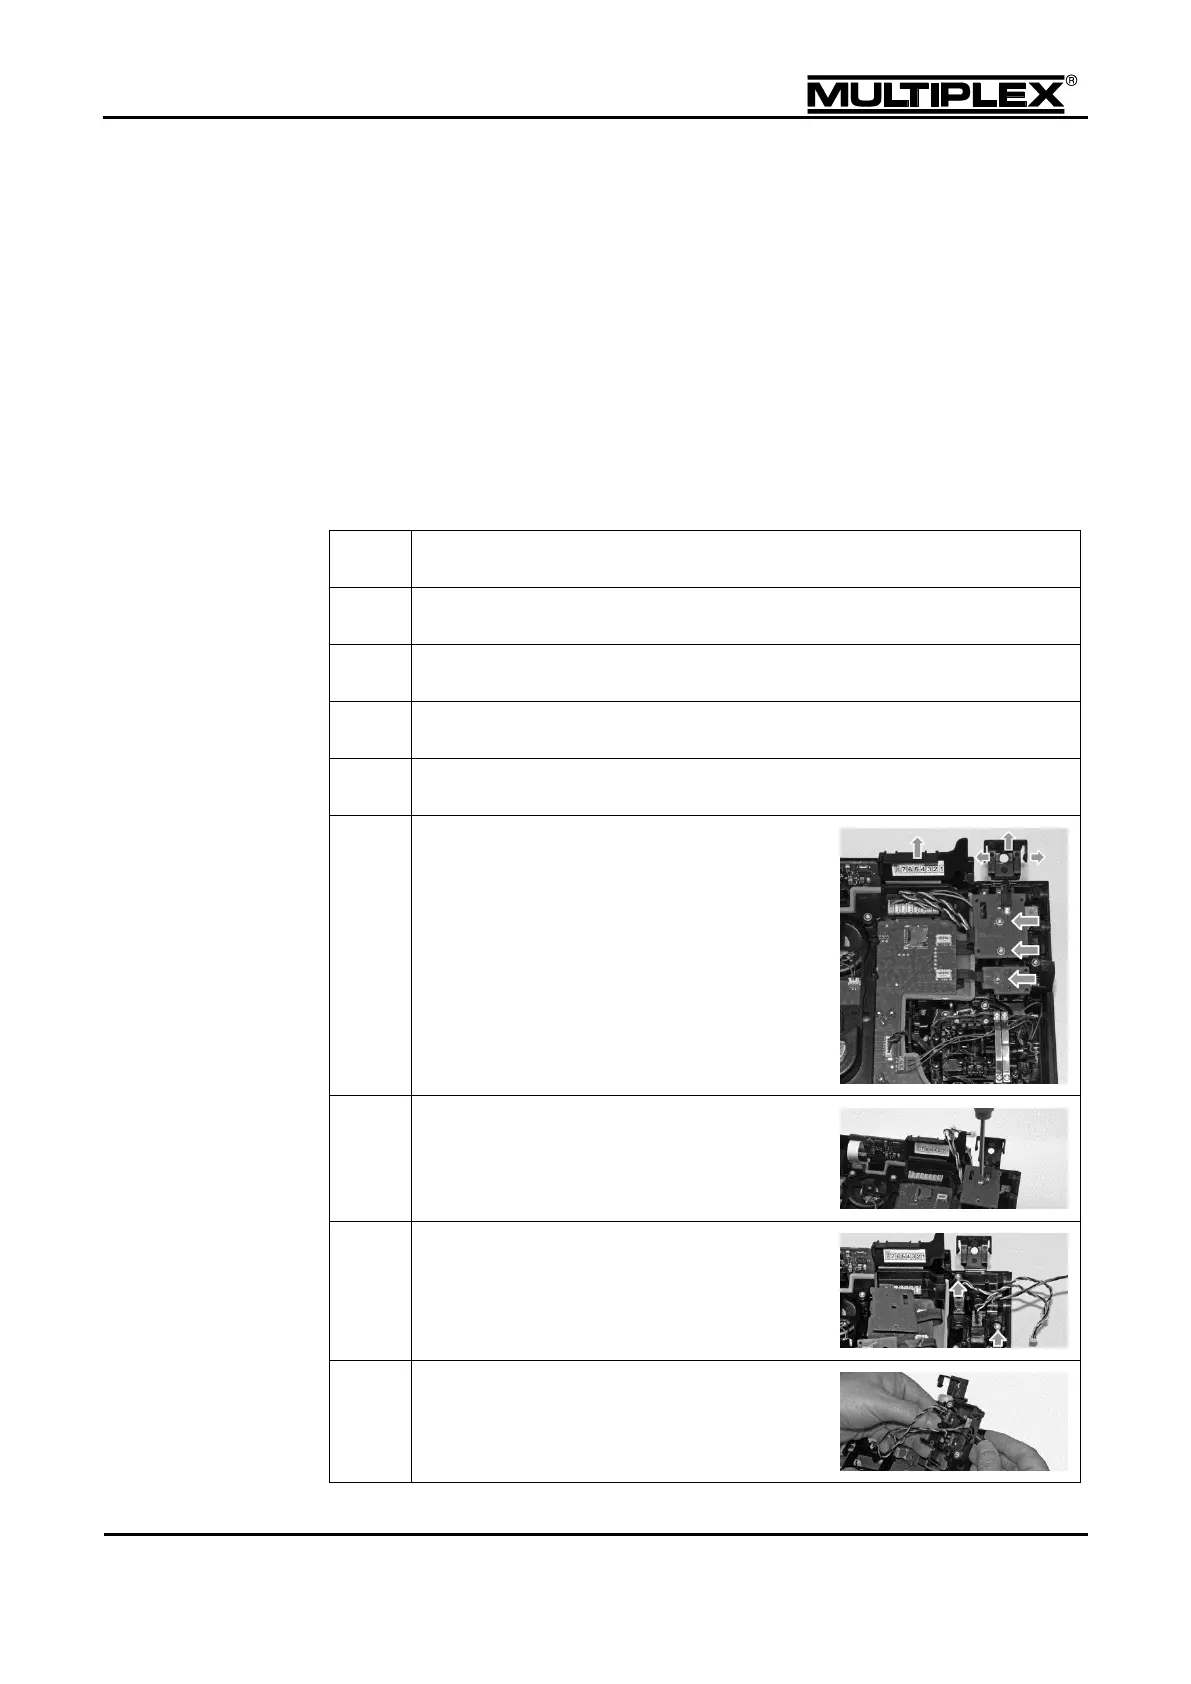
To install a control proceed as follows:
Switch off the transmitter.
Disconnect the headset and USB cables.
Unscrew the tops from all the digi-adjusters and potentiometers.
Open the cable cover on the side where you
wish to install the additional control and pull
out all the connectors.
On the headset socket side, release the
cover by pulling the two clips apart (picture).
Fold the cover out to the front.
Loosen the screws on the circuit boards on
top of the switch tray using the TORX screw
driver.
Lift off the boards and place them nearby.
Remove the two screws on the switch tray.
Lift out the switch tray and remove the blind
plugs from the required installation slots.

 Loading...