Module Remove and Replace 167
Removing a 2U Bezel
This is a representative example of removing the bezel from the 2U12 and 2U24 chassis. The removal
of the 2U12 and 2U24 chassis bezel is the same process.
To remove the 2U12 or 2U24 bezel, complete the following steps:
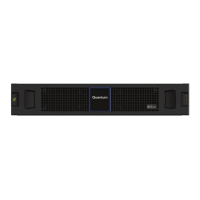
1 Refer to Figure 126 on page 167, openings are provided between the vented grille and ear LEDs
on the bezel.
2 While facing the front of the chassis , insert the index finger of each hand into the top of the
respective (left or right) opening, and insert the middle finger of each hand into the bottom of the
respective opening, with thumbs on the bezel’s bottom.
3 Gently pull the top of the bezel while applying slight inward pressure below, to release the bezel
from the ball studs.
Figure 126 Removing Bezel
Installing a 2U Bezel
The 2U12 and 2U24 chassis ships without the bezels installed. This is a representative example of
installing the bezel onto the 2U12 and 2U24 chassis. The installation of the 2U12 and 2U24 chassis
bezel is the same process.
NOTE: Within the master chassis container, locate the long shallow/narrow box containing the bezel
kit. The box lid should be labeled. Keep the bezel in the box until needed.
 Loading...