192 QXS G2 Hardware Installation and Maintenance Guide
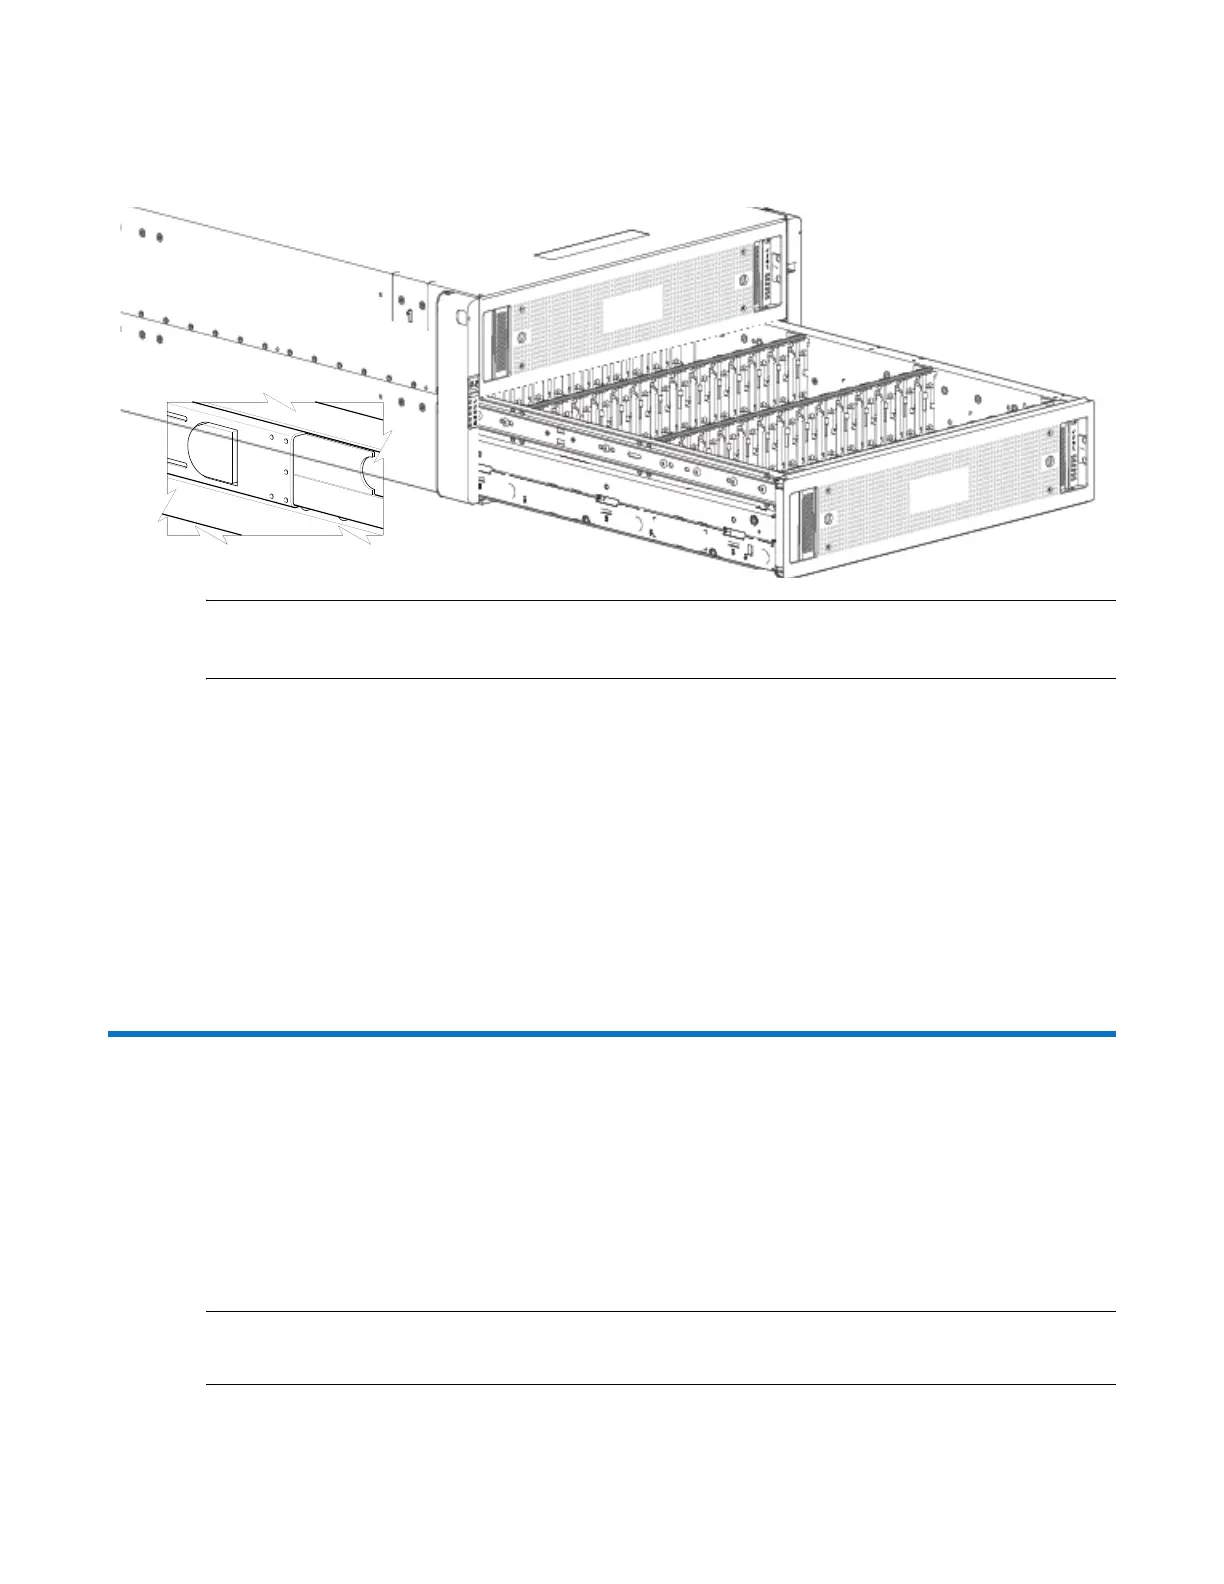
3 Pull the drawer outward until it locks at the drawer stops as shown in Figure 148.
The drawer is shown empty, which is how the chassis is delivered.
Figure 148 Opening a Drawer-2
IMPORTANT: The drawer must not remain open for more than two minutes whilst the chassis is
powered on.
Closing a 5U84 Drawer
1 Press and hold the black latches on the sides of the open drawer in each extended top rail.
Figure 148 shows a magnified detail of a slide latch, which resides on the left and right drawer
rails.
2 Push the drawer in slightly.
3 Release the drawer latches.
4 Push the drawer all the way into the chassis, making sure that it clicks home.
Replacing a 5U84 DDIC
This procedure describes removal and installation of a Disk Drive in Carrier (DDIC). Illustrations in the
DDIC replacement procedures show drawer-centric views of the chassis, and DDICs are properly
aligned for insertion into the disk slots.
Comply with all ESD precautions. Refer to ESD Precautions on page 165 for additional information.
Removing a 5U84 DDIC
NOTE: Remove a DDIC only if a replacement is available. Closing a drawer with one or more drives
missing can potentially cause cooling problems. See also Populating 5U84 Drawers on page 195.
 Loading...