Creating Cutting Lines with the GreatCut-R Plug-in (Adobe Illustrator/Corel-
DRAW)
This section explains how to use mainstream illustration software Adobe Illustrator (Adobe Illustrator
2020) or CorelDRAW (CorelDRAW 2020) to create cutting lines with the GreatCut-R plug-in.
Procedure
1. Start Adobe Illustrator or CorelDRAW.
2. Click [File]>[Open] to open the data for cutting.
3. Select the object for which you want to create cutting lines using the selection tool.
4. Open the window for setting the cutting lines.
• Adobe Illustrator: Click [File]>[GreatCut-R]>[Create Contour] or [Create outline].
• CorelDRAW: Click
or on the menu bar.
MEMO
• Only [Create Contour] is available for raster data.
• For the difference between contour lines and outlines and details on these settings, refer to the Great-
Cut-R online help.
5. Set the conditions for the cutting lines to be created.
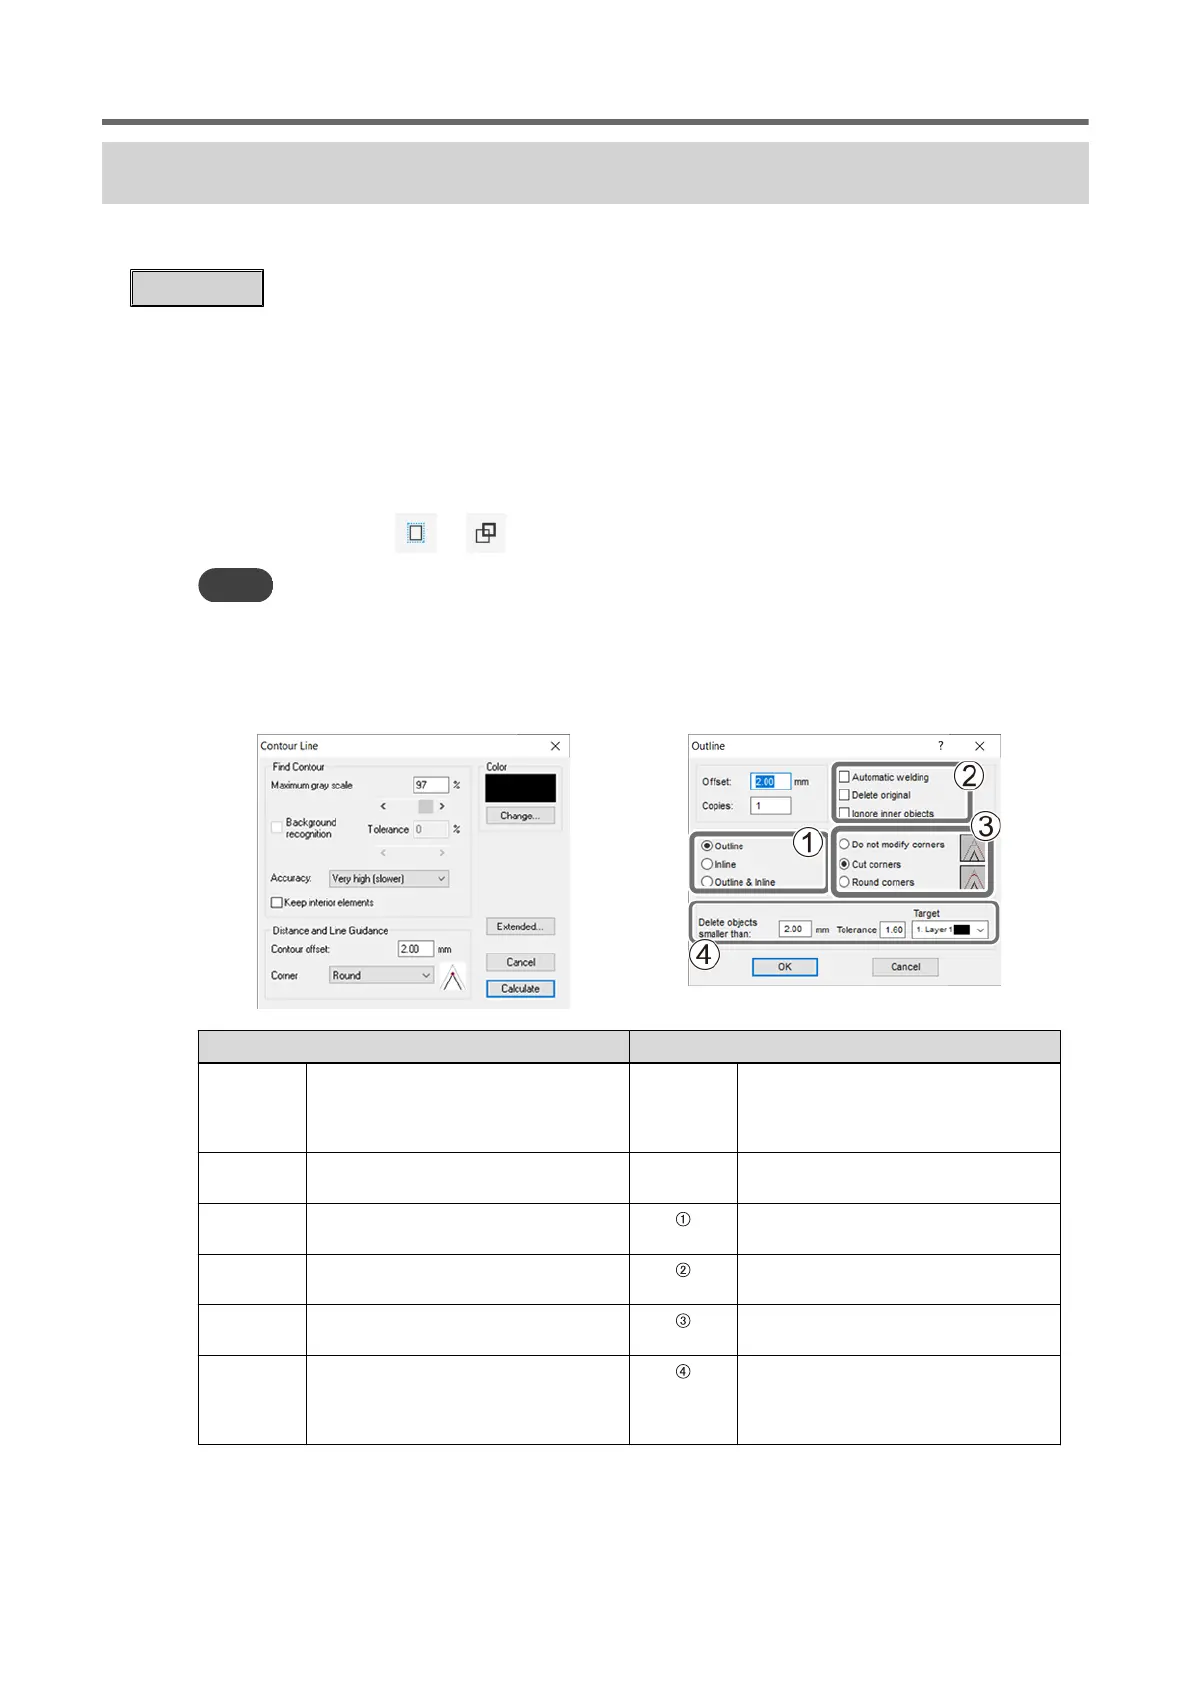
[Contour Line] window
[Outline] window
[Maximum
gray scale]
To clarify the borders on which the cutting
lines are created, a higher gradation value
should be used for the object and back-
ground.
[Offset] Enter the distance from the object.
[Accuracy] Select the accuracy level. [Copies] Enter the number of cutting lines to be
created with the offset value.
[Contour
offset]
Enter the distance from the object. Select the position of cutting lines to be
created for the object.
[Corner] Select how to process the corners of cut-
ting lines.
Select how to create the cutting lines.
[Color] Select the color to assign to the cutting
lines.
Select how to process the corners of cut-
ting lines.
[Extended] Click this button to set the cutting lines in
more detail.
If the distance between the ends of an
open path is less than or equal to the en-
tered value, a merged outline is created in
the specified layer.
6. Click [Calculate] or [OK].
The cutting lines are created for the object.
Creating Cutting Data
Preparations before Cutting Output 43
 Loading...