Setting Crop Marks with GreatCut-R
Using GreatCut-R, set up crop marks in cutting data that includes cutting lines.
Procedure
1. Start GreatCut-R.
2. Display cutting data, which includes the cutting lines, on the GreatCut-R work screen.
• GreatCut-R format file:
Select the cutting data from [File]>[Open], and then click [Open].
• Other files:
Select the cutting data from [File]>[Import], and then click [Open].
MEMO
CorelDRAW format files cannot be imported into GreatCut-R. Open the target cutting data in CorelDRAW and
click on the menu bar.
3. Select cutting data that includes cutting lines.
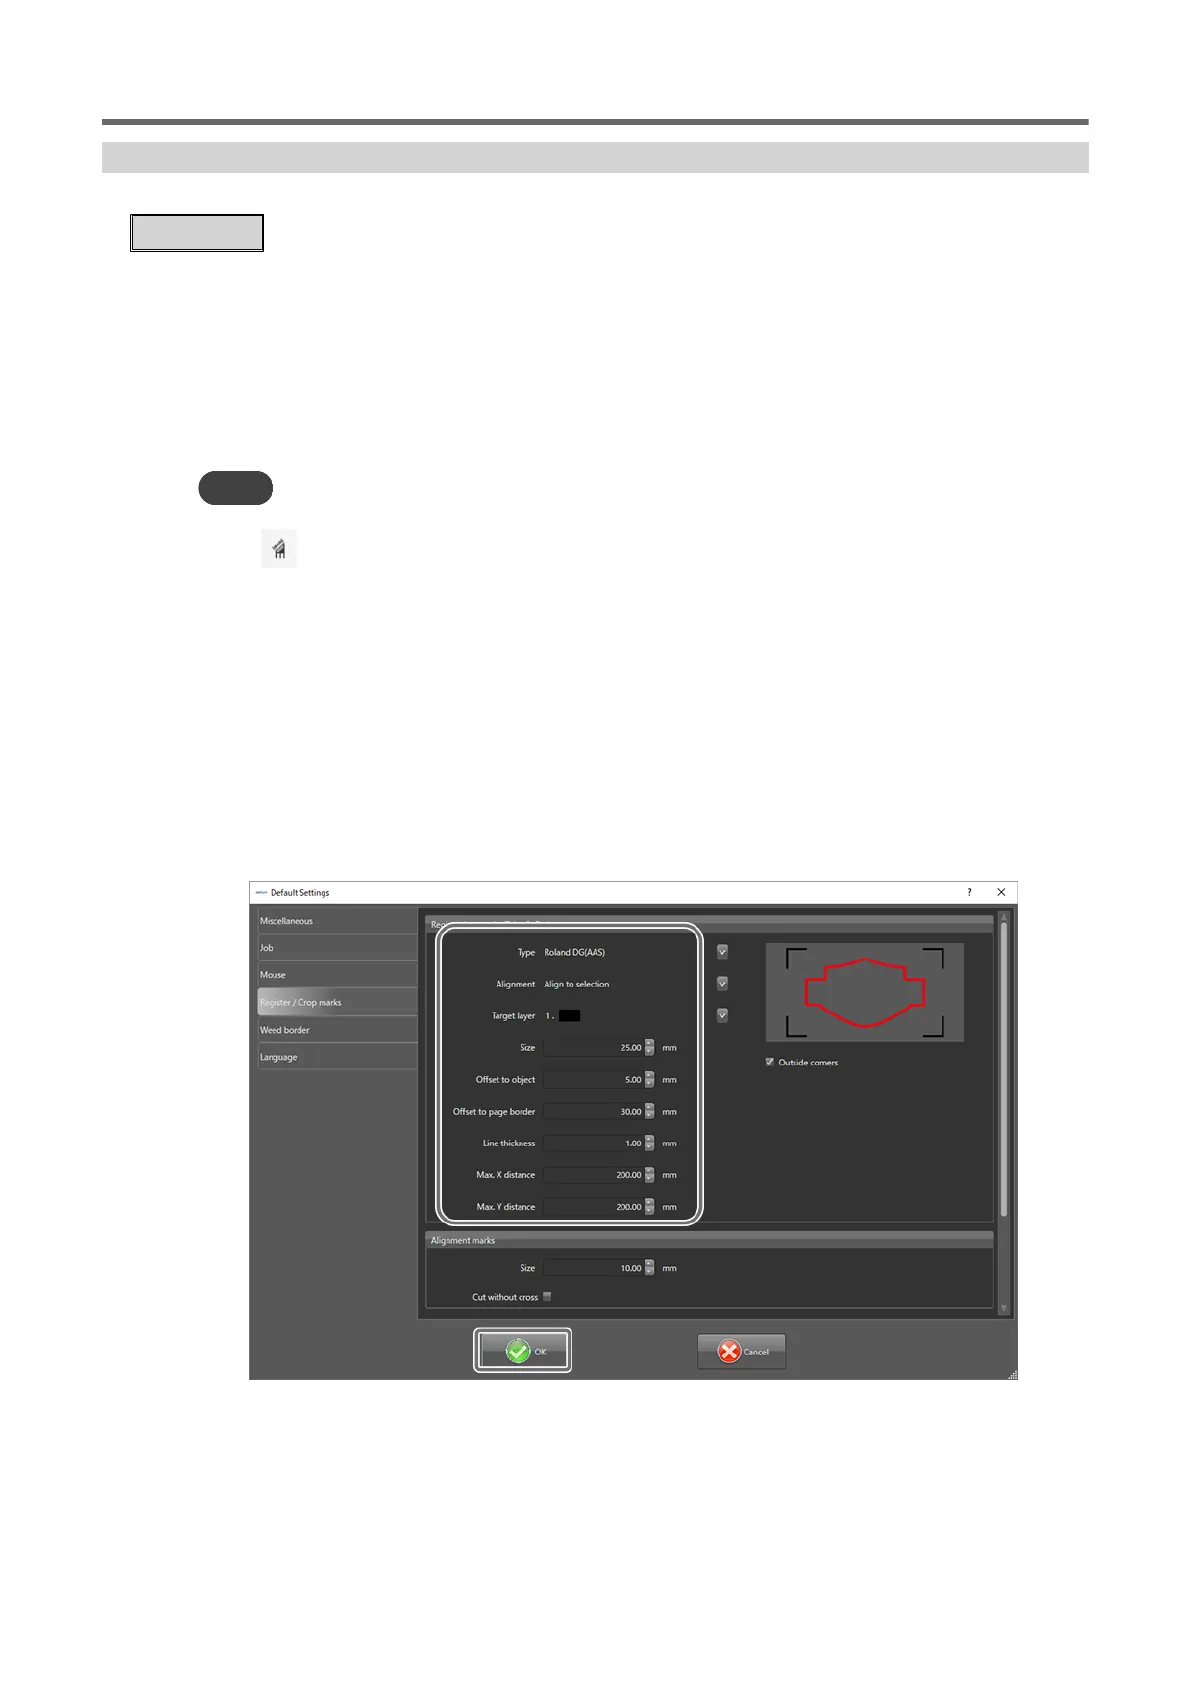
4. Click [Settings]>[Standard Settings]>[Register/ Crop Marks].
The crop mark setting window appears.
5. Set the crop mark conditions.
• [Type]: Roland DG(AAS)
• [Alignment]: Selects the crop mark creation target.
• [Target layer]: Selects the color of the layer in which to create crop marks.
• Set the basic four-point crop marks and enter the distance to be used for creating crop
marks.
6. Click [OK].
7. Select cutting data that includes cutting lines.
8. Click [Tools]>[Set Register Marks].
Crop marks are generated around the cutting data based on the conditions set.
Setting Crop Marks in Cutting Data
Basic Printing and Cutting 69
 Loading...