To accurately read the cutting data positions printed on the material, set AAS-compatible crop marks.
Use appropriate crop marks according to your application.
Setting Crop Marks with the AAS Plug-in (Adobe Illustrator)
If you are using section cutting or automatic material feed direction detection, set up crop marks with
the AAS plug-in before sending the cutting job to the machine from Adobe Illustrator.
Procedure
1. Start Adobe Illustrator.
2. Click [File]>[Open] to select cutting data that includes cutting lines.
You do not need to select cutting data when setting up crop marks on a page.
3. Click [File]>[Script]>[RolandDG_AASII_Mark].
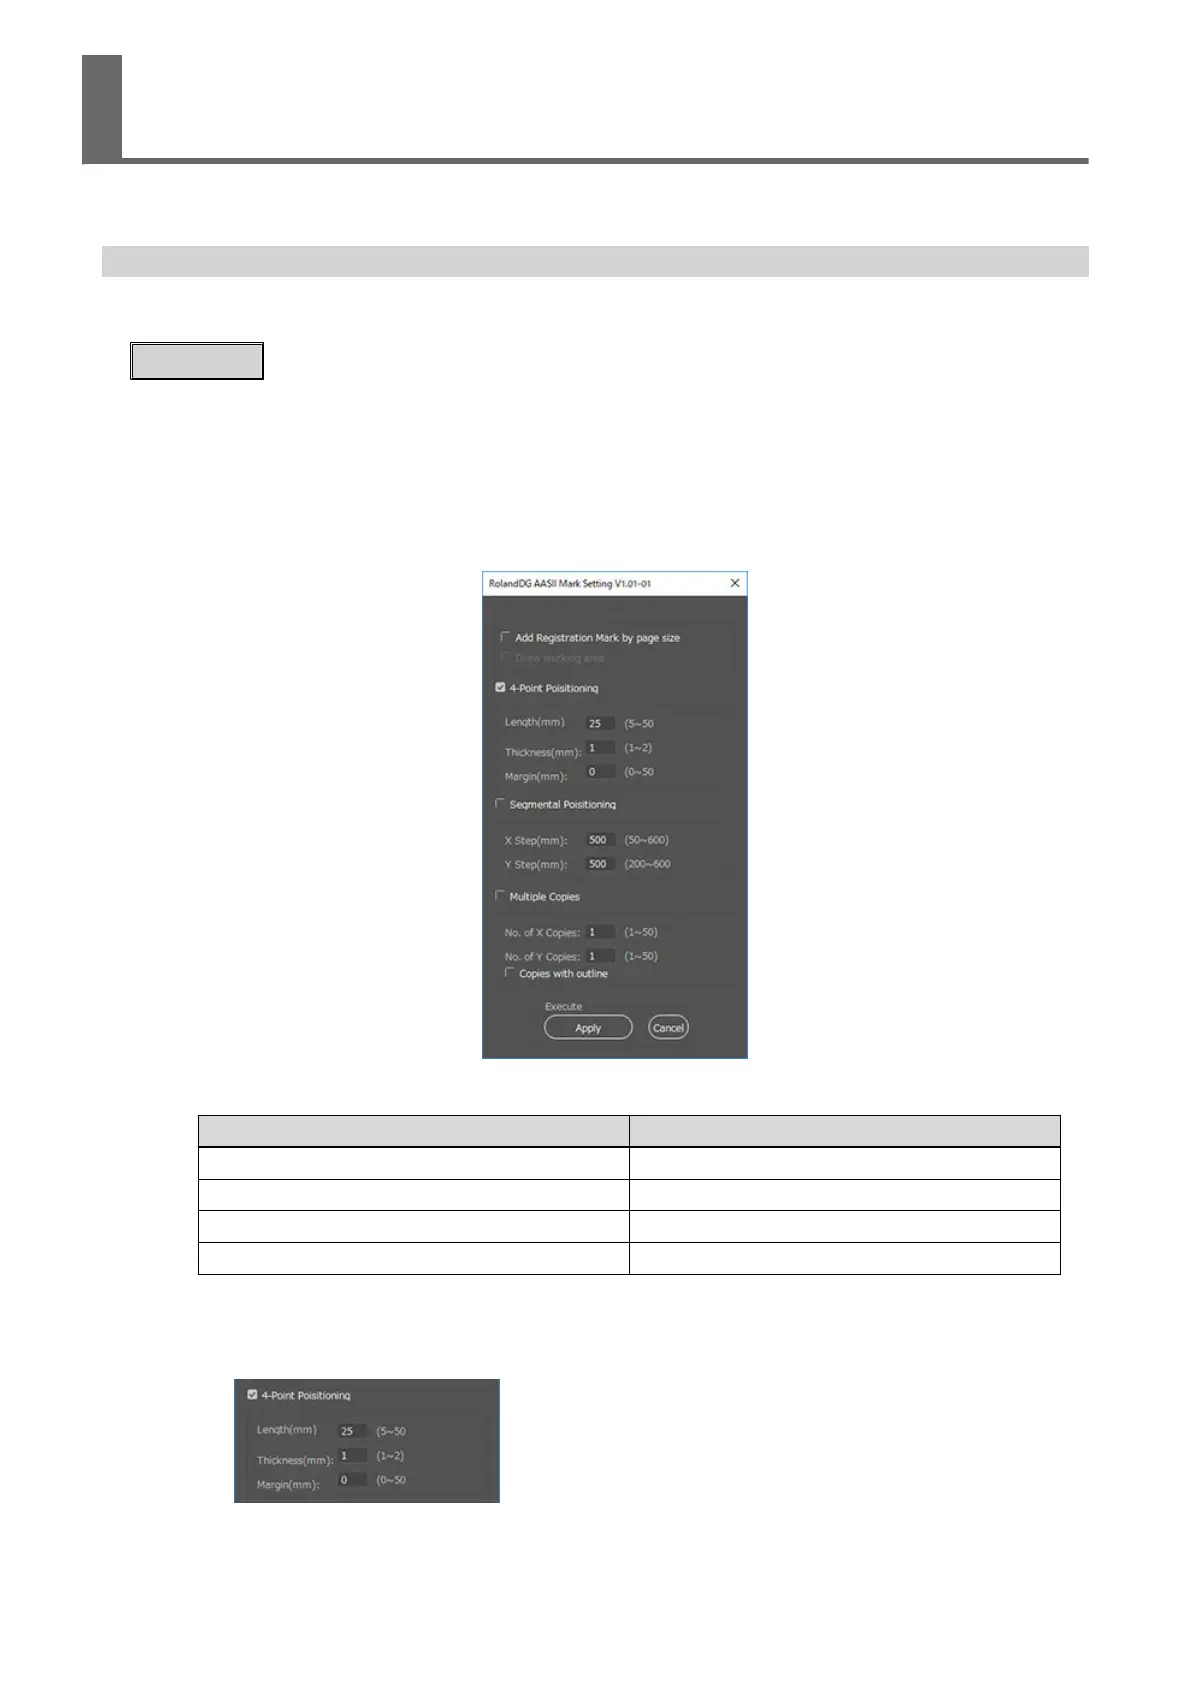
The crop mark setting window appears.
4. Select the mode of crop mark creation.
Settings
Crop marks
[Add Registration Mark by page size] Set crop marks on page
[4-Point Positioning] Four-point
[Segmental Positioning] Segmental
[Multiple Copies] Multiple
5. Enter setting values for the selected type of crop mark.
The setting values for four-point crop marks are applied to all crop marks.
• Set the four-point crop marks.
• Set the segmental crop marks.
Setting Crop Marks in Cutting Data
64 Basic Printing and Cutting
 Loading...