F.2.3 Connecting multiple positioners
Introduction
Each PA module installed in the 19" slide-in module has five channels (CH1 to CH5). A remote
basic electronics with 8 terminals is behind each channel (CHx). Use a Burndy 50 connector to
connect up to five positioners 6DR5910-.... The table shows the assignment of the individual
connector pins and how the pins must be connected to the terminals on the positioner.
Requirement
1. The ORL EC modules are already installed on the rear of the 19" slide-in module.
2. The cables with male connectors that are connected to the 19" slide-in module are available.
To do that:
– The positioners 6DR5910-... must be installed at the valves.
– The positioners 6DR5910-... must be connected to the field distributors.
You can find an overview of the connection concept at Grounding concept 19" slide-in module
(Page 361).
Assignment table Burndy 50 connector
Note on "Connector contacts" column: Depending on the design of the Burndy 50 connector,
the contacts are labeled either with numbers or letters.
QRL EC module
Connec‐
tor con‐
tacts
Chan‐
nel
CH1
Contacts not
assigned
Contacts
B50
Chan‐
nel
CH2
Contacts
B50
Chan‐
nel
CH3
Connec‐
tor con‐
tacts
Chan‐
nel
CH4
Connec‐
tor con‐
tacts
Channel
CH5
1 C Sup.+ 9 x 17 U Sup.+ 25 FF Sup.+ 33 m Sup.+ 41 R Sup.+
2 H Sup.- 10 V x 18 Y Sup.- 26 D Sup.- 34 s Sup.- 42 V Sup.-
3 M Exh.+ 11 Z x 19 c Exh.+ 27 J Exh.+ 35 w Exh.+ 43 Z Exh.+
4 S Exh.- 12 DD x 20 h Exh.- 28 N Exh.- 36 AO Exh.- 44 d Exh.-
5 W GND 13 A x 21 n GND 29 T GND 37 EI GND 45 i GND
6 a VRef 14 E x 22 t VRef 30 X VRef 38 B VRef 46 p VRef
7 e GND 15 K x 23 x GND 31 b GND 39 F GND 47 u GND
8 k POS 16 P x 24 BB POS 32 f POS 40 L POS 48 y POS
49 CC x
50 HH Shield
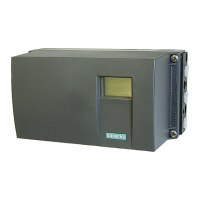
Positioner with remote control electronics
F.2 19" slide-in module
SIPART PS2 with PROFIBUS PA
356 Operating Instructions, 05/2019, A5E00127926-AC
 Loading...