Technical Information
66
DGC 6xxx
11. Release the three switches from the rear of the water container.
12. Cut zip ties as necessary to release any other wiring from/around the
drive assembly.
13. Remove the drive assembly.
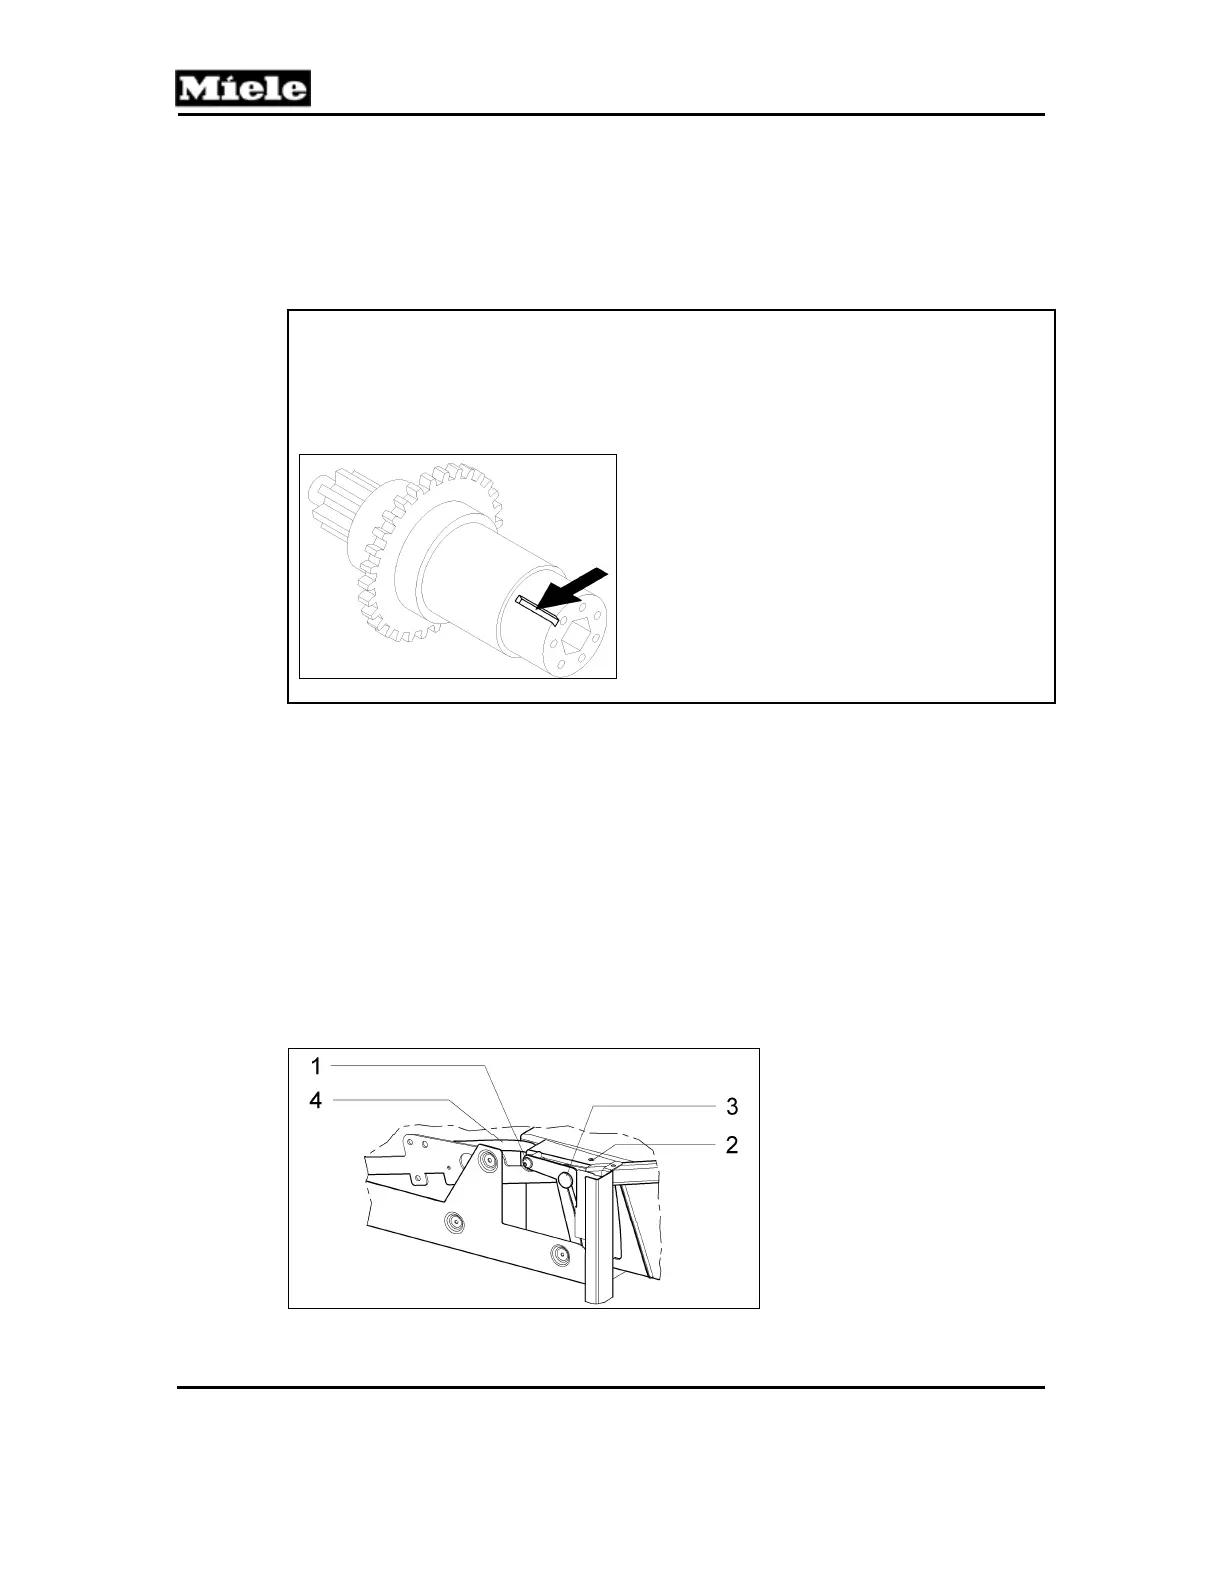
Note:
When re-installing the cog wheels in the guide rails, take care with the
correct cog wheel setting. The grooves (see Figure 040-3) in the left and
right cog wheels must each be aligned in the same direction. After
assembly, the fascia must be leveled.
Figure 040-3: Cog Wheel Setting
4.3 Water Container Removal
1. Remove the appliance from its housing unit; see Section 010-4.1.
2. Disconnect the appliance from the power supply.
3. Remove the lid; see Section 010-4.2.
4. Remove the side panels; see Sections 010-4.3 and 010-4.4.
5. Open the fascia panel, or remove it, if necessary; see Section 060-4.4.
1. Remove the container retaining screws on both sides; see Figure 040-4,
Item 1.
2. Unscrew the guide pins from the container; see Figure 040-4, Item 2.
3. Unscrew the retaining nut from the container; see Figure 040-4, Item 3.
4. Loosen the connection cable from its guide and release it; see Figure
040-4, Item 4.
Figure 040-4: Water Container Removal
 Loading...