47
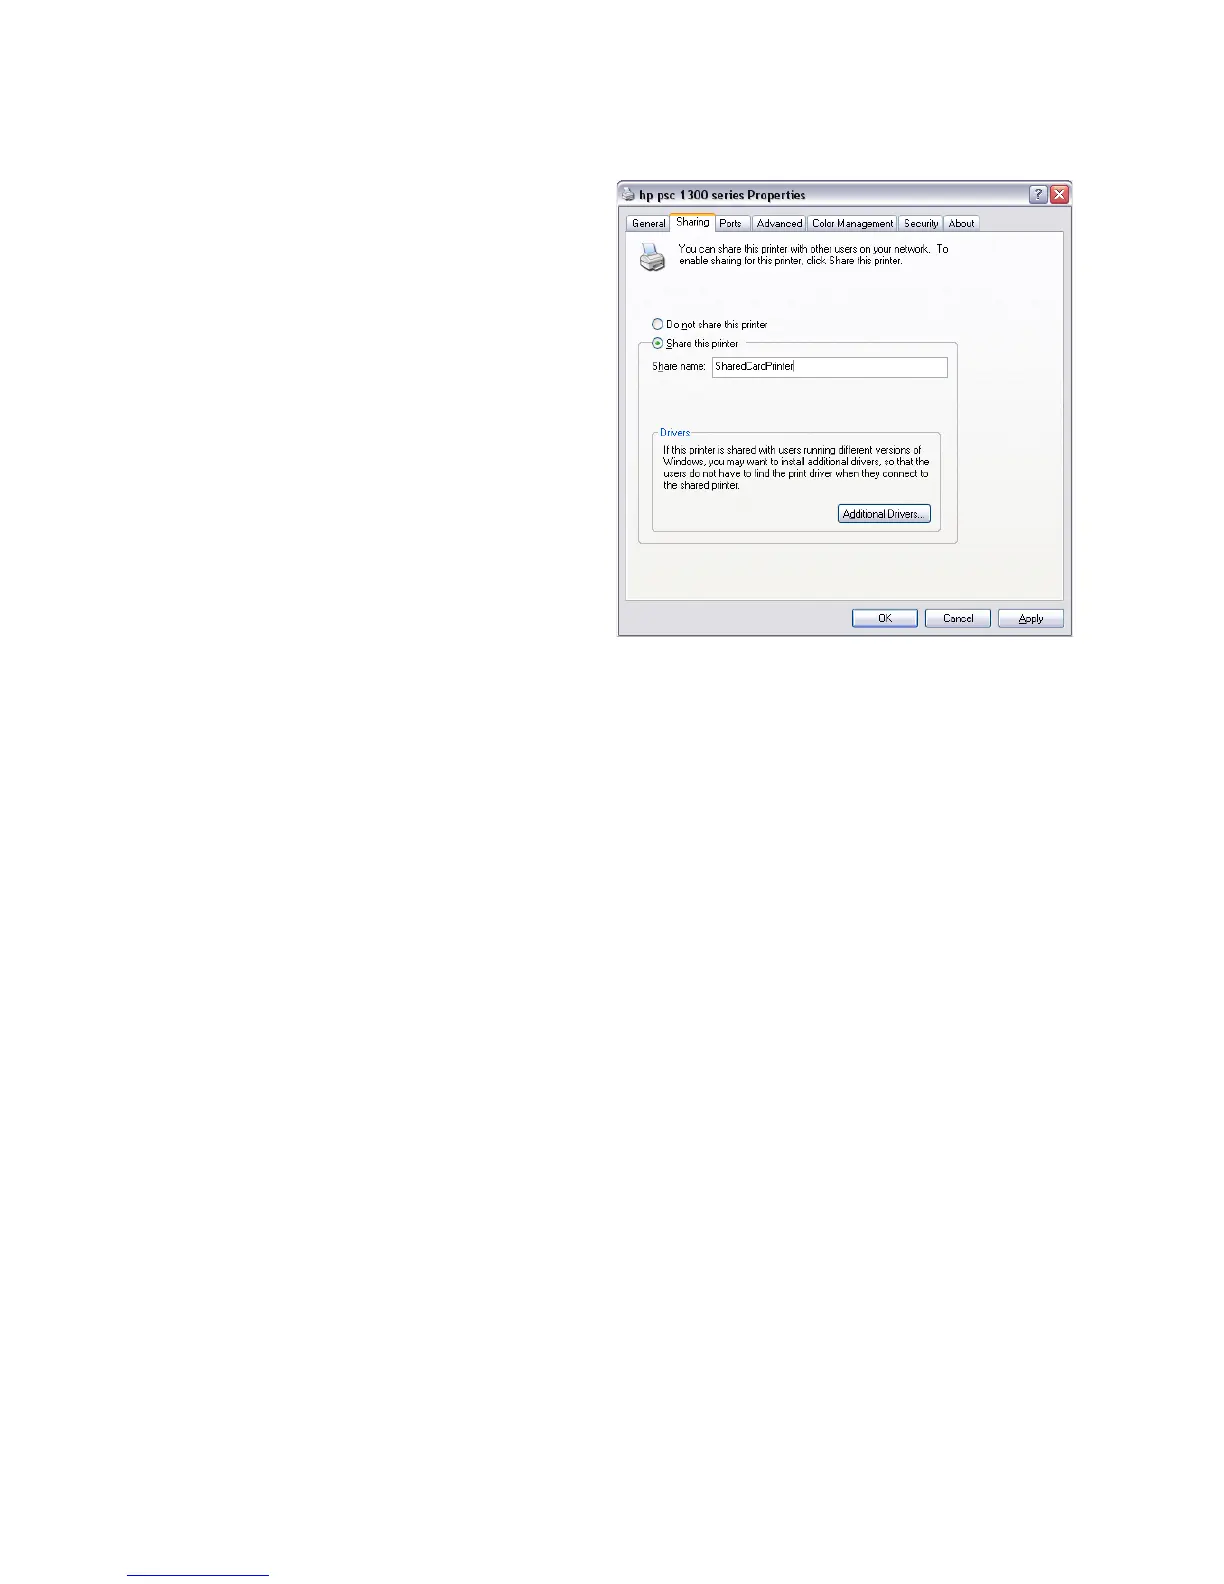
F. On the Printer
Properti
es Sharing tab,
click the "Share this
printer" radio button to
enable sharing.
4. Enter a printer name.
5. Write down the name of
the H
ost PC.
This step is important to
success! The cl
ient PC
installation requires the
printer
name to install the
driver.
6. Click OK to save the
settin
gs.
7. Con
figure security:
A. Open Printer Properties. See “Open Printer Properties”.
B. C
hoose the Security tab.
C. Review the Group or User Names list
. If the names or group for which
you want to specify permissions do not appear in the list, add the names
or create a group.
a. Choose the Add button to open th
e Users and Groups dialog box.
b. Click on the name and click Add. Repeat for each nam
e to add.
c. When finished adding names, click OK. The Users and Groups dialog
box cl
oses.
D. I
n the Names list, select the name or group for which you want to specify
permissions.
a. Select Manage this
printer for the Everyone group.
b.
To restrict users, remove the check from the All Print permission in the
Everyone group and set pe
rmissions for each user.
Note: Do not use the Manage documents or the Deny checkboxes for any
name or group.
c. Select Appl
y to save
the change. Save changes for each name.
d. Close Printer Properties.
E. Enable bidire
ct
ional support.