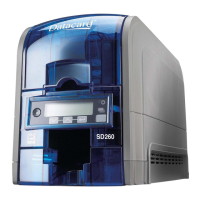
44 Install the Printer
a. Choose the Add button to open the Users and Groups dialog box.
b. Click on the name and click Add. Repe
at for each name to add.
c. When finished adding names, click OK. The U
sers and Groups dialog
box closes.
D. I
n the Names list, select the name or group for which you want to specify
permissions.
a. Select Manage thi
s
printer for the Everyone group.
b. To restrict u
sers, remove the check from the All Print permission in
the Everyone group and set permissions for each user.
Note: Do not use the Mana
ge docu
ments or the Deny checkboxes for any
name or group.
c. Select Apply
to save the change. Save changes for each name.
d. Close Printer Properties.
5. Use the tabs and settings in Printing Prefer
ences and Printer Properties to
reflect the card design including ribbon type, print mode, and magnetic stripe
options. Write the settings down so you can make the same settings on the
client PC.
Install the Driver on the Client PC, Windows 7
The Client PC must have a user account and password that matches an account
on the Host PC.
1. Install the driver
on the clie
nt PC:
A. Login to the client PC with an account that has administrator
privileges
and matches an account on the host PC.
B. F
rom the Windows Start menu, select Devices and Printers.
C.
Choose File> Add a printer.
D. Select Add a netw
ork, wireless, or Bluetooth printer.
E. The client driver will be installed from the host PC.
• If the printer is not discovered automatically, select "The printer that I
wa
nt wasn't listed" entry.
• In the address bar, type the name of the Host PC and the printer name
foll
owing this format: \\host PC name\shared printer name.
2. Install the following support fi
les from the driver CD, if needed.
 Loading...