EasyManuals Logo
Home>DataCard>Printer>SD260

DataCard SD260 User Manual

DataCard SD260
216 pages
To Next Page IconTo Next Page
To Previous Page IconTo Previous Page
Page #73 background imageLoading...
Page #73 background image
63
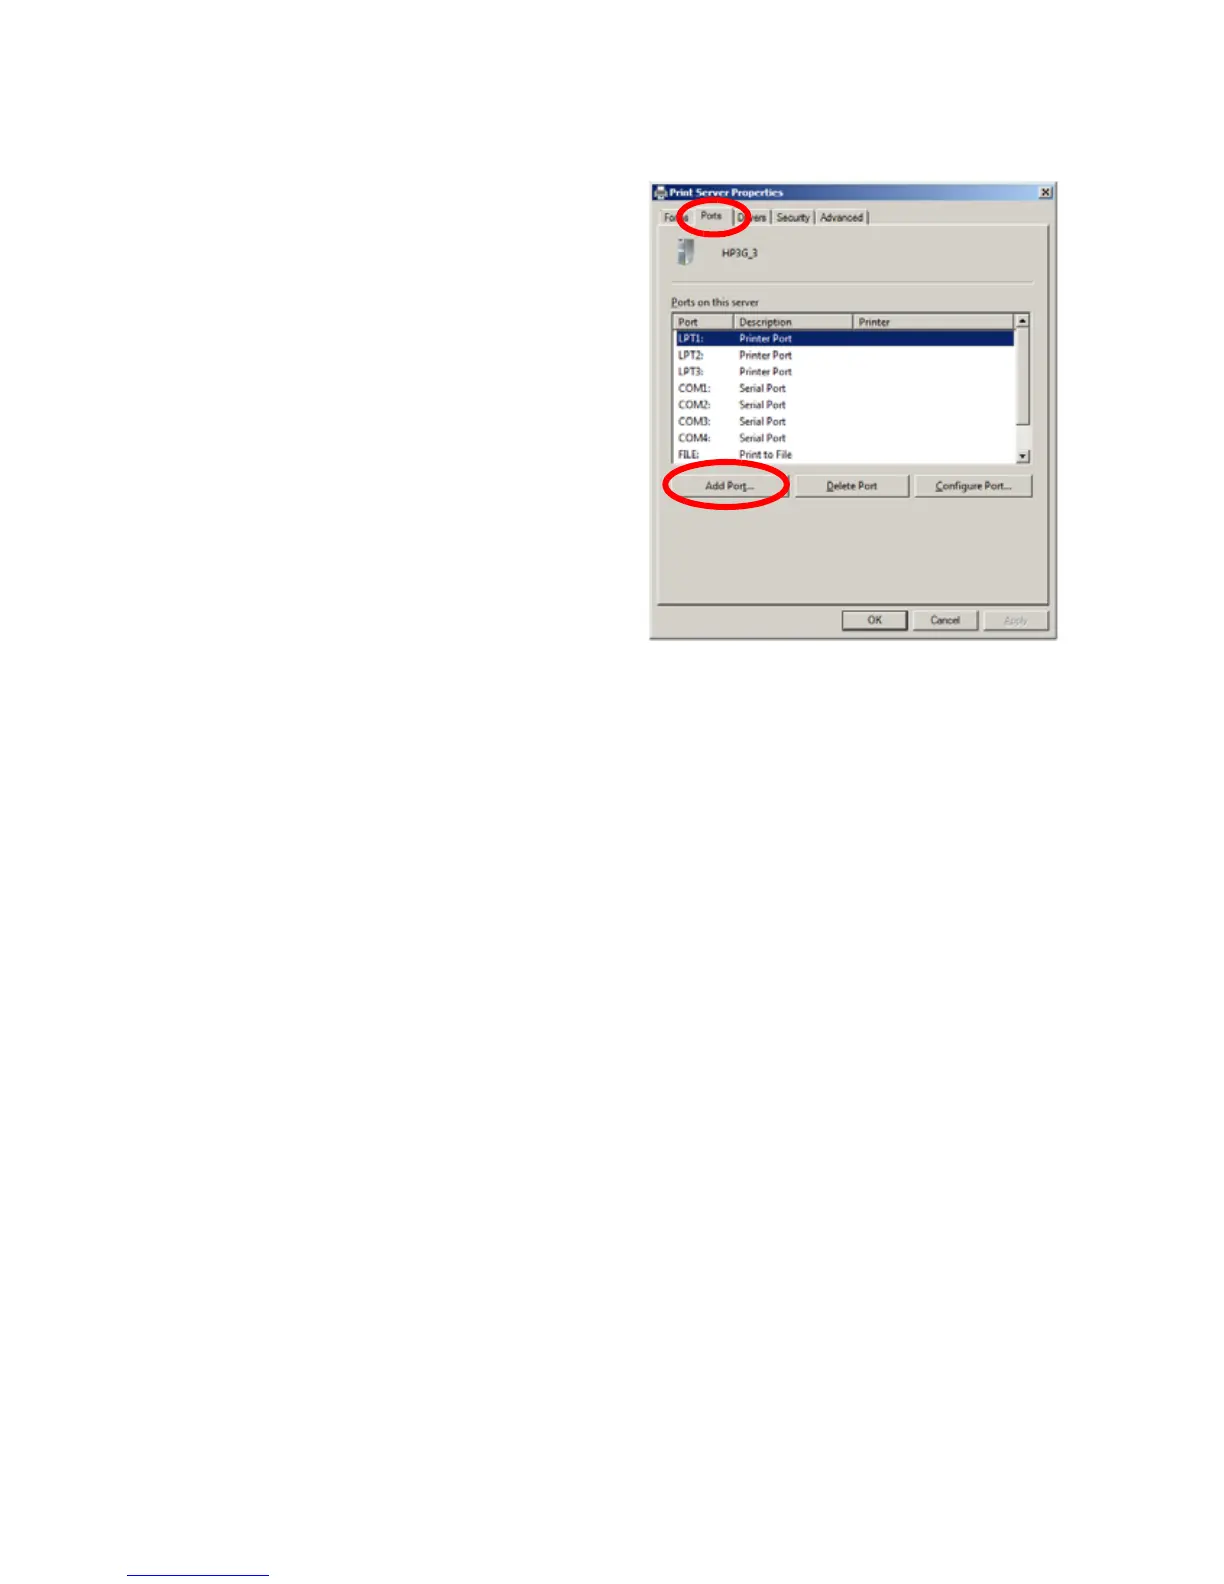
C. Click the Ports tab.
D. Click the Add Port…
button.
E. Click once on the Standard
TCP/IP Port to select it
and then click the New
Port... button.
F. Click Next.
G. Type the IP address of one
of the unassigned printers.
H. Enter a name in the Port
Name field. Enter a name
such as Pooled Printer 2.
I. Click Next.
J. Click Finish to complete the wizard.
K. Repeat these steps for each printer that will be added to the pool.
L. Click Close when all printers and ports have been added.
5. Enable printer pooling:
A. From the Print Server Properties> Ports tab, make sure there is a check in
the box next to the original printer port. Click once on the original printer
port and check the Enable Printer Pooling checkbox.
B. Check the boxes next to the ports added in Step 4.
C. Click Apply or OK to save the settings.
6. Close the Print Server Properties window.

Table of Contents

Other manuals for DataCard SD260

Questions and Answers:

Question and Answer IconNeed help?

Do you have a question about the DataCard SD260 and is the answer not in the manual?

DataCard SD260 Specifications

General IconGeneral
Windows operating systems supportedWindows 7 Enterprise, Windows 7 Enterprise x64, Windows 7 Home Basic, Windows 7 Home Basic x64, Windows 7 Home Premium, Windows 7 Home Premium x64, Windows 7 Professional, Windows 7 Professional x64, Windows 7 Starter, Windows 7 Starter x64, Windows 7 Ultimate, Windows 7 Ultimate x64, Windows 8, Windows 8 Enterprise, Windows 8 Enterprise x64, Windows 8 Pro, Windows 8 Pro x64, Windows 8 x64
ColorYes
Print speed (color)200 card/h
Product colorBlue, Grey
Weight and Dimensions IconWeight and Dimensions
Depth391 mm
Width175 mm
Height224 mm

Related product manuals