3.10
Engine/Cooling/Exhaust
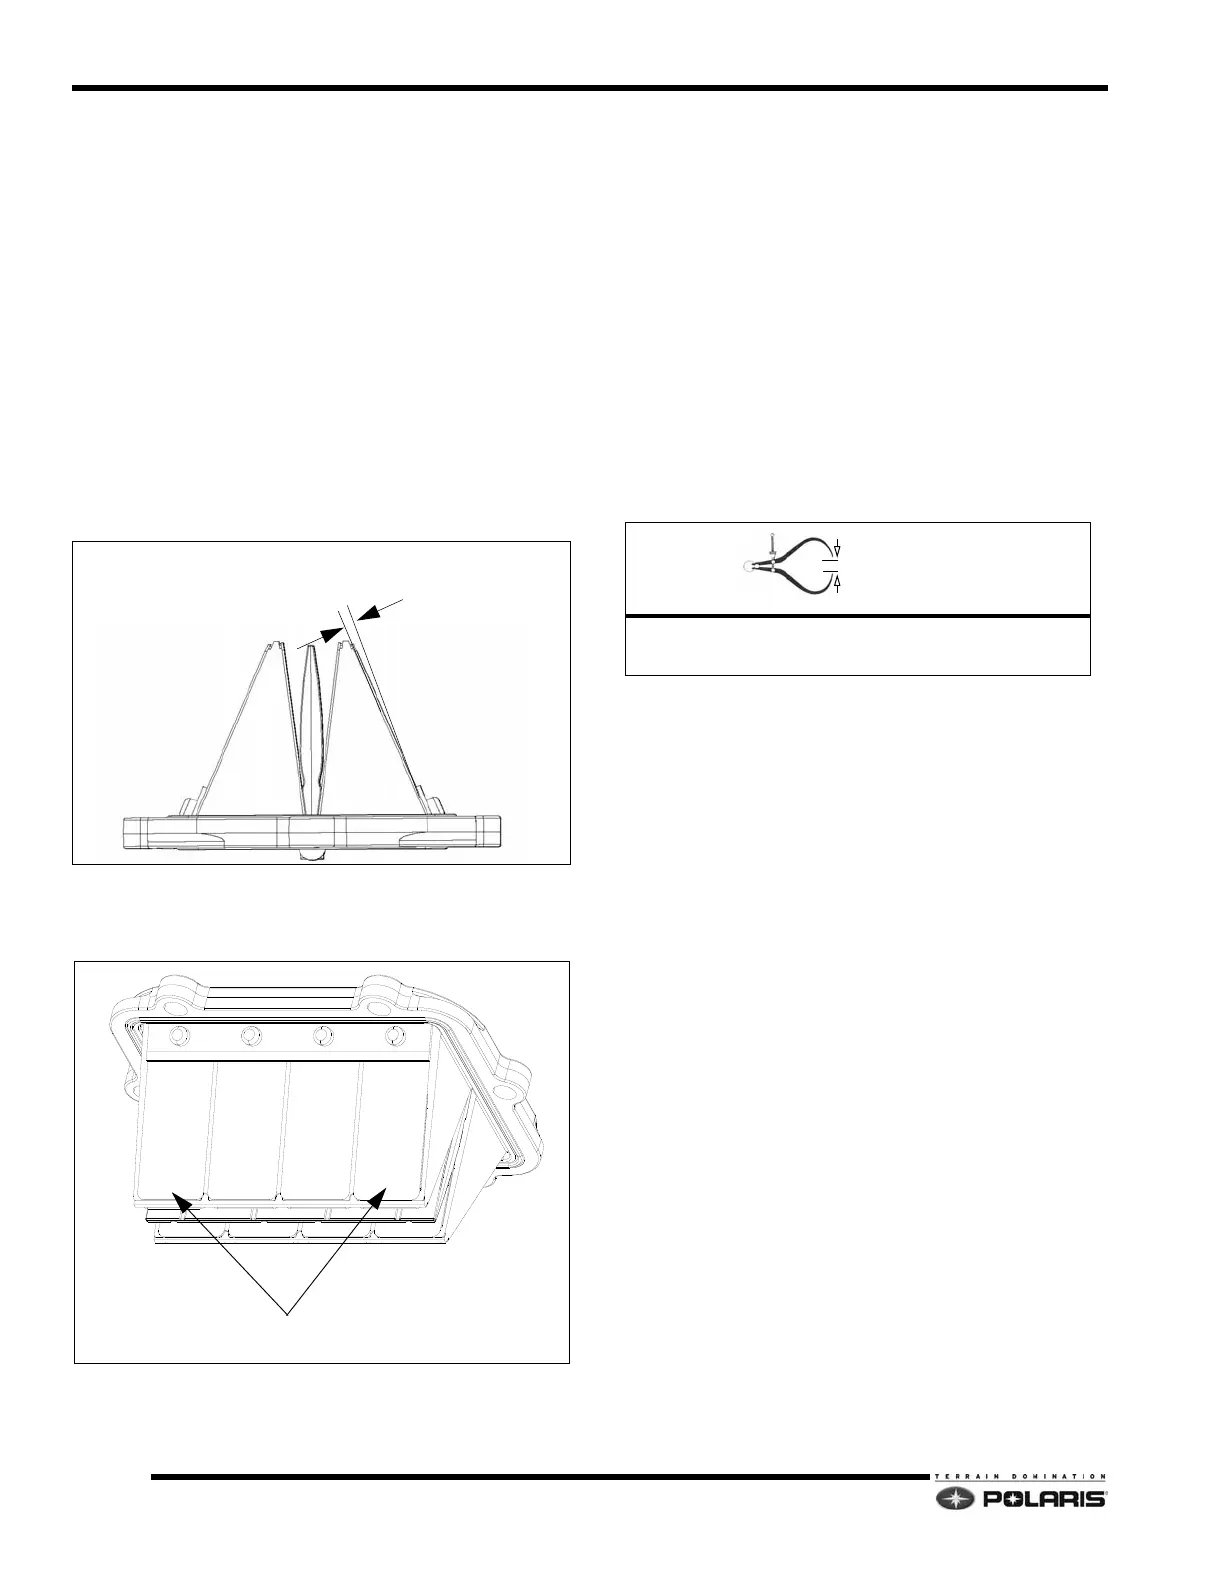
Reed Valve Inspection
1. Loosen the hose clamps.
2. Remove the throttle body
from the intake boots.
3. Remove the intake boot fasteners.
4. Remove the intake assembly.
5. Separate the intake boot from the reed cages.
6. Separate the reed stuffer(s) from the reed cage and
in
spect the reeds before they are removed from the
reed cage.
NOTE: Measure the air gap between the fiber reed and the
reed block. The air gap should not exceed .015" (.38mm). If
clearance is excessive DO NOT attempt to reverse the reeds
to reduce the air gap. Always replace them if damaged or
worn. Check each fiber reed for white stress marks or
missing material.
7. Inspect the leading edges of each reed petal. If edges
are chipped, or excessively worn, replace the reed
assembly.
Bearing Fit
Any time crankshaft bearing failure occurs and the case is
reused, check the bearing fit into the case halves using the
following procedure.
With case halves cleaned, reins
tall the main bearings with
a piece of Plastigage between the bearing race and
crankcase.
Install and torque the crankcase fasteners to
s
pecification. Take the crankcase apart, and then
measure the Plastigage. Compare Plastigage width to
interference fit specification.
The air gap should not exceed.015” (0.30mm)
INSPECT EACH PETAL EDGE FOR DAMAGE
.061mm)
Bearing Interference Fit:
.0014" - .0024" (0.035-0.061mm)
 Loading...


