9.39
Chassis
9
Left Support Brace Removal
1. Remove the following components:
• Right/left engine compartment door
•Hood
• Exhaust pipe/silencer
• Oil tank/clutch cover assembly
• Driven clutch
• Airbox assembly
• Engine assembly
• Left-side front/rear engine mount
• Bulkhead floor plate
• Fuel tank (Remove fuel hoses and gasoline from
t
ank)
2. Drill out the rivets securing the left
fender to the
bulkhead and chassis.
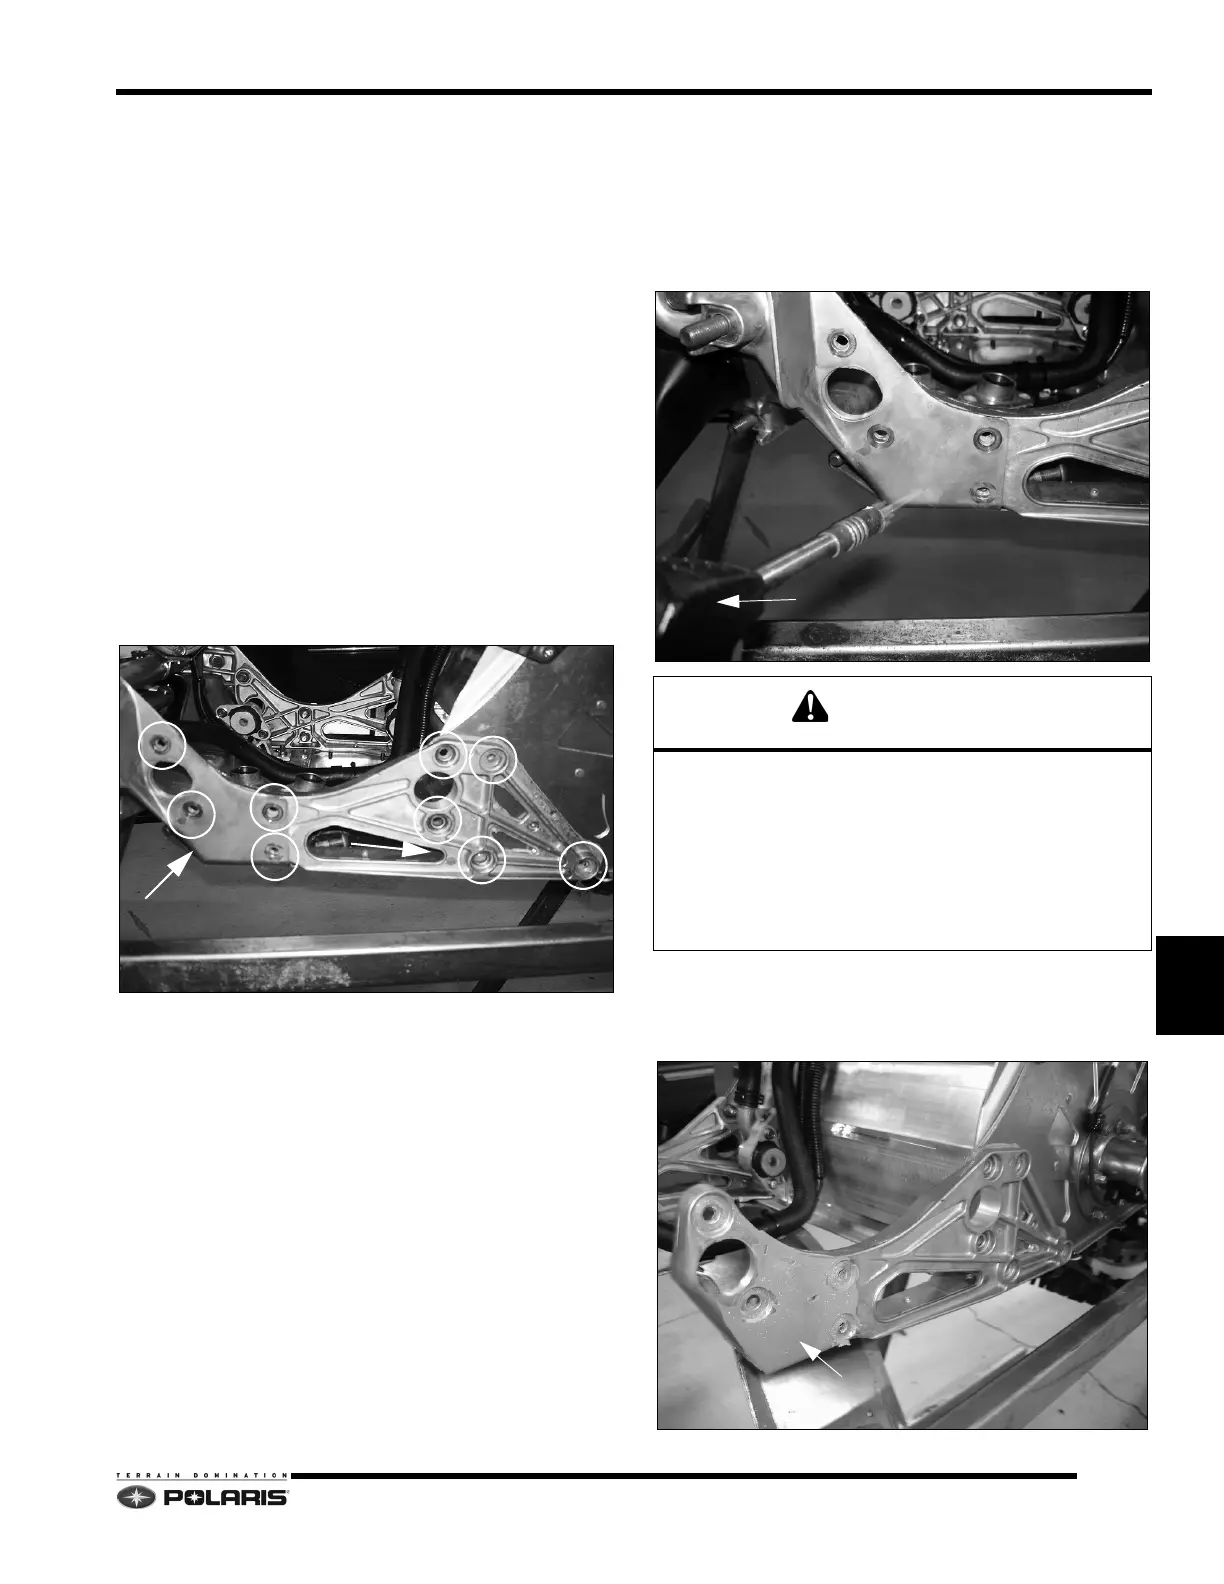
3. Remove the three screws and n
uts and seven screws
securing the bulkhead clip to the left side engine side
support brace.
Note the screw located on the inside of the brace
a
ttaching the brace to the bulkhead cooler.
4. When all of the noted fasteners, nuts, and screws are
r
emoved, the next step is to heat where the brace
mounts to the tunnel and bulkhead clip.
5. Wearing heat resistant glove
s, use a propane gas
torch to heat the where the brace mounts to the tunnel
and bulkhead clip.
Apply torch until adhesive begins to crackle. During
th
is time, the adhesive may smoke and bubble.
Continue heating the area until the brace can be
se
parated from the bulkhead and tunnel.
6. Note the residual adhesive on the brace, bulkhead clip
an
d tunnel. If the component is to be re-used, the
adhesive must be completely removed. See Bonded
Component Surface Preparation section.
Keep flame away from flammable materials. Use torch
in well-ventilated area.
Only apply heat to area that requires adhesive bond
separation. Do not apply heat to areas of adhesive
where bond line separation is not needed. Doing so will
require removing the part, removing adhesive, and then
re-applying new adhesive.
 Loading...


