7.39
Shocks
7
FOX™ Zero Pro Shock Assembly
NOTE: The rebuild kit (PN: 1500710) will supply all of
the required o-rings, wear bands and a u-cup seal.
Lubricate all components with new shock oil prior to
a
ssembly.
1. If the shock shaft eyelet was removed for service,
clamp
the shock shaft using the shaft blocks in a
bench vise.
2. Apply Loctite
™ Primer N to the shaft threads. Allow
for proper curing time before apply Loctite
™ Green
638 to threads.
3. Install the eyelet and torque to specification.
4. Mount the shock shaft eyelet in a bench vise with the
thr
eaded end upwards.
5. Assemble the bearing assembly using new o-rings, u-
cu
p seal, and scraper.
6. Install the shock shaft seal pr
otector tool onto the
shock shaft. Install the body cap, and then the bearing
assembly onto the shock shaft.
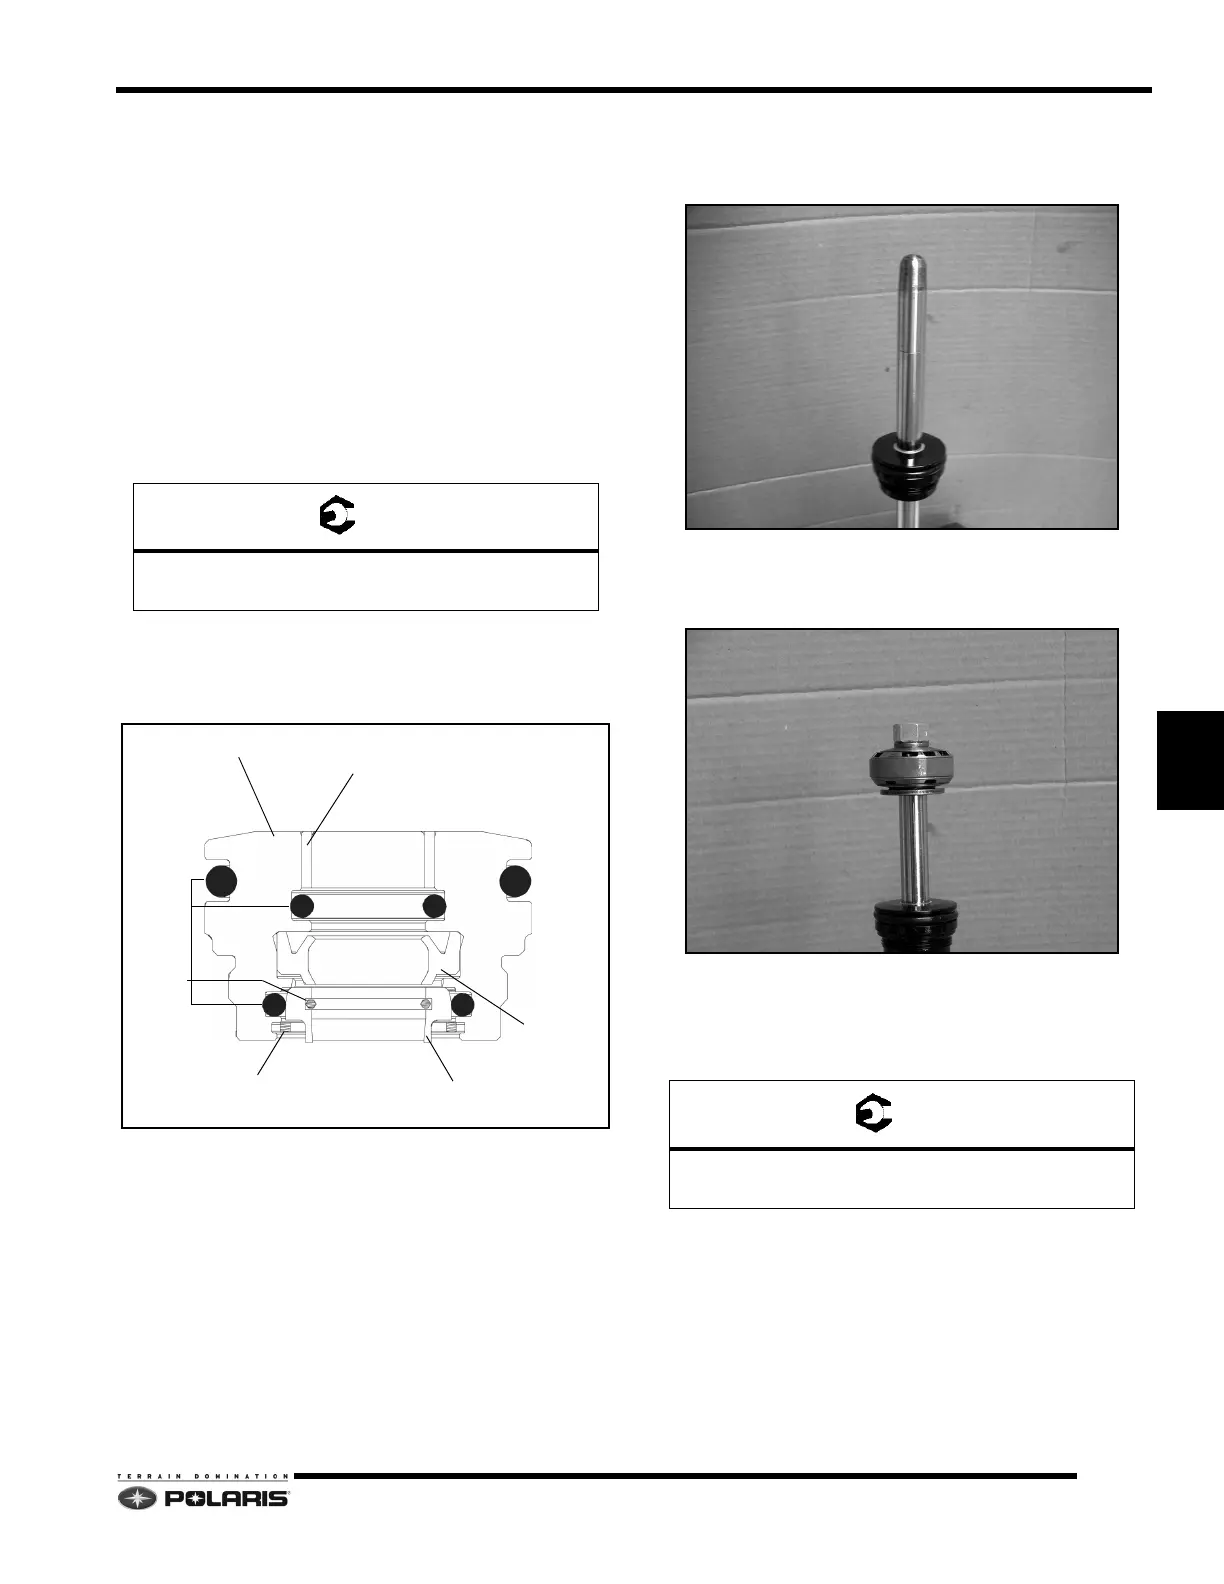
7. Install the piston valve and rebound/compression
valv
e stacks as shown in the photo. Install the lock nut
and torque to specification.
8. Replace the wear band on the piston valve and
lu
bricate with shock oil.
9. Install new lock nut. Tighten lock nut to sp
ecification.
Place shock rod assembly on a clean, lint free towel.
10. Replace the IFP o-ring. Apply a thin layer of low
te
mperature grease to the IFP.
Shock Shaft Eyelet:
50 ft-lbs (68 Nm)
BEARING ASSEMBLY
DU BUSHING
O-RINGS
SNAP RING
SCRAPER
U-CUP SEAL
Shock Shaft Lock Nut:
22 ft-lbs (30 Nm)
 Loading...


