3.21
Engine/Cooling/Exhaust
3
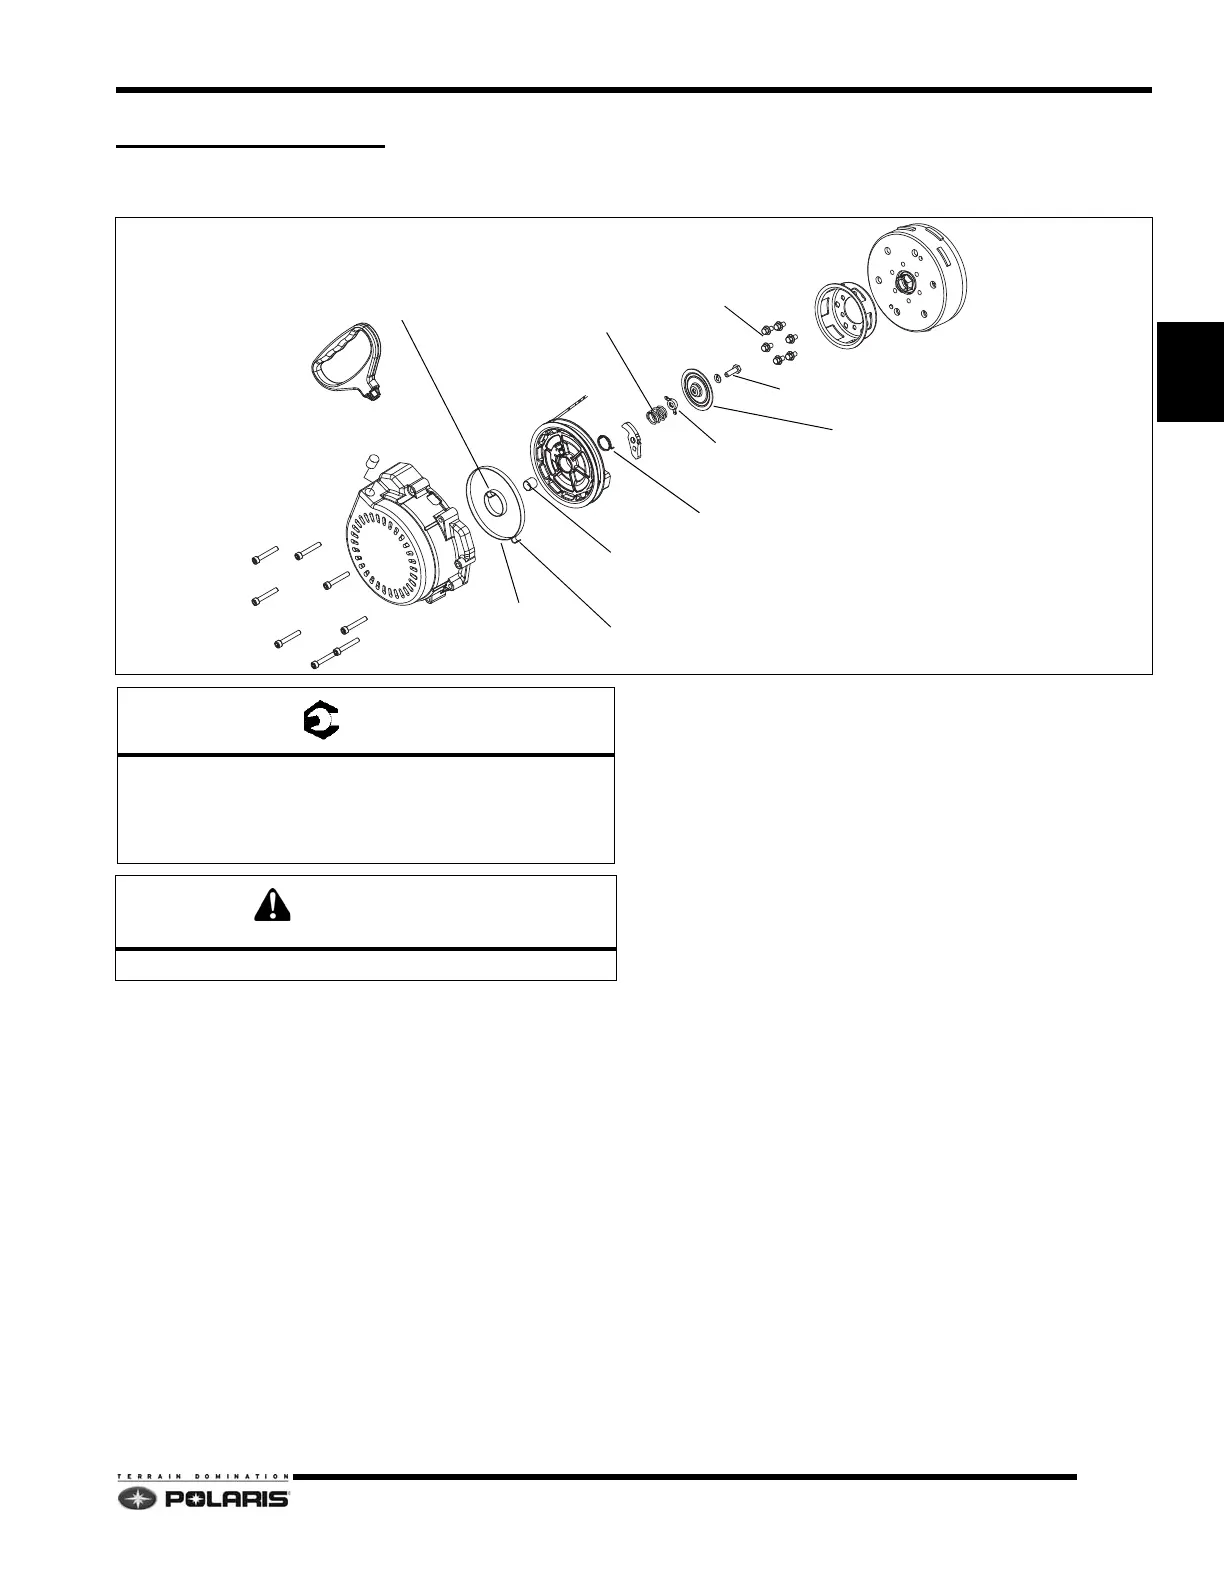
RECOIL ASSEMBLY
Rope Removal and Installation
1. Remove recoil housing from the engine. Un-tie knot in
the recoil rope and allow the reel to slowly unwind.
2. Remove the screw, washer, friction plate, ratchet
gu
ide, friction spring, ratchet and return spring from
the reel.
3. Lift the reel straight out of the housing making sure the
spr
ing is no longer connected to the backside of the
reel.
NOTE: If the recoil spring tension is removed, the
s
pring should stay inside the housing.
4. Inspect all components for signs of abnormal wear.
Rep
lace components as required. If replacing the
rope, tie a small square knot at one end. Push the knot
firmly into the pocket on the reel.
5. If the reel recoil spring was removed during
di
sassembly, install the spring by spiraling the spring
counterclockwise toward the center of the housing.
6. Lubricate the center shaft and spring with Premium
gr
ease.
7. Wind the rope counterclockwise around the pulley as
vie
wed from the ratchet-side of the reel.
8. Pass the end of the rope through the hole in the
h
ousing. If the rope guide was removed from the
housing, reinstall it before attaching the rope handle.
9. Slide the reel down the center shaft and into the
h
ousing making sure the recoil spring re-engages the
reel tab.
10. Install the return spring and rat
chet into the reel face.
The return spring leg fits in the notch on the ratchet
and holds the ratchet in (retracted).
11. Install friction spring with one leg inserted in the
bottom hole on
the ratchet.
12. Apply Loctite® 242™ and install screw and washer
an
d torque to specification.
13. Pull rope out to its full extension and align pulley notch
with
rope hole in housing.
14. Using a needle nose pliers or hooked wire, pull a loop
o
f rope through the notch in the reel.
15. Prevent the rope from being retracted by tying a knot
in
the rope on the outside of the housing at the rope
guide hole.
16. Wind the recoil pulley counterclockwis
e until the
spring begins to bind. Unwind the pulley clockwise two
revolutions.
17. Pull on the rope to disengage it from the notch in the
pulley
. Un-tie the knot in the rope and allow it to retract
into the housing.
18. Pull on the handle to verify proper operation.
FRICTION PLATE
FRICTION SPRING
RATCHET
RETURN SPRING
ROPE
RECOIL HUB
RECOIL SPRING
TAB (ENGAGES INSIDE HOUSING)
TAB (ENGAGES INSIDE PULLEY)
ROPE GUIDE (HOLE)
BUSHING
REEL
RATCHET GUIDE
HANDLE
SCREWS
SCREW
SCREWS
COVER
Cover/Hub Screws: 9 ft-lbs (12Nm)
Friction Plate Screw:
1204173 Recoil Assembly: 9 ft-lbs (12 Nm)
1204331 Recoil Assembly: 14 ft-lbs (19 Nm)
Recoil spring under high tension. Wear eye protection.
 Loading...


