5.11
Final Drive/Brake System
5
Bonded Chaincase Removal/Installation
1. Follow the procedures for chaincase disassembly.
2. Follow the procedures for removing the track, rear
suspe
nsion, and driveshaft.
3. Remove the fasteners securing the chaincase to the
tun
nel, front cooler/closeoff panel, and side support.
4. While wearing protective gloves and clothing, use a
propane torc
h to evenly heat the backside and
fastener points of the chaincase/tunnel.
5. While applying heat, carefully and slowly pull the
cha
incase assembly away from the tunnel. Use
extreme care as to not distort the tunnel.
6. Allow the chaincase to properly cool. Once cooled,
in
spect the seals for excessive wear or damage.
Replace as required.
7. Verify bearings roll smoothly. Replace if they do not
or
if excessive play is evident. Use an arbor press to
remove and install bearings.
8. Thoroughly clean the chaincase-to-tunnel mating
sur
faces. All residual bonding adhesive MUST be
removed. Use a putty knife and wire brush to remove
material.
9. After removing residual adhes
ive, wash parts in
solution of warm, soapy water and allow to air dry.
10. Begin chaincase installation by verifying all fasteners
a
re accounted for and staged for installation.
11. Verify the chaincase and tunnel mating surfaces are
cle
an and free of dirt, and oil residue.
12. Reference Adhesive Applicator Kit and Adhesive
Application
sections in Chapter 9. See “Bonded
Component Service” on page 9.25.
NOTE: The Bonded Component Service section in
Cha
pter 9 outlines the adhesive, applicator tools, and
the adhesive application procedure required to
properly install bonded components.
13. After the adhesive has been applied to the backside
of th
e chaincase, quickly install all of the fasteners.
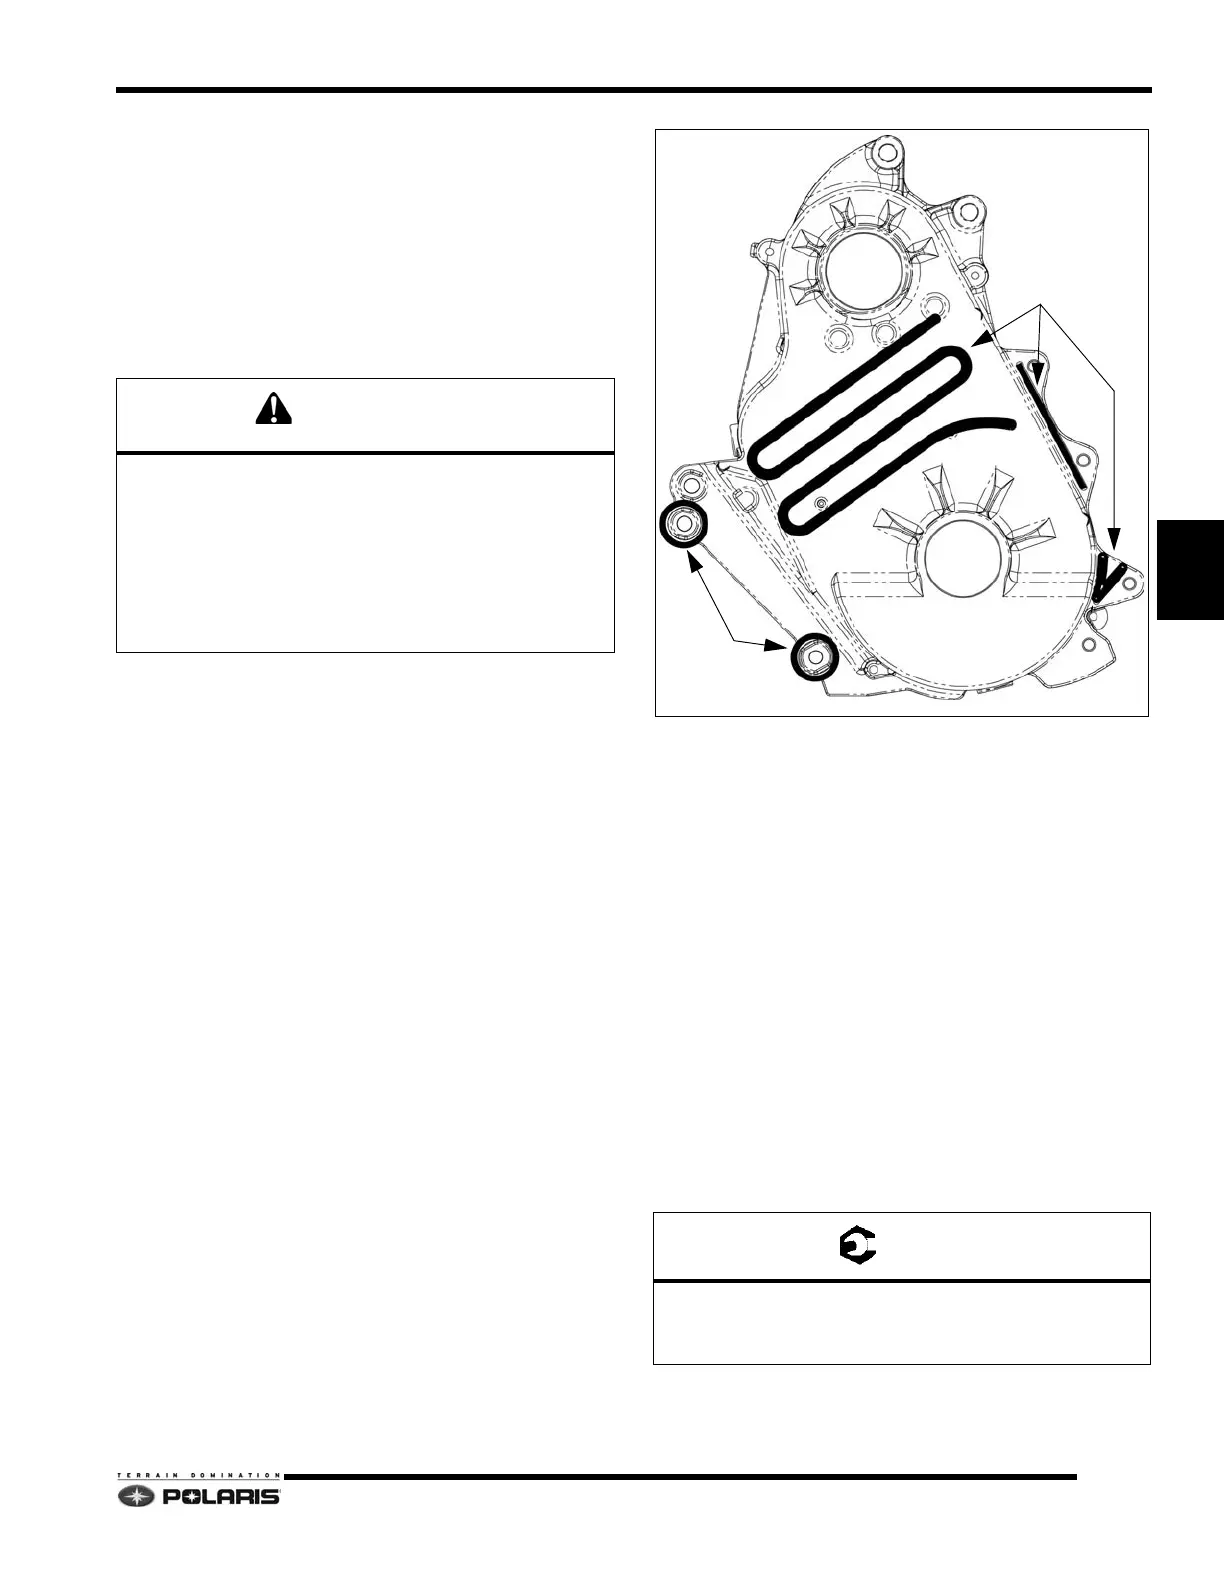
14. Verify fastener (1) is installed in the
lower chaincase
mounting hole has shown in the illustration. See
“Mounting Assembly View” on page 5.10.
15. Torque fasteners to specifications.
16. Follow the procedures for reinstalling the driveshaft
an
d track.
17. Follow the procedures for chaincase assembly.
Keep flame away from flammable materials. Use
propane torch in well-ventilated area.
Only apply heat to area that requires adhesive bond
separation. Do not apply heat to areas of adhesive
where bond line separation is not needed. Doing so will
require removing the part, removing adhesive, and then
re-applying new adhesive.
A: 26 ft-lbs (35 Nm) DO NOT OVER-TORQUE
B: 26 ft-lbs (35 Nm)
C: 14 ft-lbs (19 Nm)
 Loading...


