DS1067-062C 24 LBT20063
2.4.4 Partial arming from electronic key reader
2.4.4.1 System in use mode = Mode 3 (EN50131 grade 3 compliant)
Proceed as follows to arm only the zones assigned to the reader and to the key using the proximity key:
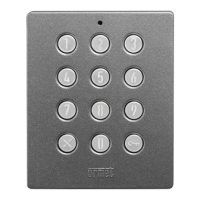
1. Insert the electronic key in the reader. The red LED will blink to indicate that the key is being read and the green LED
will light up after a few instants to indicate that the key was recognised. All the green LEDs will blink rapidly if the key is
not recognised.
2. The green LEDs corresponding to the armed zones, if any, will appear if the key is recognised. The red LED will keep
blinking.
3. Extract the key.
4. Insert the electronic key again when the red LED switches off.
5. The red LED will blink and after a few seconds a cycle will start during which the green LEDs blink for a few seconds
showing the various combinations of zones in sequence.
6. Extract the electronic key when the combination of zones to be armed is displayed by the LEDs. The possibility of
arming each zone depends on the programming of the reader and on the key used.
7. The chosen zones will be armed and the green LEDs will indicate the status of the zones assigned to the reader for a
few seconds.
IMPORTANT! The key will arm only the assigned zones and not necessarily all the zones even with this procedure.
2.4.4.2 System in use mode = Mode 2 or Mode 0
Proceed as follows to arm only the zones assigned to the reader and to the key using the proximity key:
1. Insert the electronic key in the reader when all the green LEDs are off (the procedure will arm the zones if any LEDs
are green during the first cycle). The red LED will blink to indicate that the key is being read. All the green LEDs will
blink rapidly if the key is not recognised.
2. The red LED will blink and after a few seconds a cycle will start during which the green LEDs blink for a few seconds
showing the various combinations in sequence.
3. Extract the electronic key when the combination of zones to be armed is displayed by the LEDs. The possibility of
arming each zone depends on the programming of the reader and on the key used.
4. The green LEDs indicate the status of the zones assigned to the reader. LED on fixed = zone(s) armed, LED off = zone
disarmed.
IMPORTANT! The key will arm only the assigned zones and not necessarily all the zones even with this procedure.
2.4.5 Partial arming from proximity key reader
2.4.5.1 System in use mode = Mode 3 (EN50131 grade 3 compliant)
Proceed as follows to arm only the zones assigned to the reader and to the key using the proximity key:
1. Approach the proximity key to the transponder. The red LED will blink to indicate that the key is being read and the
green LED will light up after a few instants to indicate that the key was recognised. All the green LEDs will blink rapidly
if the key is not recognised.
2. The green LEDs corresponding to the armed zones, if any, will appear if the key is recognised. The red LED will keep
blinking.
3. Move the proximity key away.
4. Approach the proximity key again when the red LED switches off.
5. The red LED will blink and after a few seconds a cycle will start during which the green LEDs blink for a few seconds
showing the various combinations of zones in sequence.
6. Move the proximity key away when the combination of zones to be armed is displayed by the LEDs. The possibility of
arming each zone depends on the programming of the reader and on the key used.
7. The chosen zones will be armed and the green LEDs will indicate the status of the zones assigned to the reader for a
few seconds.
IMPORTANT! The key will arm only the assigned zones and not necessarily all the zones even with this procedure.
2.4.5.2 System in use mode = Mode 2
Proceed as follows to arm only the zones assigned to the reader and to the key using the proximity key:
1. Approach the proximity key to the transponder and hold it close for at least three seconds. The red LED will blink to
indicate that the key is being read. Move it away when the four green LEDs blink.
2. A cycle will be started during which the green LEDs blink for a few seconds showing the various combinations in
sequence. The possibility of arming each zone depends on the programming of the reader and on the key used.
3. When the combination of zones to be armed is displayed by the LEDs, approach the proximity key to the transponder
again, wait for an instant and then move it away.
4. The green LEDs will indicate the status of the zones assigned to the reader for a few seconds: LED on fixed = zone (s)
armed, LED off = zone disarmed.
IMPORTANT! The key will arm only the assigned zones and not necessarily all the zones even with this procedure.

 Loading...