HANDLEBAR
4-71
EAS31396
ADJUSTING THE HANDLEBAR POSITION
1. Check:
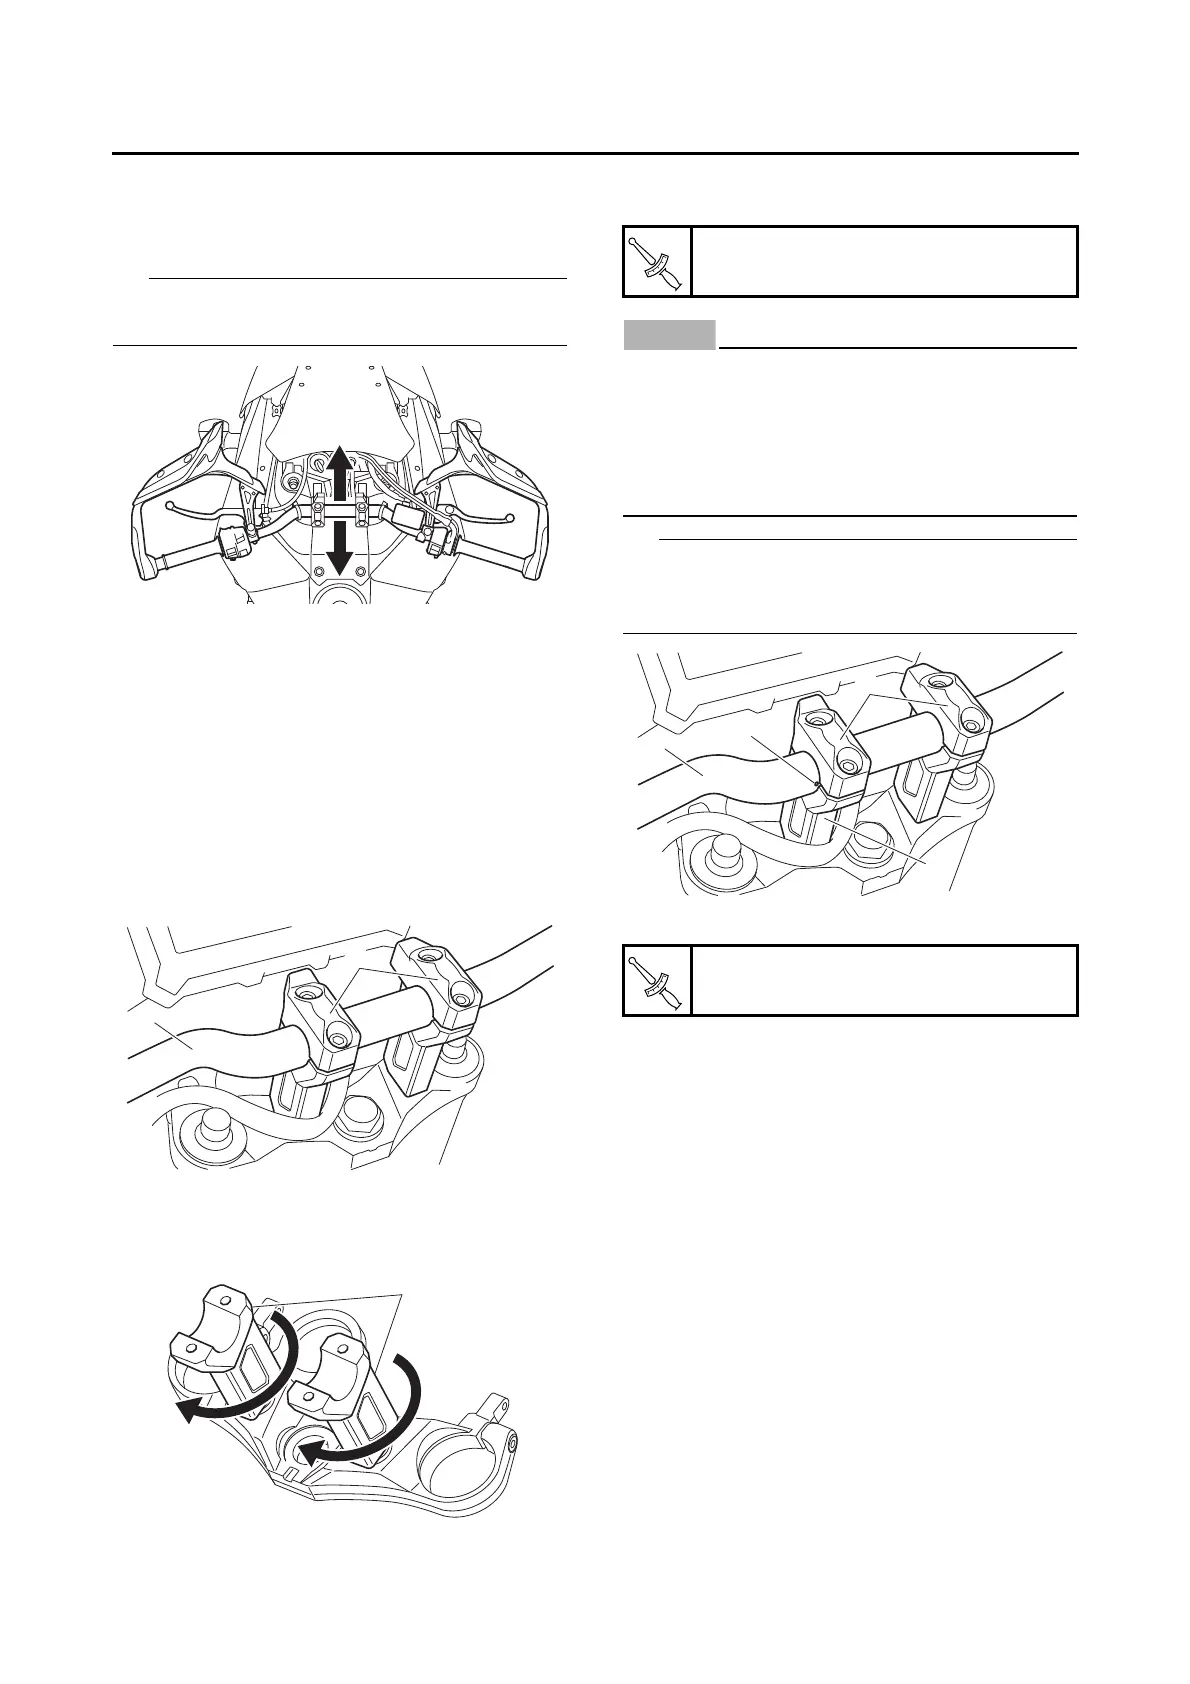
• Handlebar position
The handlebar position can be adjusted in two
positions to suit the rider’s preference.
2. Remove:
• Fuel tank front cover
• Front side panel
• Front side cowling
Refer to “GENERAL CHASSIS (2)” on page
4-6.
3. Adjust:
• Handlebar position
▼▼▼▼▼▼▼▼▼▼▼▼▼▼▼▼▼▼▼▼▼▼▼▼▼▼▼▼▼▼▼▼
a. Remove the upper handlebar holders “1” and
handlebar “2”.
b. Loosen the lower handlebar holder nuts.
c. Adjust the handlebar position by rotating both
of the lower handlebar holders “3” in 180.
d. Install the handlebar “2” and upper handlebar
holders “1”.
ECA19130
• First, tighten the bolts on the front side of
the upper handlebar holder, and then on
the rear side.
• Turn the handlebar all the way to the left
and right. If there is any contact with the
fuel tank, adjust the handlebar position.
Align the punch mark “a” on the handlebar with
the left side upper surface of the lower handle-
bar holder (left) “4”.
e. Tighten the lower handlebar holder nuts.
▲▲▲▲▲▲▲▲▲▲▲▲▲▲▲▲▲▲▲▲▲▲▲▲▲▲▲▲▲▲▲▲
4. Install:
• Front side cowling
• Front side panel
• Fuel tank front cover
Refer to “GENERAL CHASSIS (2)” on page
4-6.
Upper handlebar holder bolt
22 N·m (2.2 kgf·m, 16 lb·ft)
Lower handlebar holder nut
40 N·m (4.0 kgf·m, 29 lb·ft)

 Loading...