CHAIN DRIVE
4-101
EAS30234
INSTALLING THE DRIVE CHAIN
1. Install:
• Drive chain
ECA17410
Be sure to put on safety goggles when work-
ing.
Install the drive chain joint with the drive chain
cut & rivet tool.
▼▼▼▼▼▼▼▼▼▼▼▼▼▼▼▼▼▼▼▼▼▼▼▼▼▼▼▼▼▼▼▼
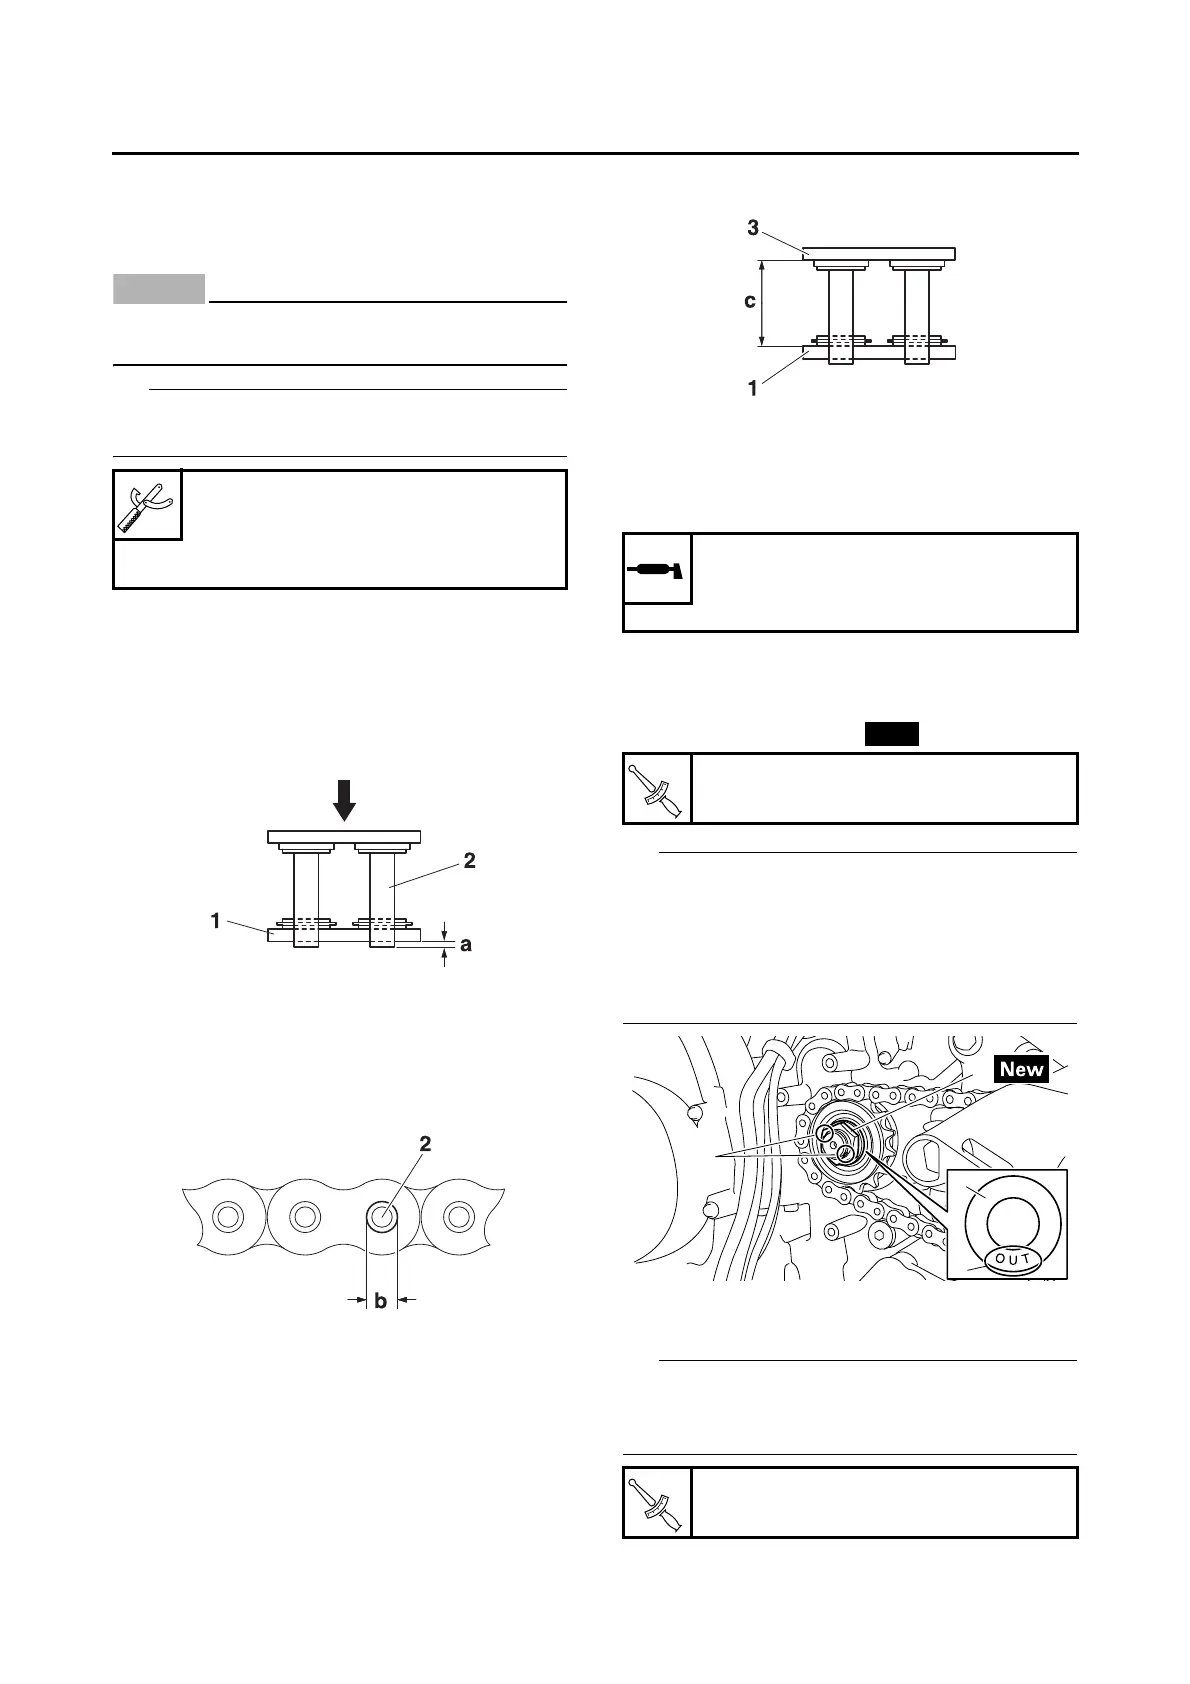
a. When press fitting the connecting plate “1”,
make sure the space “a” between the end of
the connecting pin “2” and the connecting
plate is 1.2–1.4 mm (0.05–0.06 in).
b. After riveting, make sure the diameter be-
tween the edges “b” of the connecting pin “2”
is 5.5–5.8 mm (0.22–0.23 in).
c. After riveting, make sure the space “c”, which
is inside of the connecting link “3” and inside
of the connecting plate “1”, is 14.1–14.3 mm
(0.56–0.65 in).
▲▲▲▲▲▲▲▲▲▲▲▲▲▲▲▲▲▲▲▲▲▲▲▲▲▲▲▲▲▲▲▲
2. Lubricate:
• Drive chain
3. Install:
• Drive sprocket
• Washer “1”
• Drive sprocket nut “2”
• While applying the rear brake, tighten the drive
sprocket nut.
• Install washer “1” with the “OUT” mark “a” fac-
ing out.
• Stake the drive sprocket nut “2” at cutouts “b”
in the drive axle.
4. Install:
• Shift arm “1”
Before installing, make sure to align the mark “a”
of the shift shaft with the punch mark “b” of the
shift arm.
Drive chain cut & rivet tool
90890-01550
Drive chain cut & rivet tool
YM-01550
Recommended lubricant
Chain lubricant suitable for O-
ring chains
Drive sprocket nut
95 N·m (9.5 kgf·m, 69 lb·ft)
Shift arm bolt
14 N·m (1.4 kgf·m, 10 lb·ft)

 Loading...