CLUTCH
5-46
2. Check:
• Pull rod bearing
Damage/wear Replace.
EAS30363
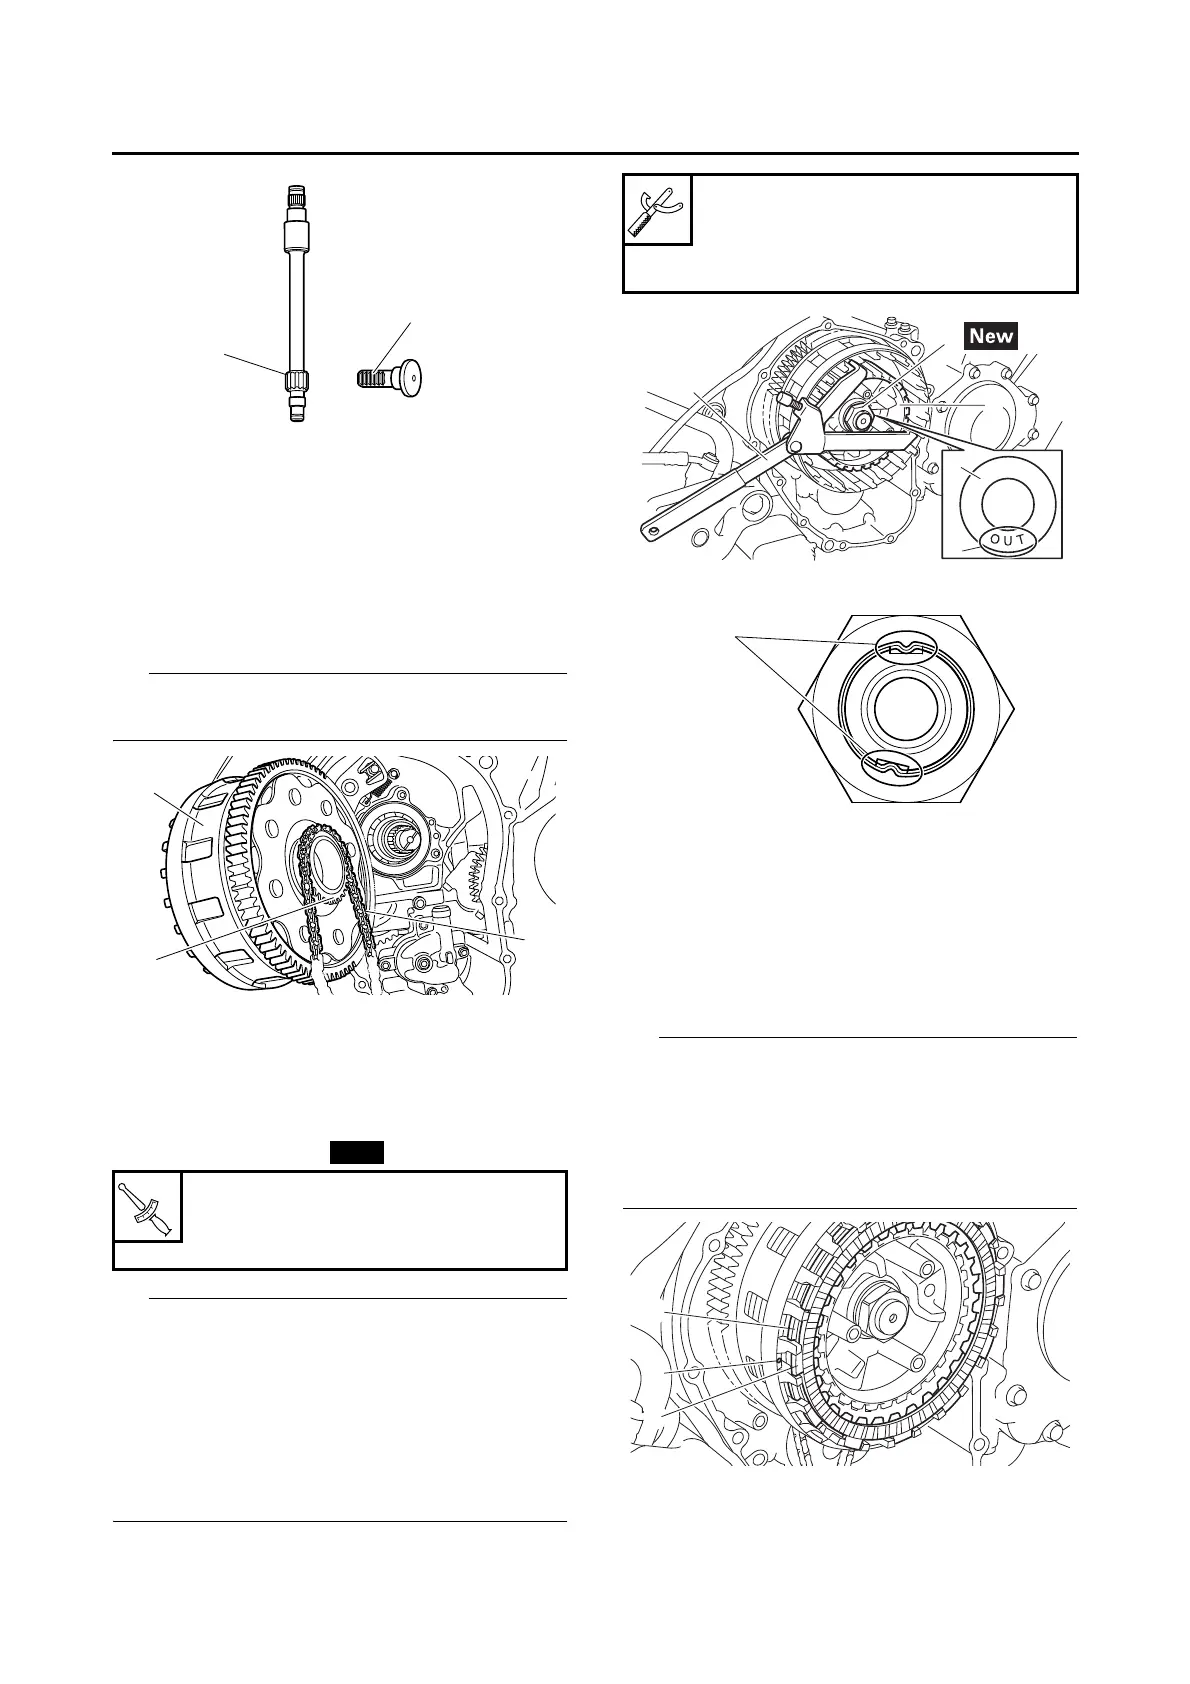
INSTALLING THE CLUTCH
1. Install:
• Oil pump drive chain “1”
• Clutch housing “2”
Install the oil pump drive chain onto the oil pump
drive sprocket “a”.
2. Install:
• Thrust plate
• Clutch boss “1”
• Washer
• Conical spring washer “2”
• Clutch boss nut “3”
• Install the conical spring washer on the main
axle with the “OUT” mark “a” facing away from
the vehicle.
• While holding the clutch boss “1” with the uni-
versal clutch holder “4”, tighten the clutch boss
nut.
• Stake the clutch boss nut at cutouts “b” in the
main axle.
3. Install:
• Clutch damper spring seat
• Clutch damper spring
• Friction plates 1
• Clutch plates 2
• Friction plates 2
• Clutch plate 1
• First, install a friction plate and then alternate
between a clutch plate and a friction plate.
• Install the last friction plate “1” offset from the
other friction plates “2”, making sure to align a
projection on the friction plate with the punch
mark “a” on the clutch housing.
4. Install:
• Pull rod
• Pressure plate 2
Clutch boss nut
125 N·m (12.5 kgf·m, 90 lb·ft)
LOCTITE®
Universal clutch holder
90890-04086
Universal clutch holder
YM-91042

 Loading...