FRONT FORK
4-86
ment.
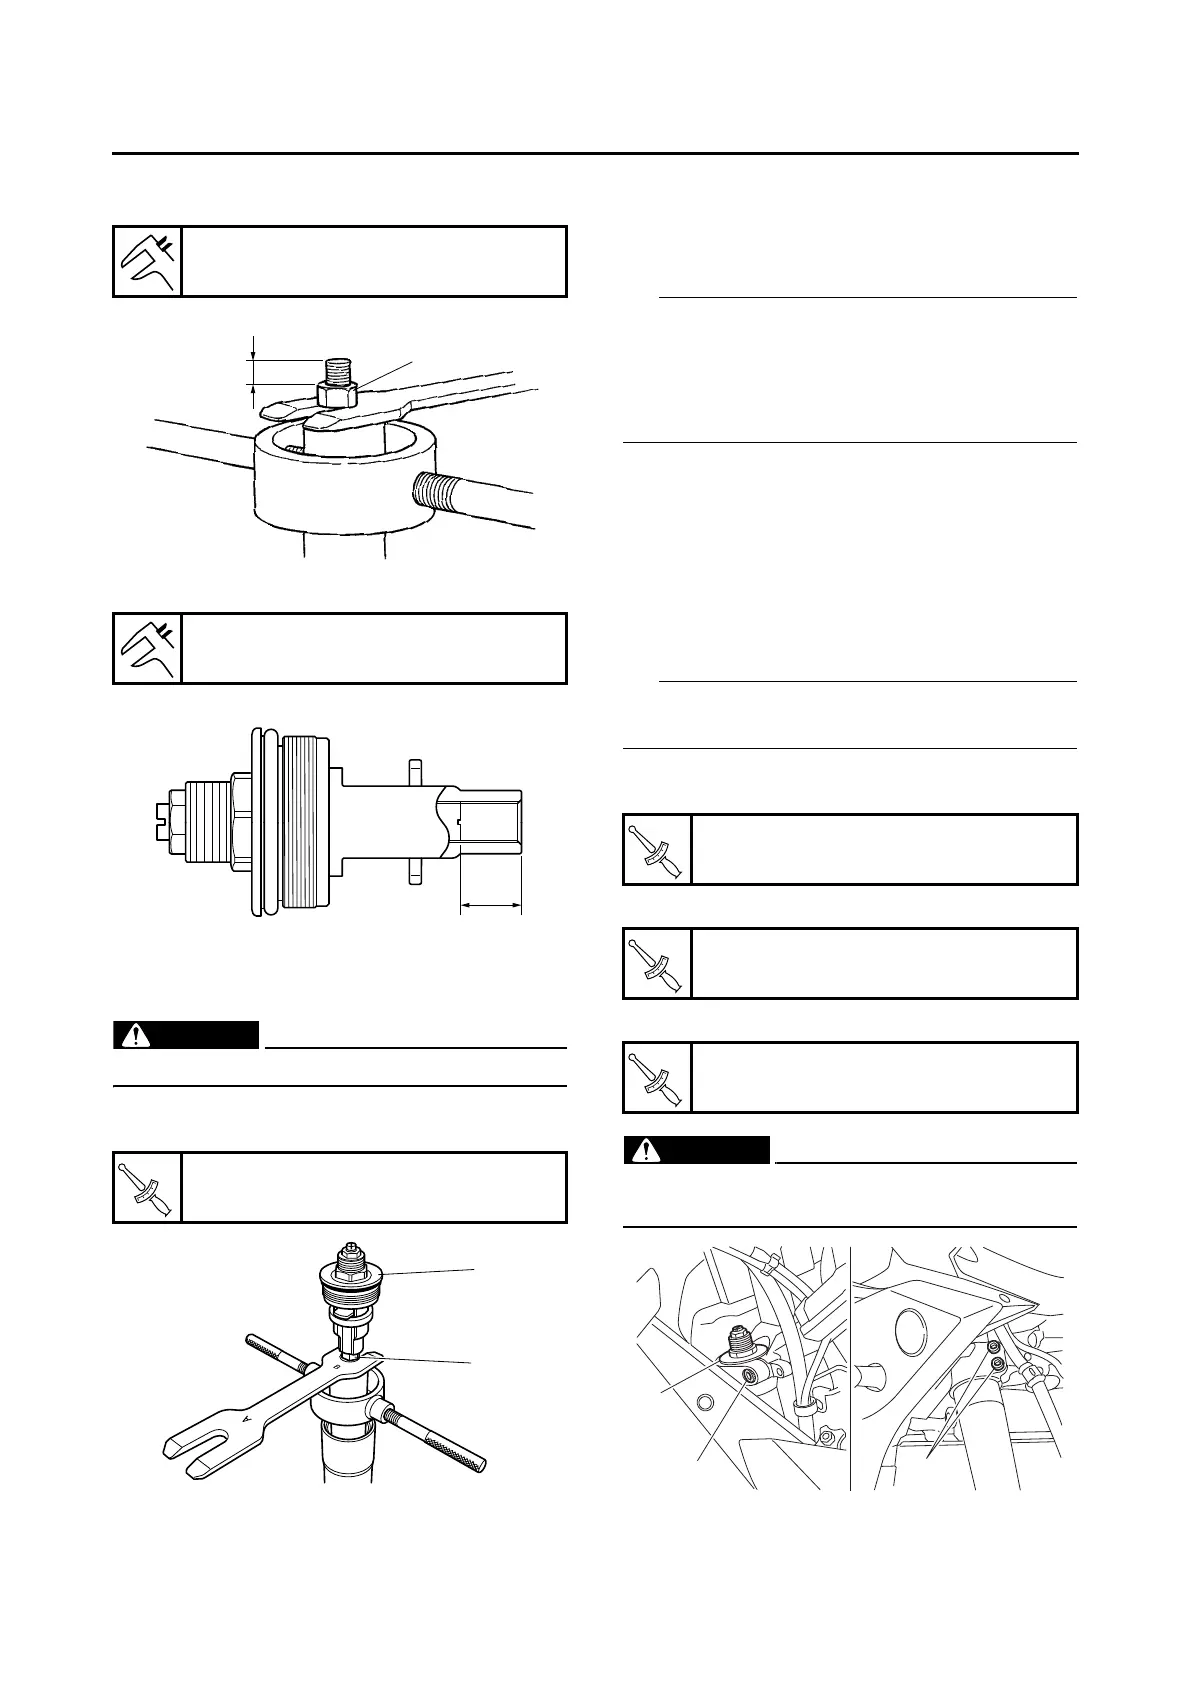
j. Position the locknut “3” as specified “b”.
k. Set the cap bolt distance “c” to specification.
l. Install the damper adjusting rod, washer and
cap bolt, and then finger tighten the cap bolt.
EWA13670
Always use a new cap bolt O-ring.
m. Hold the cap bolt “5” and tighten the locknut
“3” to specification.
n. Remove the rod holder and fork spring com-
pressor.
▲▲▲▲▲▲▲▲▲▲▲▲▲▲▲▲▲▲▲▲▲▲▲▲▲▲▲▲▲▲▲▲
17.Install:
• Cap bolt
(to the outer tube)
• Temporarily tighten the cap bolt.
• When to tighten the cap bolt to the specified
torque is after installing the front fork leg to the
vehicle and tightening the lower bracket pinch
bolts.
EAS30210
INSTALLING THE FRONT FORK LEGS
The following procedure applies to both of the
front fork legs.
1. Install:
• Front fork leg
Temporarily tighten the upper and lower
bracket pinch bolts.
Make sure the outer tube is flush with the top of
the upper bracket.
2. Tighten:
• Lower bracket pinch bolts “1”
• Cap bolt “2”
• Upper bracket pinch bolt “3”
EWA13680
Make sure the brake hoses are routed prop-
erly.
Distance “b”
12 mm (0.47 in)
Distance “c”
13 mm (0.51 in)
Front fork cap bolt locknut
15 N·m (1.5 kgf·m, 11 lb·ft)
Lower bracket pinch bolt
23 N·m (2.3 kgf·m, 17 lb·ft)
Front fork cap bolt
23 N·m (2.3 kgf·m, 17 lb·ft)
Upper bracket pinch bolt
26 N·m (2.6 kgf·m, 19 lb·ft)

 Loading...