TRANSMISSION
5-81
EAS30430
REMOVING THE TRANSMISSION
1. Remove:
• Drive axle assembly “1”
• Shift drum retainers “2”
• Shift fork guide bars
• Shift fork-L
• Shift fork-R
• Shift drum assembly
• Shift fork-C
2. Remove:
• Bearing housing “1”
• Main axle assembly “2”
▼▼▼▼▼▼▼▼▼▼▼▼▼▼▼▼▼▼▼▼▼▼▼▼▼▼▼▼▼▼▼▼
a. Insert two bolts “3” of the proper size, as
shown in the illustration, into the main axle
assembly bearing housing.
b. Tighten the bolts until they contact the crank-
case surface.
c. Continue tightening the bolts until the main
axle assembly comes free from the upper
crankcase.
▲▲▲▲▲▲▲▲▲▲▲▲▲▲▲▲▲▲▲▲▲▲▲▲▲▲▲▲▲▲▲▲
3. Remove:
• Bearing “1”
EAS30431
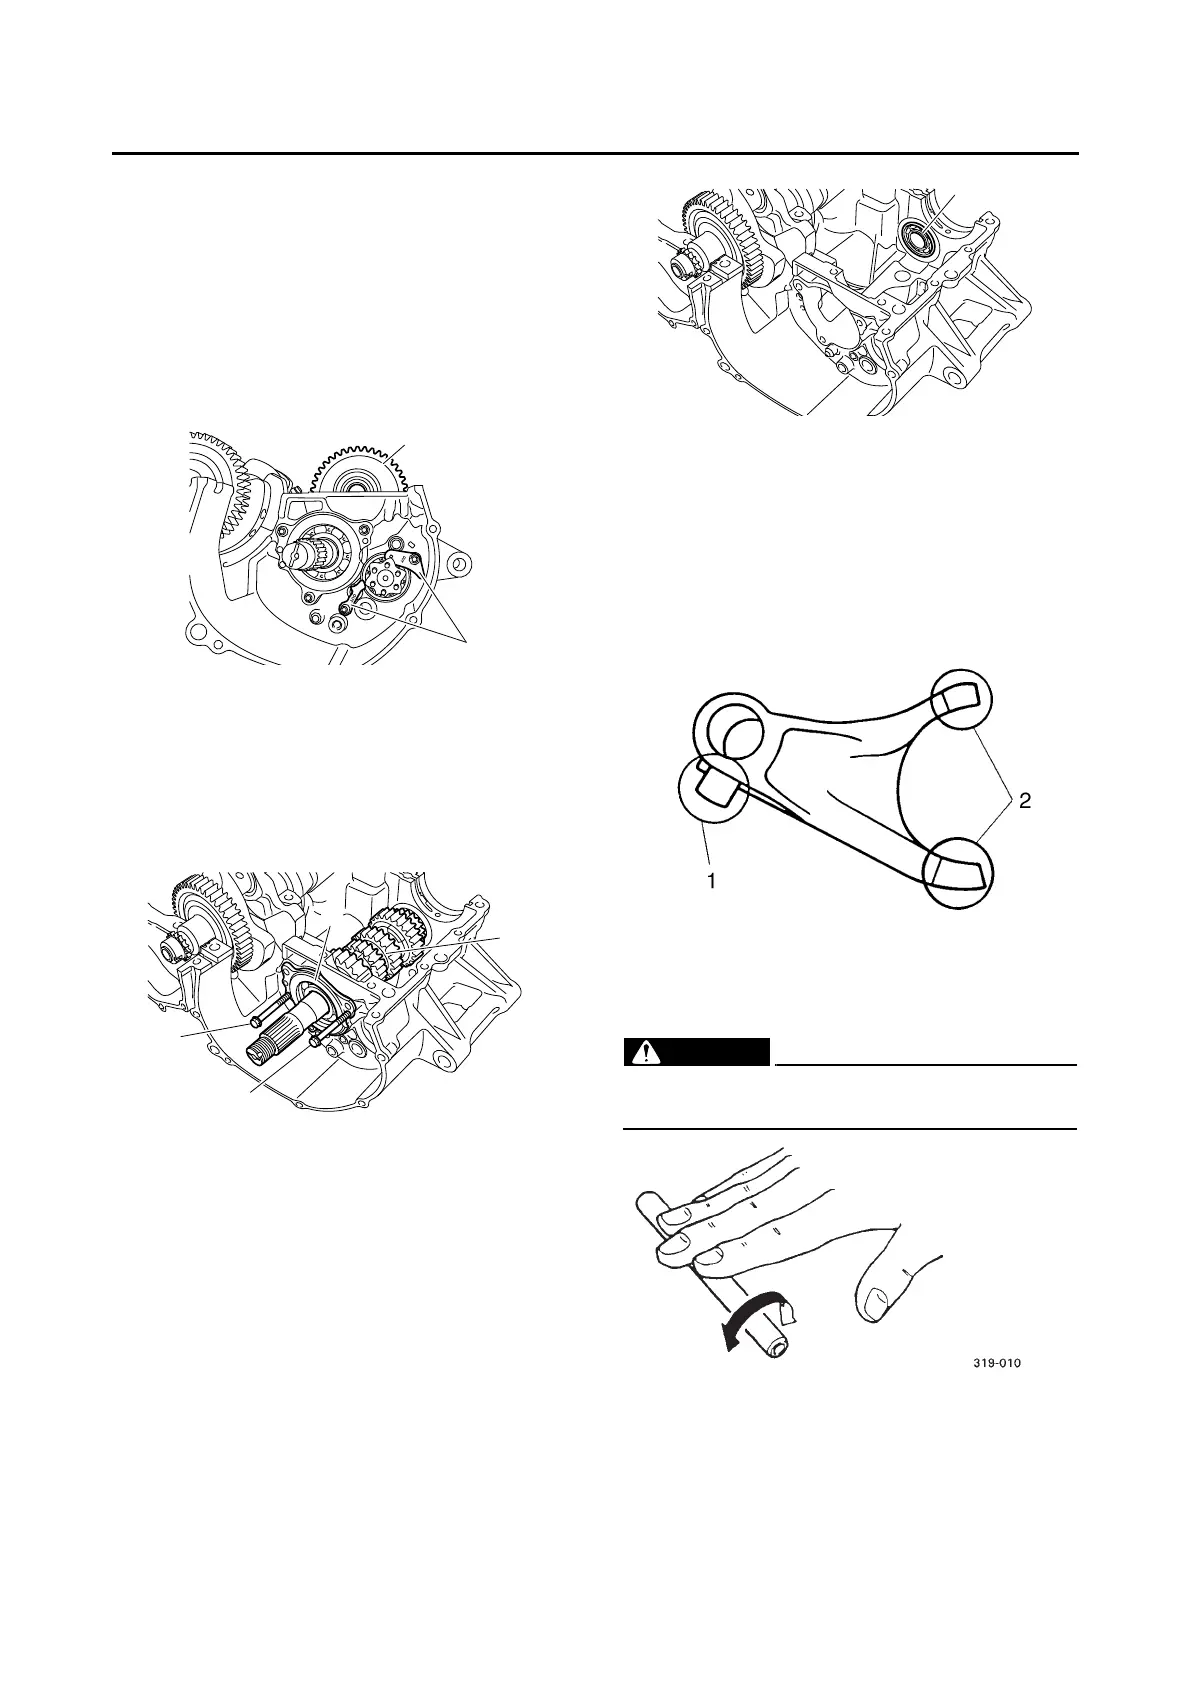
CHECKING THE SHIFT FORKS
The following procedure applies to all of the shift
forks.
1. Check:
• Shift fork cam follower “1”
• Shift fork pawl “2”
Bends/damage/scoring/wear Replace the
shift fork.
2. Check:
• Shift fork guide bar
Roll the shift fork guide bar on a flat surface.
Bends Replace.
EWA12840
Do not attempt to straighten a bent shift fork
guide bar.
3. Check:
• Shift fork movement
(along the shift fork guide bar)
Rough movement Replace the shift forks
and shift fork guide bar as a set.

 Loading...