Version 5.8 161 September 2009
SIP User's Manual 3. Web-Based Management
5. To save the changes to flash memory, refer to ''Saving Configuration'' on page 167.
Note: To delete a community string, select the Delete check box corresponding to
the community string that you want to delete, and then click Submit.
Table 3-29: SNMP Community Strings Parameters Description
Parameter Description
Community String
Read Only [SNMPReadOnlyCommunityString_x]: Up to five
read-only community strings (up to 19 characters each). The
default string is 'public'.
Read / Write [SNMPReadWriteCommunityString_x]: Up to
five read / write community strings (up to 19 characters each).
The default string is 'private'.
Trap Community String
[SNMPTrapCommunityString]
Community string used in traps (up to 19 characters).
The default string is 'trapuser'.
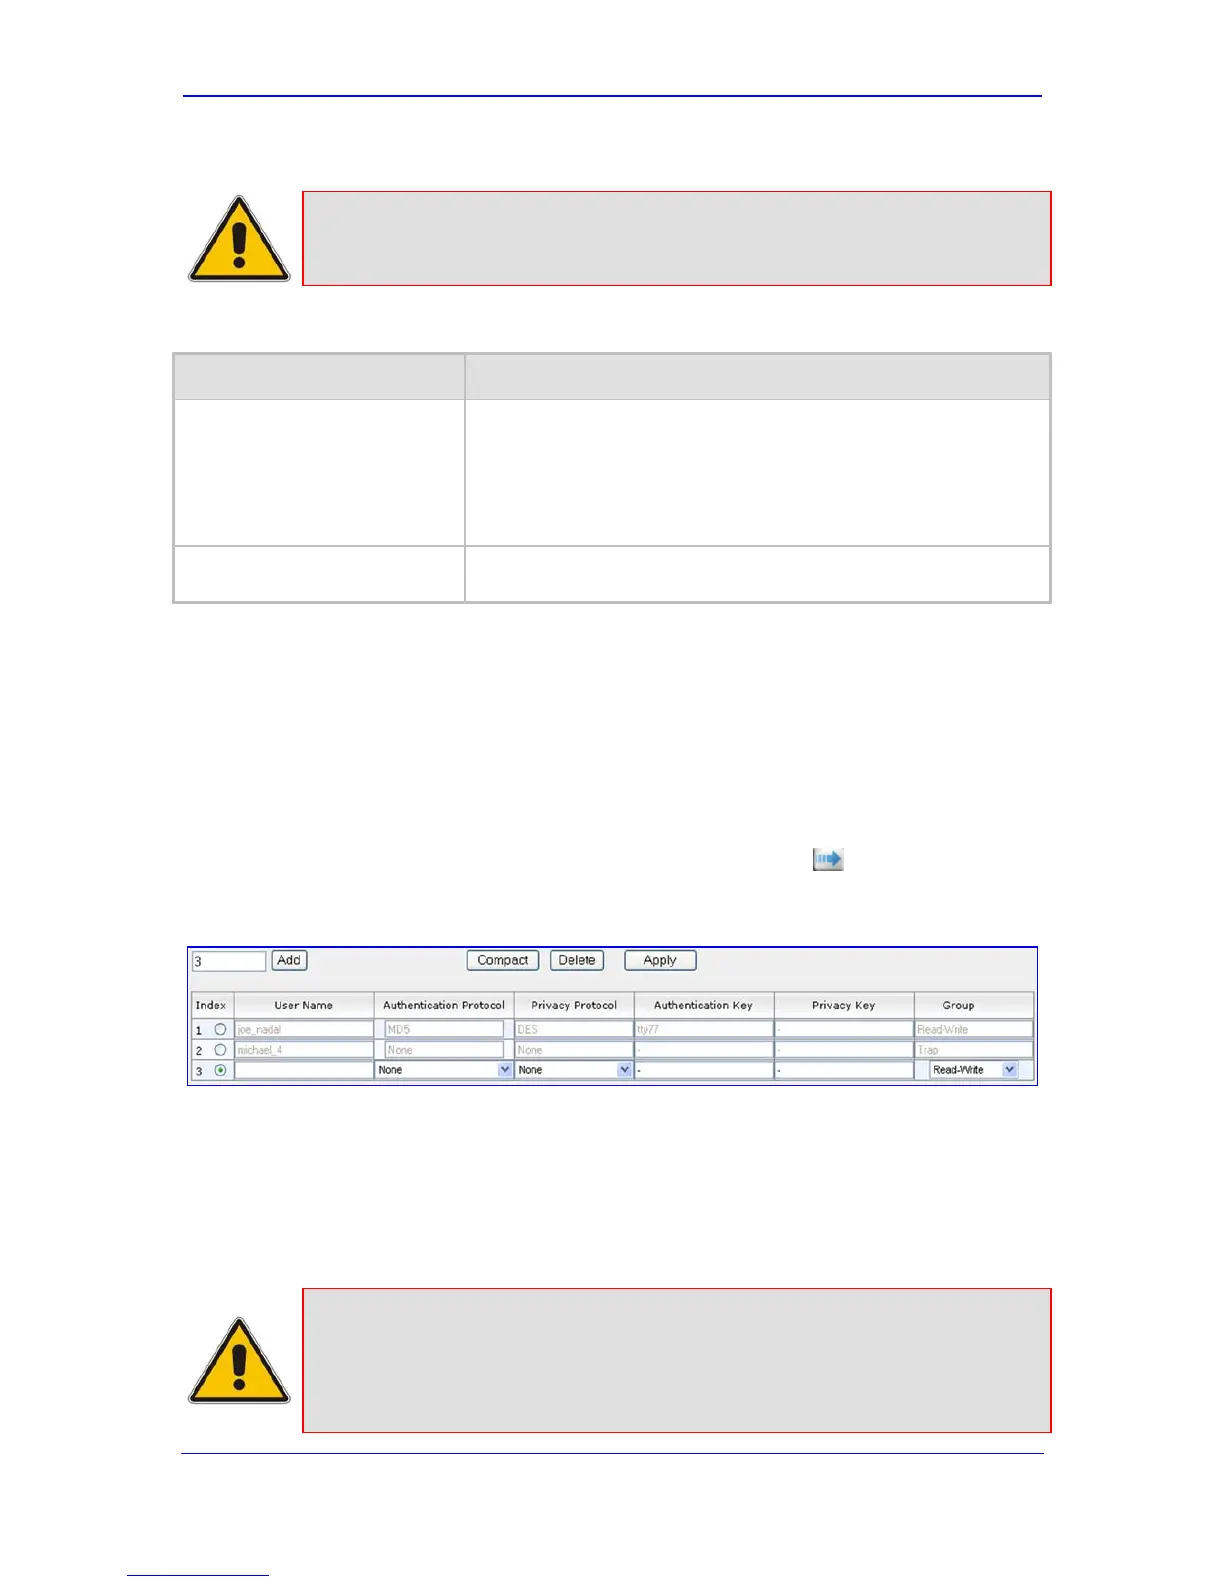
3.4.1.1.3 Configuring SNMP V3 Users
The 'SNMP V3 Settings' page allows you to configure authentication and privacy for up to
10 SNMP v3 users.
¾ To configure the SNMP v3 users:
1. Access the 'Management Settings' page, as described in ''Configuring the
Management Settings'' on page 157.
2. In the 'SNMP
V3 Table' field, click the right-pointing arrow
button; the 'SNMP V3
Settings' page appears.
Figure 3-96: SNMP V3 Setting Page
3. To add an SNMP v3 user, in the 'Add' field, enter the desired row index, and then click
Add. A new row appears.
4. Configure the SNMP V3 Setting parameters according to the table below.
5. Click the Apply button to save your changes.
6. To save the changes, refer to ''Saving Configuration'' on page 167.
Notes:
• For a description of the web interface's table command buttons (e.g.,
Duplicate and Delete), refer to ''Working with Tables'' on page 37.
• You can also configure SNMP v3 users using the ini file table parameter
SNMPUsers (refer to ''SNMP Parameters'' on page 249).

 Loading...


