QX50/QX200/QX2000; (SW Version 6.0.x) 68
QX50/QX200/QX2000 Manual II: Administrator’s Guide
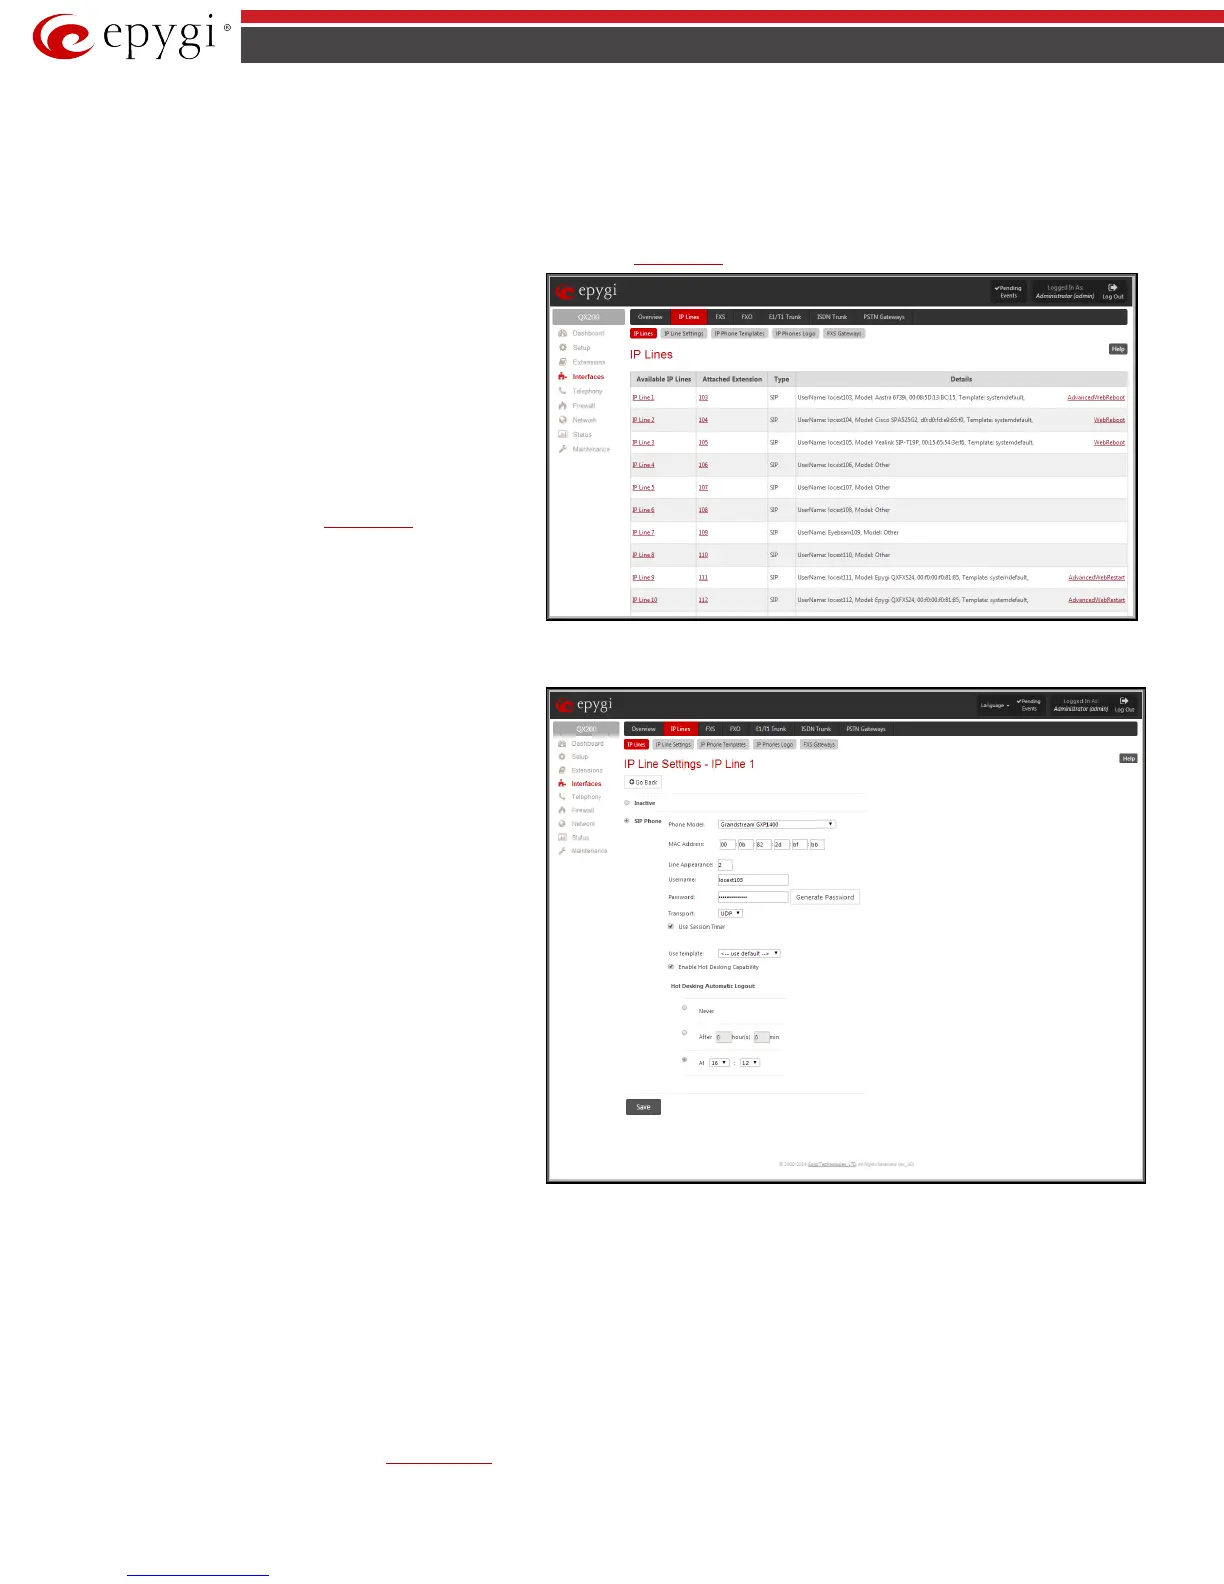
IP Lines
The IP Lines page is used to configure IP lines for IP phones to be connected to the QX IP PBX. QX IP PBX provides the options to connect SIP phones to its
LAN side, assign the corresponding IP line to an active extension, and use SIP phones as a simple phone with all telephony services of the QX IP PBX (for
example, call hold, waiting, transfer, etc).
By default, 16 IP lines are available on QX50, 24 IP lines are available for QX200 and 200 IP lines are available on QX2000. The IP Lines page displays a
table with the available IP lines on the QX IP PBX. Entering the feature key in the
Feature Keys page can enable more IP lines.
IP Lines
table lists all available IP lines with additional
information about each of them: number of the extension
attached to it, information about the phone type and the
configuration details.
Each column heading in the tables is link. By clicking on the
column heading, the table will be sorted by the selected column.
When sorting (ascending or descending), arrows will be
displayed next to the column heading.
The alternating Hide disabled IP lines and Show disabled IP
lines buttons are used to respectively hide or show the IP lines
that have not been activated with a feature key. To enable the
lines, install a feature key from the
Feature Keys page.
By pressing on the IP line# link in the Available IP Lines
column, the IP Line Settings page specific for the current IP
line is opened. This page offers a group of manipulation radio
buttons that allows you to enable the IP line and to configure it
to for use by the SIP phones.
Fig.II- 97: IP Lines page
Inactive
– this selection disables the corresponding IP line.
SIP Phone – this selection configures the IP line for a SIP phone
to be connected to the QX IP PBX’s.
• Phone Model drop down list is used to select the IP
phone model to be used by the receptionist. The drop
down list, excluding Other selection, enables the MAC
address text fields used to insert the MAC Address of
the corresponding SIP phone. Use Other selection if
your SIP phone is not in this list.
• Line Appearance text field requires a number of
simultaneous calls supported by the SIP phone.
• Username and Password are required for this
selection. They should match on both the QX IP PBX
and the SIP phone for a successful connection. The
Password field is checked against its strength and
you may see how strong is your inserted password
right below that field.To achieve the well protected
strong password minimum 8 characters of letters in
upper and lower case, symbols and numbers should
be used. If you are unable to define a strong
password, press Generate Password to use one of
system defined strong passwords.
• Transport drop down list is used to select the SIP
protocol transport layer - UDP, TCP or TLS. For TLS
you may activate the TLS certificate update
mechanism from IP Phone to obtain the latest
certificate generated by the QX IP PBX.
Fig.II- 98: IP Line Settings – Edit page
For automatic SIP phone configuration, the SIP phone should be reset/rebooted. The appropriate configuration will then be automatically downloaded
from QX IP PBX to the SIP Phone.
Please Note: For automatic configuration, some SIP phones may require additional actions to follow the restart. For example, by default the IP Dialog SIP
Tone II is in a non-auto-provisioning mode, so it should be manually enabled on the phone. Refer to the user’s manual of the corresponding SIP phone for
instructions on performing a factory reset or reboot on any of the supported phones, what additional configurations are required for a specific SIP phone,
and how to manipulate with the GUI.
• The Use Session Timer enables the SIP session timer for the corresponding IP line. This checkbox enables advanced mechanisms for connection
activity checking. This option allows both user agents and proxies to determine if the SIP session is still active.
• The Use Template drop down list is used select a preconfigured custom template for the IP phone. When the “Use default” is selected in this drop
down list, the template selected on the
IP Line Settings page will be used.