I.38
Part. N. 8000 B0148 (02-2008)
FRONT SUSPENSION
R5155
21
3
25
21
23
25
25
35
27
24
25
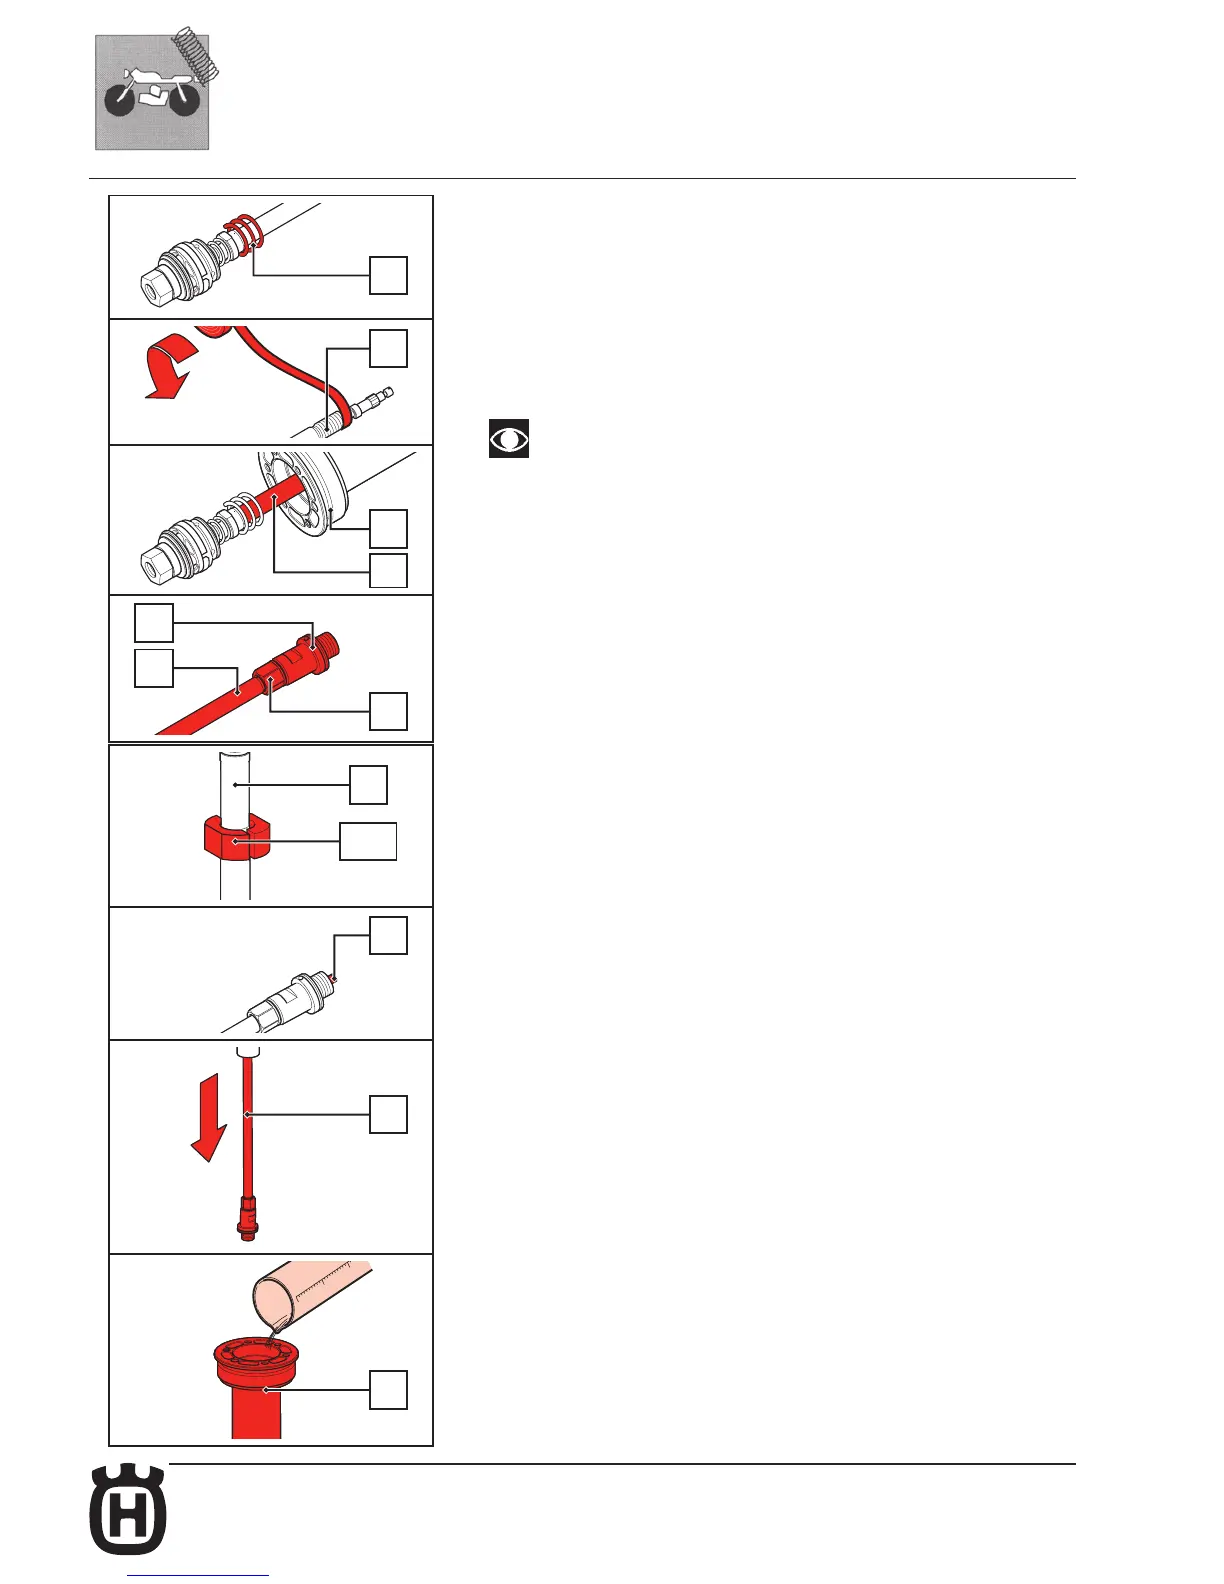
RE-ASSEMBLING THE CARTRIDGE UNIT
• Insert the spring (23) in its seat on the rod.
• Apply some stretched adhesive tape onto the end of the rod (39) in order to cover
the rod threading. Do not apply thick adhesive tape.
• Grease the rod and lubricate the sealing rings.
• Insert the piston rod (25) into the sleeve (35).
In both pumping elements there is a sealing segment; before re-assembling
make sure that it is not worn or damaged. Replace if necessary. Take great
care and if necessary use a small flat-tip screwdriver to help the piston of the
pumping element into the pumping element tube-sleeve. Insert the piston
without any interference.
• Remove the adhesive tape from the rod’s upper edge (25).
• Rotate the rebound adjuster in fully closed position (rotate it fully clockwise).
• Tighten by hand the locknut (27) and the rebound adjustment set (24) into the rod
threaded area (25).
• Fix the rebound adjuster set (24) with a 17 mm spanner and screw the locknut (27)
with another 17 mm spanner to the required torque (see Table 5 – Tightening
torques).
• Fix the cartridge set (21) in the vice by means of the special protection jaws (R5155),
as shown in the figure.
• Set the rebound adjuster (3) to 15 clicks from fully closed position.
• Pull the pumping element rod (25) completely in the configuration of maximum
extension.
• Fill the cartridge case (21) with oil to about 20 mm from the upper edge.

 Loading...