16. IMAGE QUALITY PROBLEM Field Service Ver. 2.0 Jun. 2010
138
bizhub 164
TROUBLESHOOTING
16. IMAGE QUALITY PROBLEM
16.1 How to identify problematic part
•In this chapter, troubleshooting is divided into “initial checks” and “troubleshooting proce-
dures classified by image failures.”
•If any image failure has occurred, first make the initial checks, then proceed to the corre-
sponding image failure troubleshooting procedure.
16.1.1 Initial check items
•Determine if the failure is attributable to a basic cause or causes.
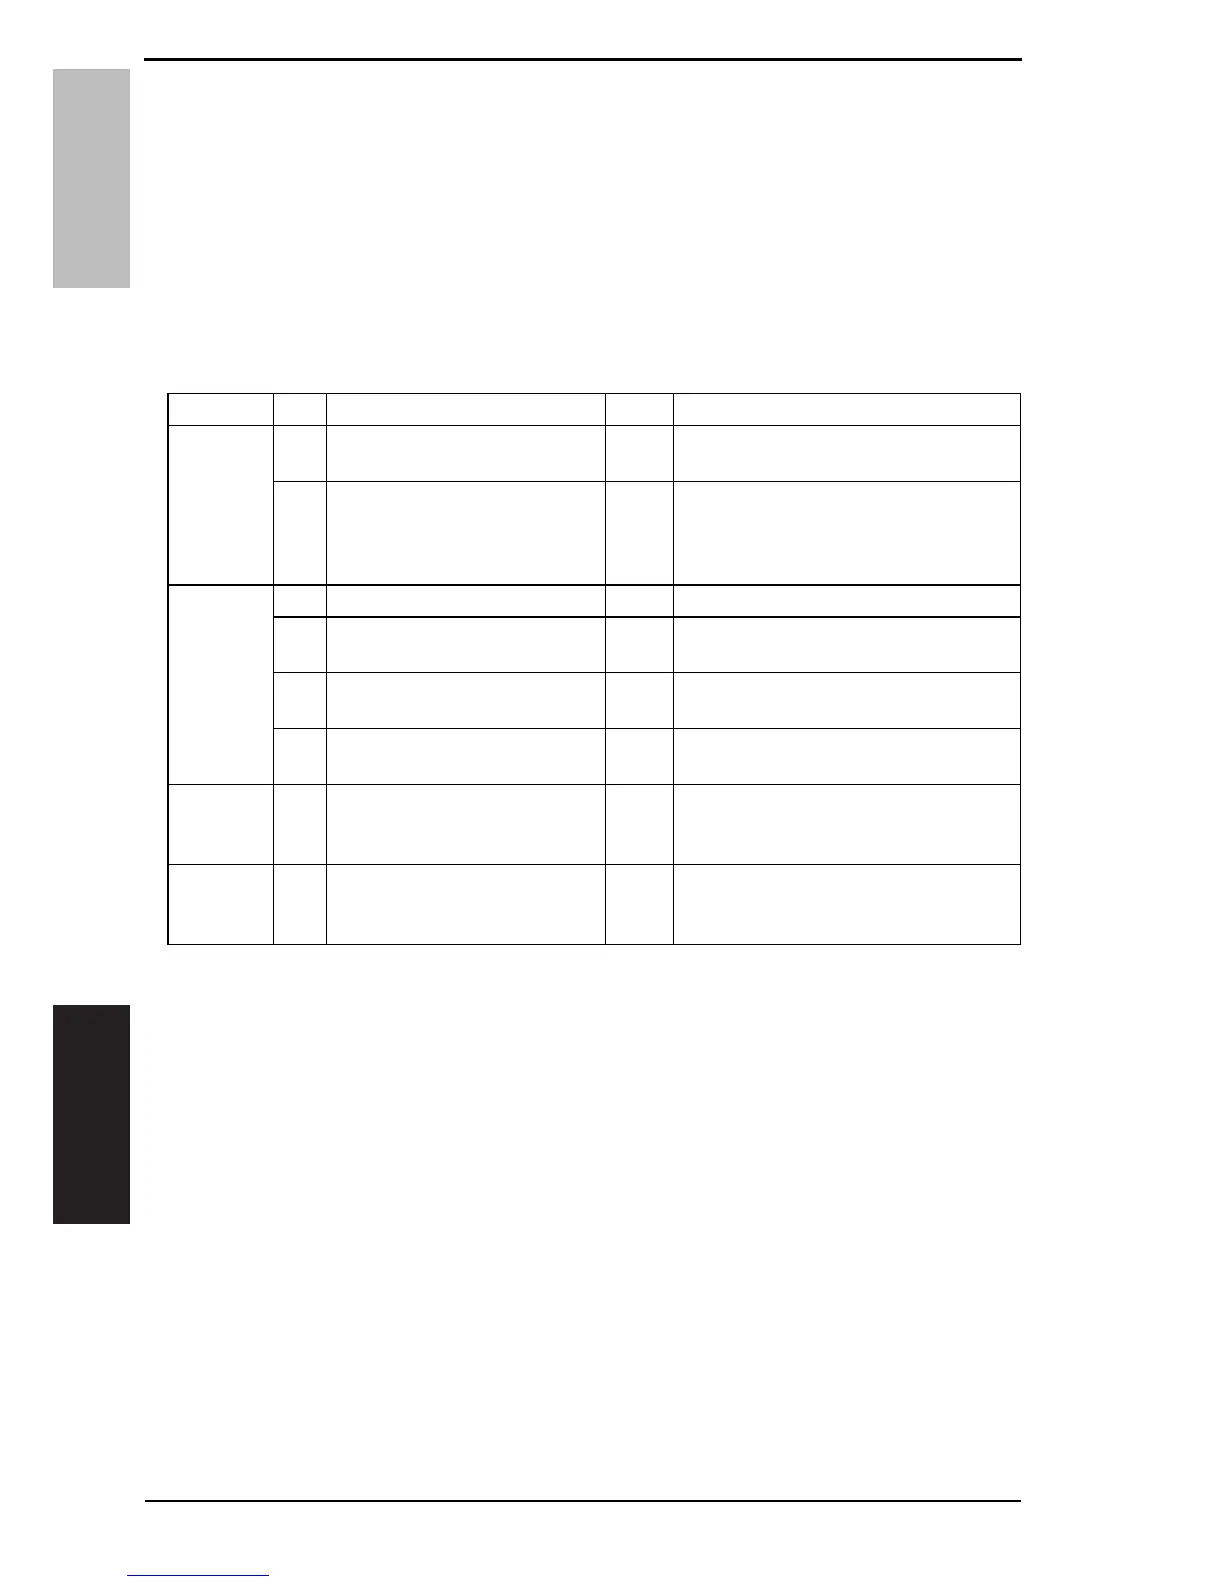
Section Step Check Result Action
Paper 1 Paper meets product specifica-
tions.
NO • Instruct user to use paper that meets
specifications and is recommended.
2Paper is damp. YES•Change paper for one that is dry.
Then, instruct user to use paper that
meets specifications and in how to
store paper.
Original 3 Original is placed correctly. NO • Reposition original.
4Original is written in light pencil.YES•Instruct user to use original with
appropriate image density.
5Original is transparent (OHP
film, etc.).
YES • Instruct user to use originals that meet
specifications.
6Original glass is dirty or
scratchy.
YES • Clean original glass.
•Change original glass.
PM parts 7 The PM parts relating to image
formation have reached the end
of cleaning/replacement cycles.
YES • Clean PM parts.
•Change PM parts.
Adjust-
ment items
8Adjustment item in which re-
adjustment is made to improve
the image faulty.
YES • Re-adjustment

 Loading...