Field Service Ver. 2.0 Jun. 2010 5. OTHER MAINTENANCE ITEMS
41
bizhub 164MAINTENANCE
5.4.13 Imaging unit
1. Open the right door.
2. Open the front door.
3. Remove the toner bottle.
See P.19
NOTE
•Do not install or remove the toner bottle while the imaging unit is not installed.
Doing so can cause a toner spill.
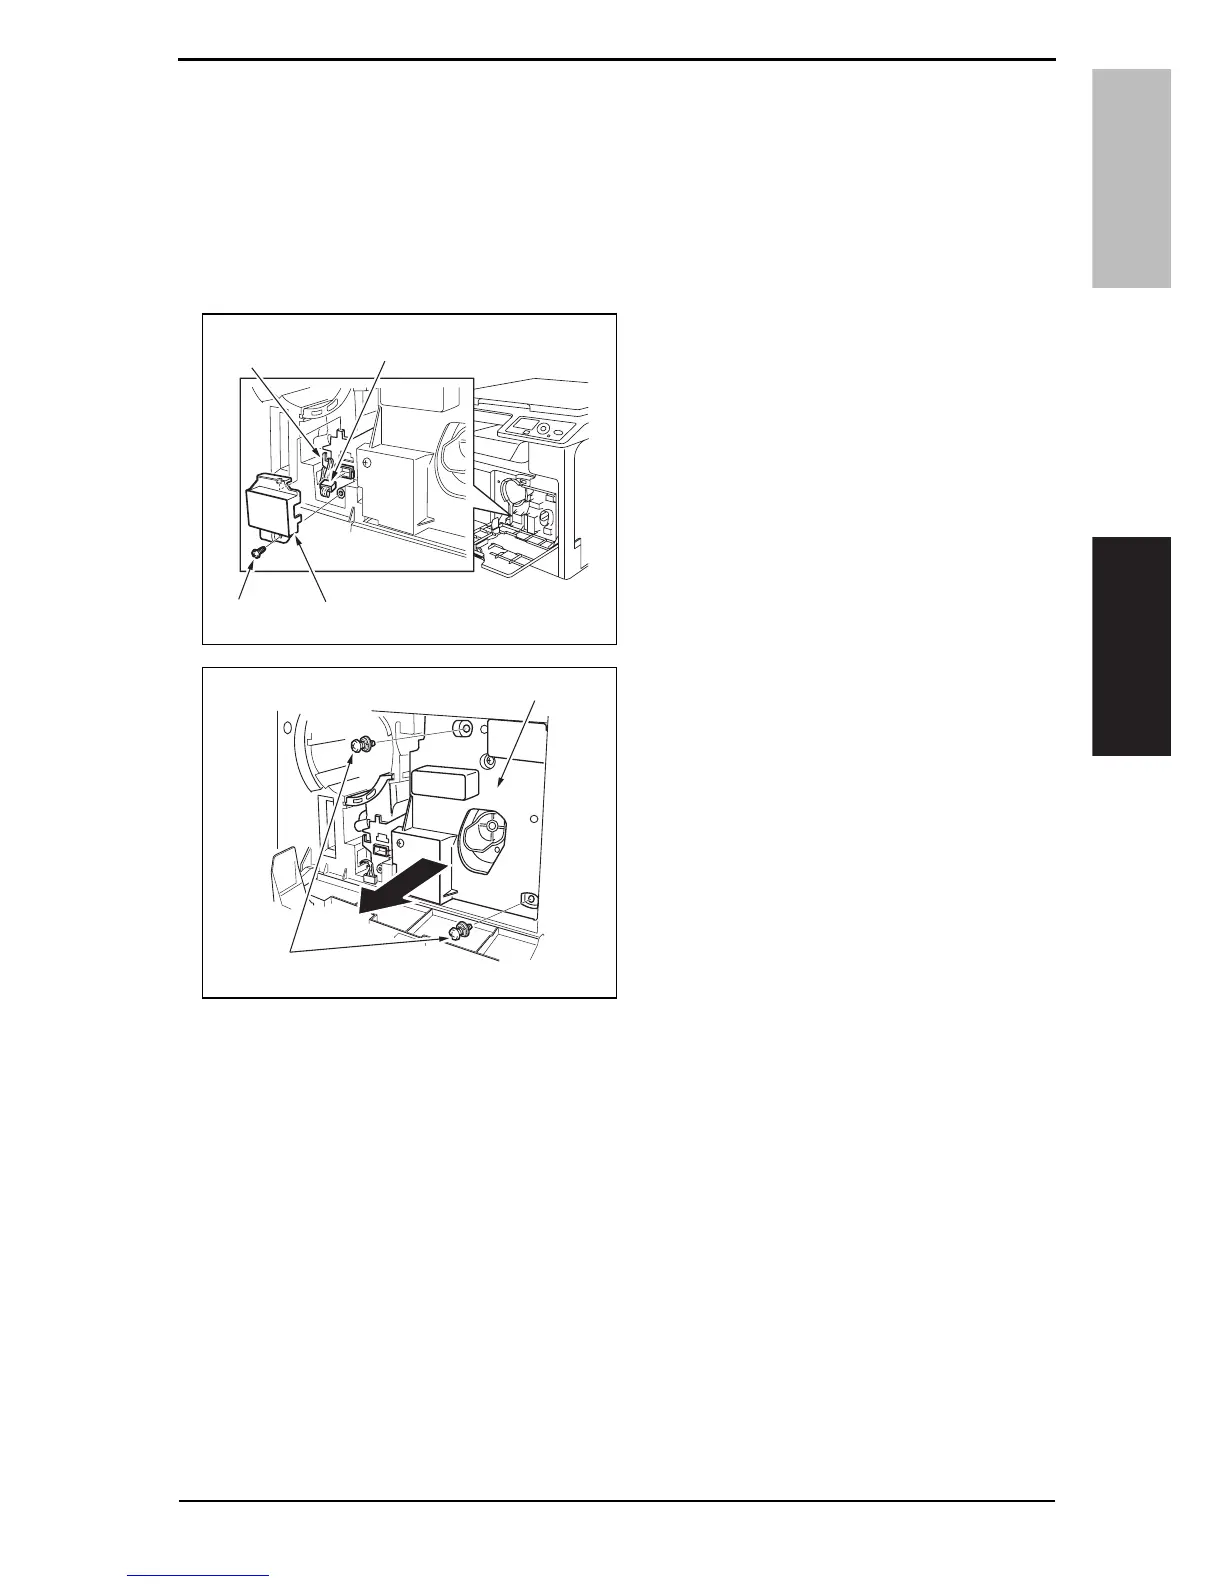
4. Remove the screw [1], and remove
the cover [2].
5. Disconnect the connector [3].
6. Remove the harness from guide [4].
7. Remove two screws [1], and remove
the imaging unit [2].
NOTE
•Do not install the toner bottle while
the imaging unit is not installed.
•When installing the imaging unit,
use care not to damage the drum.
•Before attempting to install the
imaging unit, be sure to fully open
the right door. Take care that, if the
imaging unit is installed with the
right door locked halfway, it may
interfere with the transfer roller.
•When inserting the imaging unit, do
that slowly and, when you are sure
that the drum gear contacts the
mating part, push the imaging unit
all the way into position. If this step
is done all at once, the drum gear
could be damaged.
A0XXF2E506DA
[1]
[2]
[3]
[4]
A0XXF2E507DA
[1]
[2]

 Loading...