Toyota Orderpicker Model 7BPUE 15 Service Manual
Section 7. Component Procedures
Electrical Components
Drive Motor
Drive Motor
9.
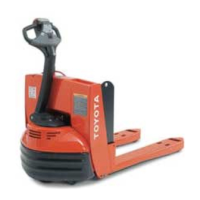
Break seal between drive motor flange and
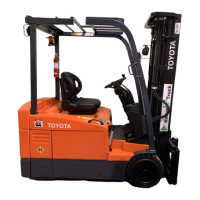
drive unit. Use
2
screws from steer motor
mounting plate. See Figure 7
-
54.
Figure 7
-
53. Removing Dipstick
Figure 7
-
54.
Breaking Seal
Between Motor and Drive Unit
Removal
10.
Attach a suitable hoist to drive motor and
1.
Remove tractor covers. See
"
Tractor
lift motor out of truck.
Covers
"
on page 7
-
1 1.
2.
Turn drive unit using steering wheel so
installation
you can reach power cables.
11.
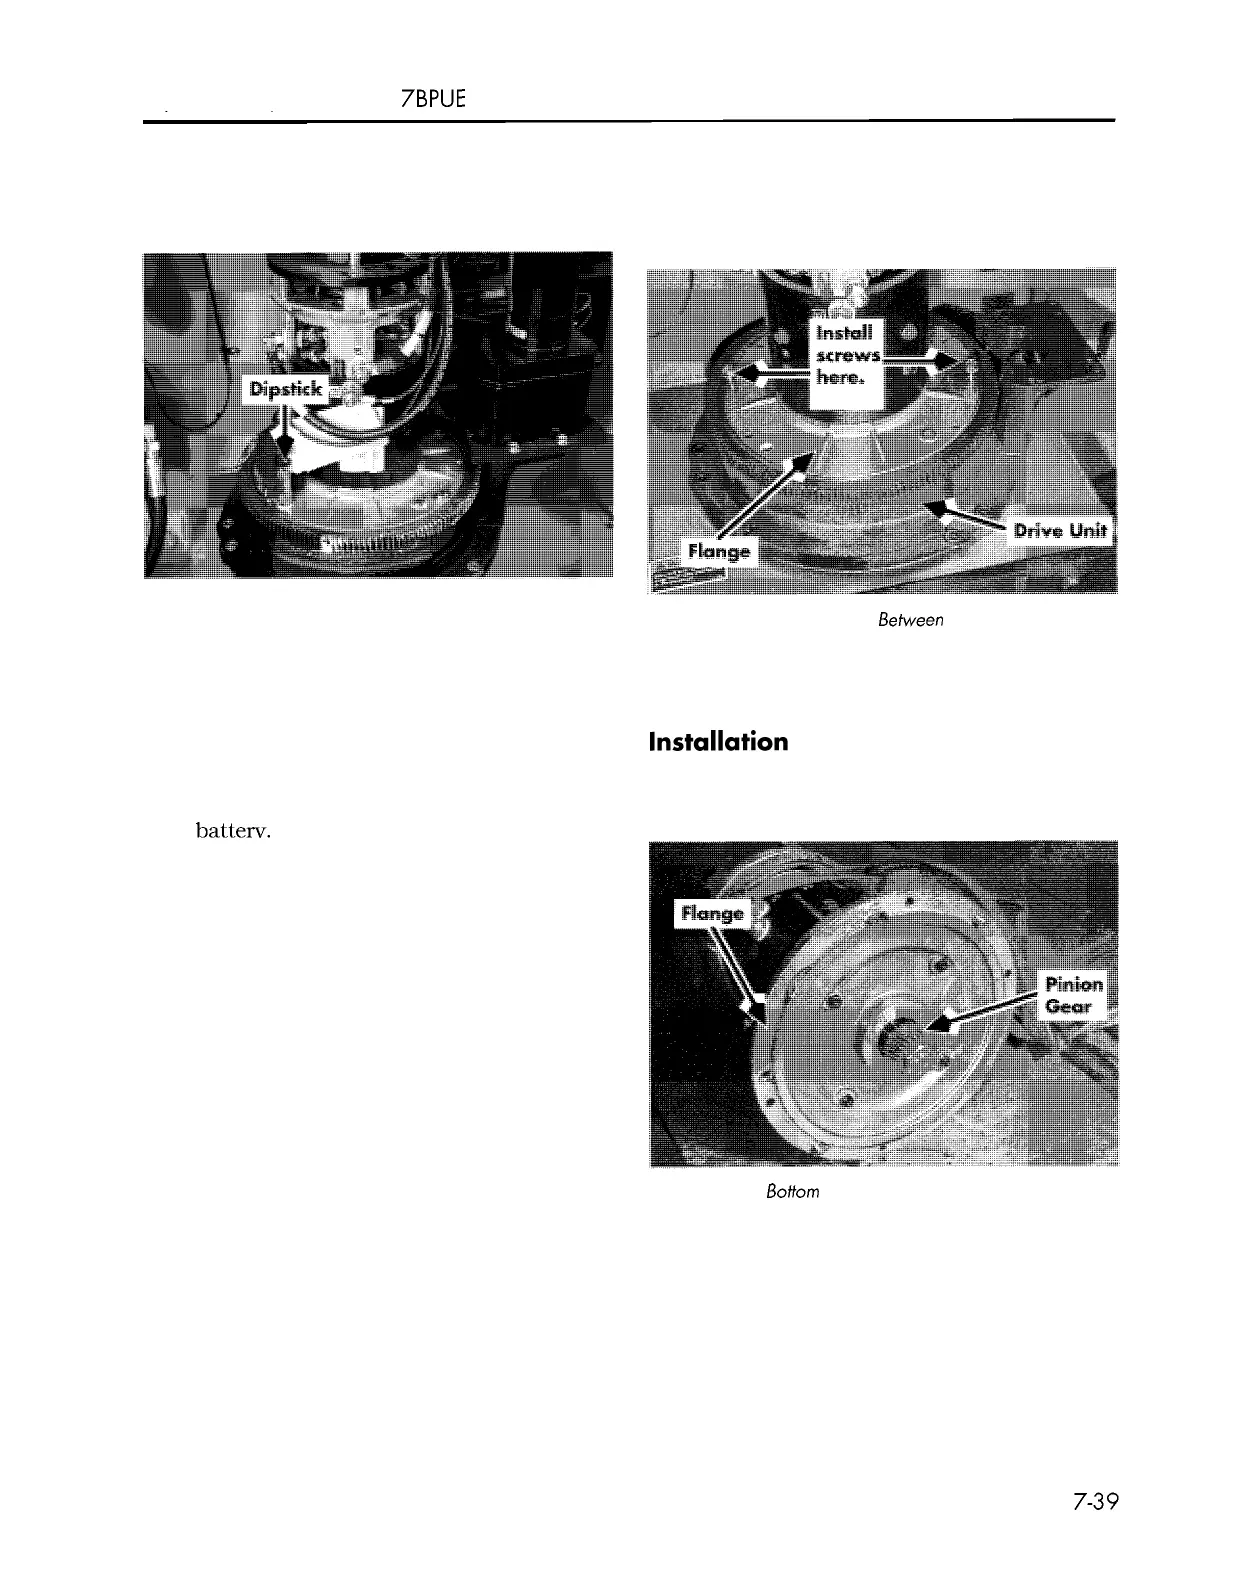
Clean sealant from motor flange and cap
3.
Turn key switch OFF and disconnect
screws for drive motor. See Figure 7
-
55.
batterv.
4. Remove brake from drive motor (if the
motor is to be replaced). See
"
Brake
"
on
page 7
-
27.
5. Disconnect power cables from drive motor.
Note location for installation and label if
necessary.
6.
Remove steer motor. See
"
Steer Motor
"
on
page 7
-
42.
7. Remove dipstick and plug. See
Figure 7
-
53.
8.
Remove the bracket that activates the
home prox switch.
Figure 7
-
55.
Bottom of Drive Motor
00700
-
CL222
-
05,
1
5 March 2005
 Loading...