Phaser 6180MFP Multifunction Printer Service Manual 8-23
Service Parts Disassembly
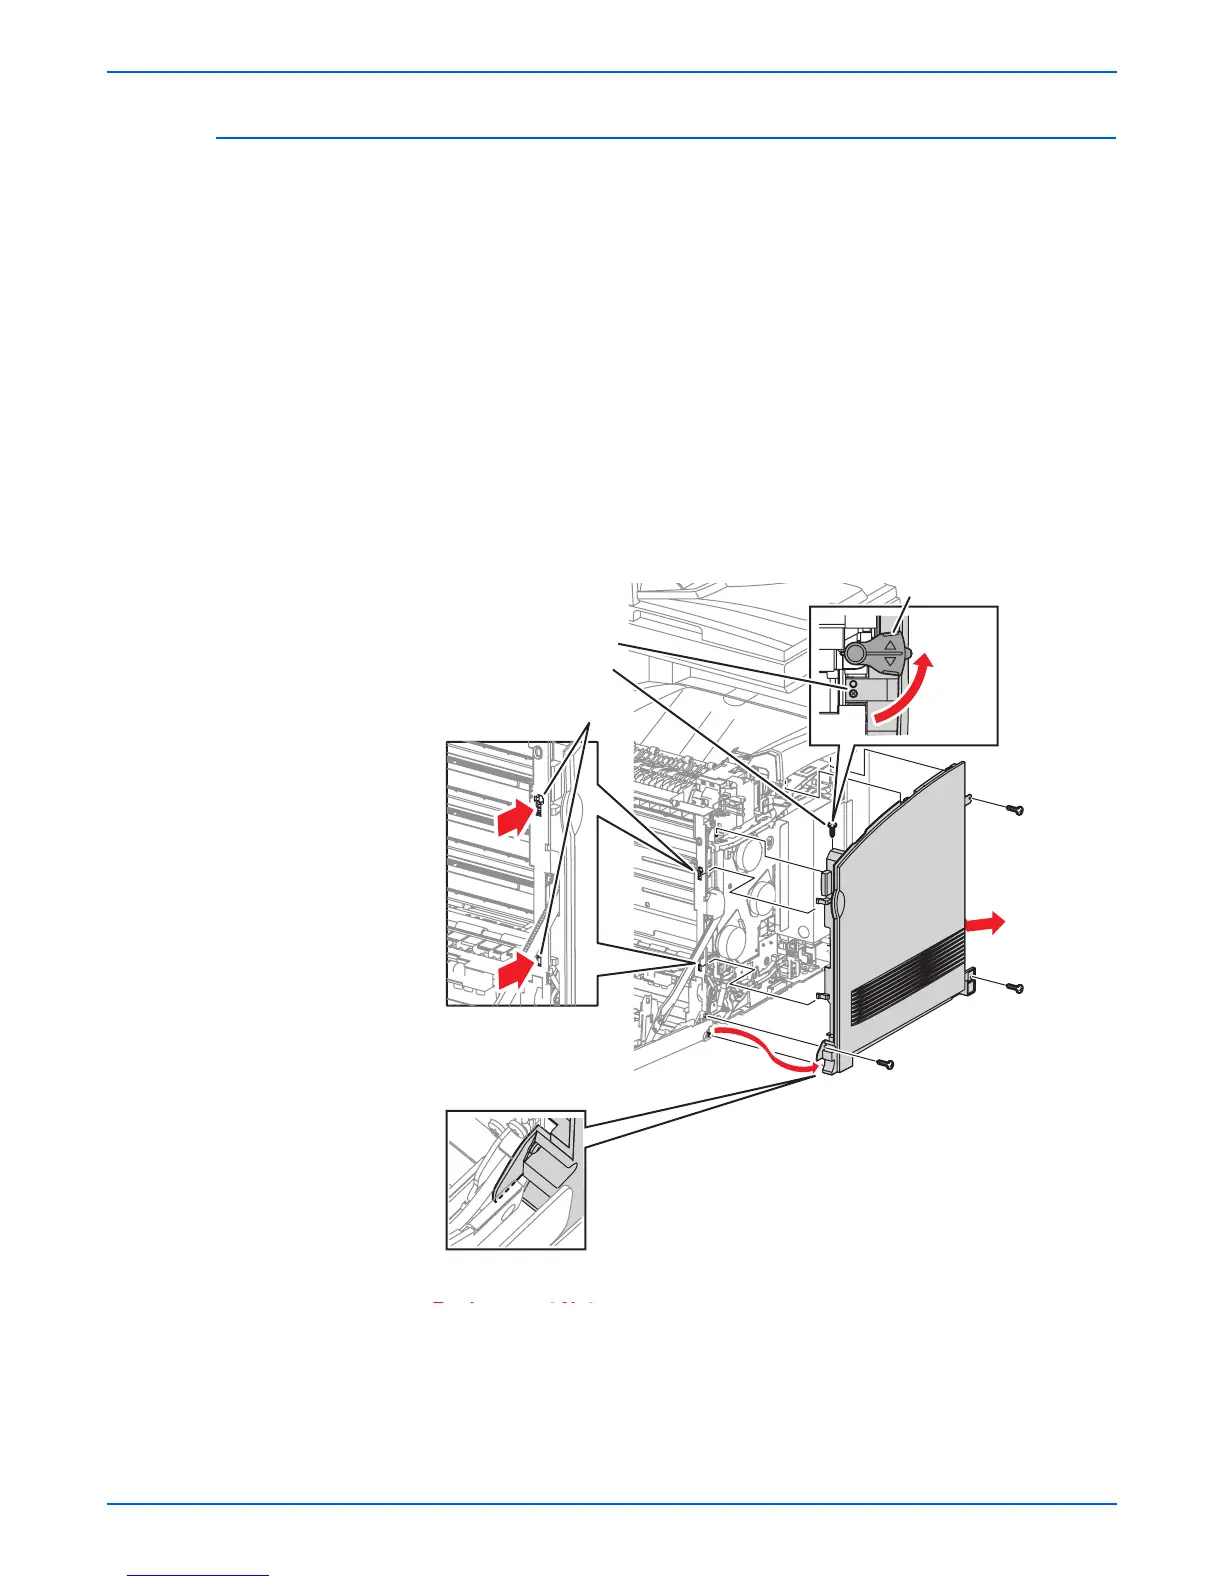
Right Cover (PL1.1.9)
1. Open the Front Cover.
2. Remove the Fuser (page 8-12).
3. Remove the Rear Cover (page 8-18).
4. Remove the Bottom Cover (page 8-19).
5. Remove the Right Pole Inner Cover (page 8-21).
6. Remove the Right Pole Cover (page 8-22).
7. Remove 2 screws (10 mm) and 2 screws (6 mm) securing the Right
Cover.
8. Use a flat tip screwdriver to release the plastic tabs from the notches on
the top and rear sides of the printer frame.
9. Slide the rear of the Right Cover slightly outward to release the 1 hook on
the Right Cover and slide the Right Cover outward.
10. Release the 2 hooks on the front section of the Right Cover and slide the
Cover backward to remove it.
ep
acemen
o
e
ep
acemen
o
e
Insert the top and bottom tabs of the Right Side Cover at an angle in
order to fit the Right Side Cover in the correct position.
Be sure the notch on the printer frame is secured to the top tab of the
Left Cover.
s6180mfp-212
Replacement Note
Align the Right Side
Cover on the inside
of the Front Cover.
Lock Lever
Top View
Tab
Tabs
6 mm
6 mm
10 mm
10 mm

 Loading...