Phaser 6180MFP Multifunction Printer Service Manual 8-61
Service Parts Disassembly
BIAS Assembly (PL5.2.11)
1. Open the Front Cover.
2. Remove the Fuser (page 8-12).
3. Remove the Rear Cover (page 8-18).
4. Remove the Bottom Cover (page 8-19).
5. Remove the Right Pole Inner Cover (page 8-21).
6. Remove the Right Pole Cover (page 8-22).
7. Remove the Right Cover (page 8-23).
8. Remove the Left Pole Inner Cover (page 8-24).
9. Remove the Left Pole Cover (page 8-25).
10. Remove the Left Cover (page 8-26).
11. Remove the Top Cover (page 8-27).
12. Remove the LED (page 8-63).
o
e
It is not necessary to disconnect the connector on the MCU Board for the
following steps.
13. Remove the HVPS (page 8-64).
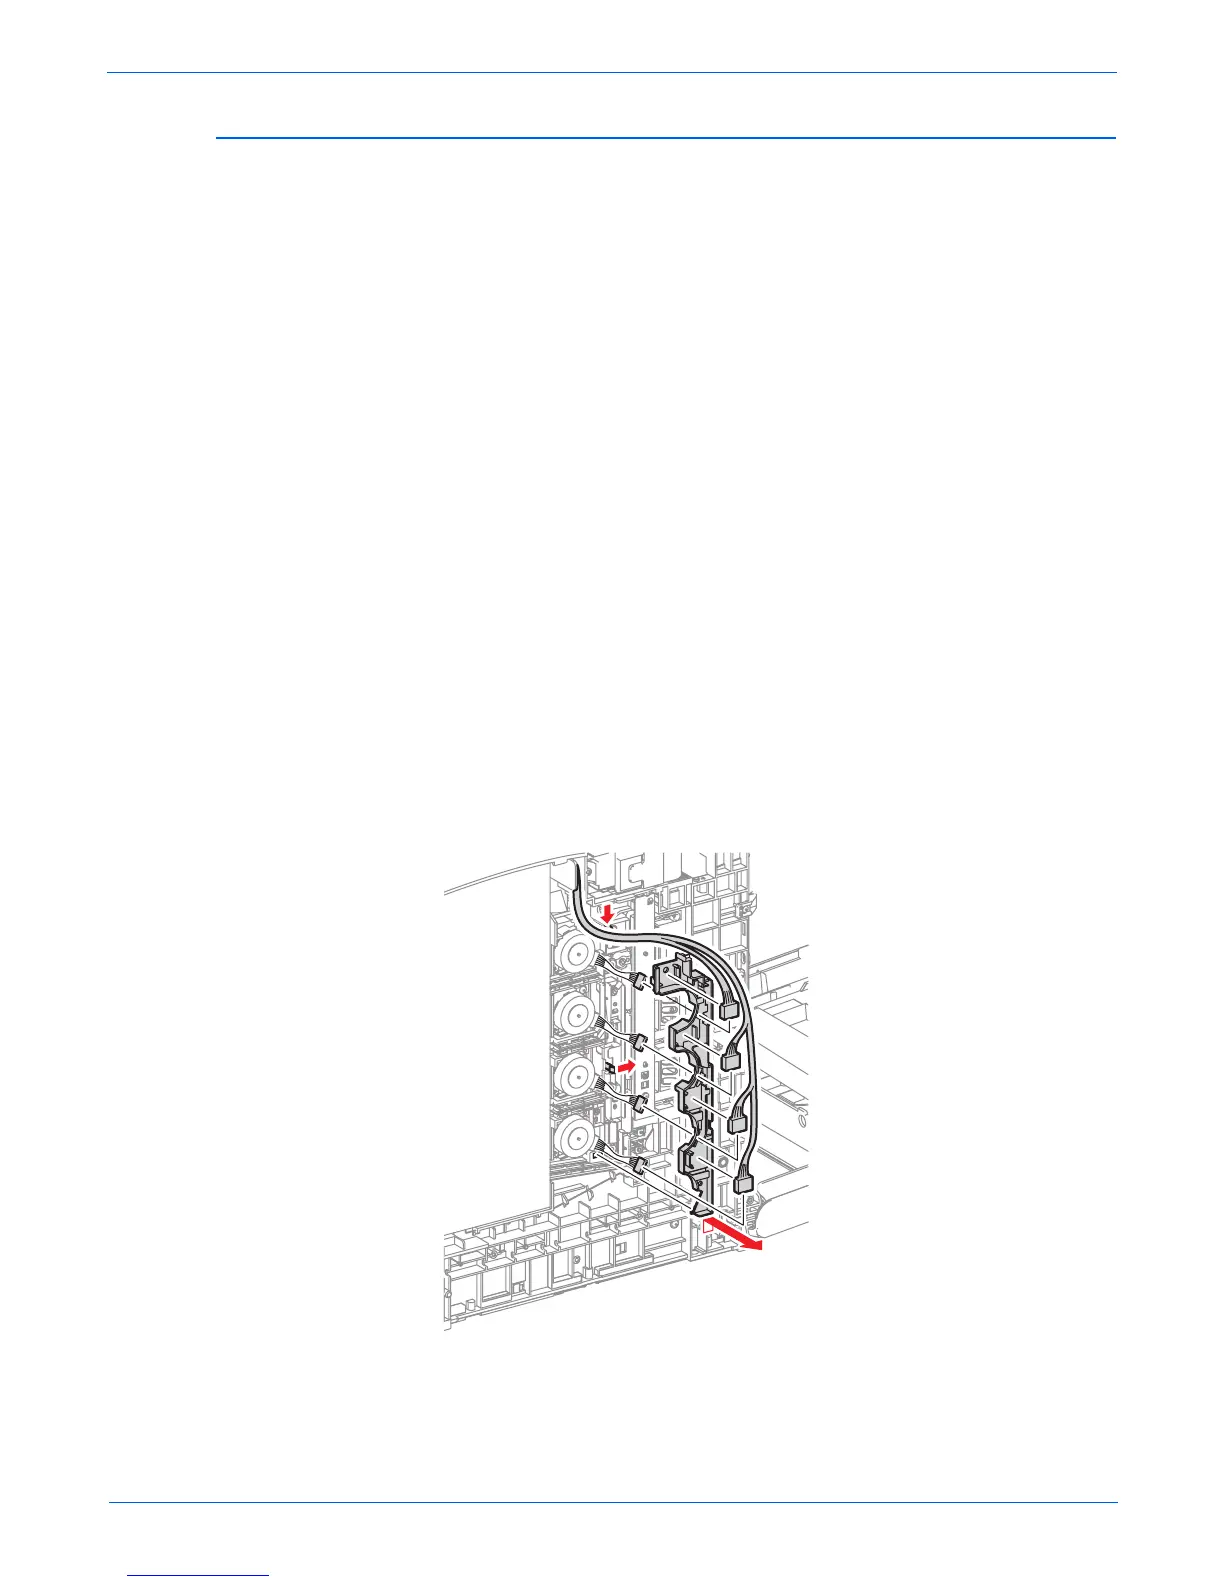
14. Disconnect the Dispenser Motor connectors and release the wiring
harnesses from the Motor Harness Duct.
15. Release the 2 hooks securing the Motor Harness Duct.
16. Slightly shift the Motor Harness Duct upward to release the convex
section from the printer. Pass the connectors through the hole of the
Motor Harness Duct and remove the Duct.
s6180mfp-291

 Loading...