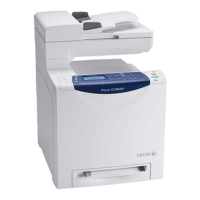
A-8 Phaser 6180MFP Multifunction Printer Service Manual
Reference
Firmware MPC Update
1. Down load the applicable files from the Xerox support web site. Unzip
(decompress) the files.
2. Be sure your appropriate downloading cable option (Ethernet, USB, or
Parallel) is available and connected.
3. Reboot the printer.
4. On your computer, locate the decompressed files. Double-click the
Xeroxfwup.exe file.
5. The xeroxfwup window with connection options is displayed. Select the
appropriate downloading option (Network, USB, or Parallel). Click the
Next button.
6. The xeroxfwup window is displayed.
a. For Network connection:
■ If your printer’s IP address is available, select the appropriate box.
Click the Next button.
■ If your printer’s IP address in not listed, click the Add button.
Enter your printer’s IP address. Click the OK button. Select the
box with your printer’s IP address. Click the Next button.
■ On the printer’s Control Panel, messages are displayed from
Receiving data Port 9100 NIC --> Checking... Port 9100 NIC --
> Writing... Port 9100 NIC as the printer starts updating the
firmware.
b. For USB or Parallel connection:
■ The xeroxfwup window with the module number is displayed.
Click the Next button.
■ On the printer’s Control Panel, messages are displayed from
Receiving data Parallel/USB --> Checking... Parallel/USB -->
Writing... Parallel/USB as the printer starts updating the
firmware.
Caution
Do Not reboot or turn off the printer. The printer will automatically reboot.
7. When the process is completed, the Please wait... --> Ready messages
are displayed on the printer’s Control Panel.
8. On your computer, verify that the firmware update has been completed.
■ For Network and USB connections: In the xeroxfwup window, verify
that the Sent message is displayed under the Status column. Click
the Next button. Click the OK button.
9. Print the Configuration page (System > Information Pages >
Configuration) and verify the Firmware Version information. The
Firmware Version for the MPC is displayed under Network Settings.

 Loading...


